

Guide:
Link Homey with Google Sheets
How do you ensure that the data from Homey comes into Google Sheets?
Link Homey and Google Sheets:
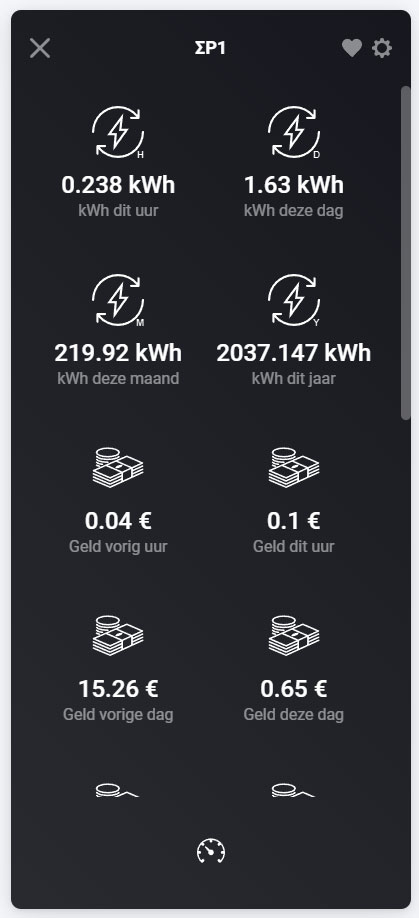
The Homey is a great Smart Home system to be able to switch your devices and lamps on and off and to fully automate this via smart rules. The tracking of energy consumption is also well organized. This way you can see the current consumption and total consumption per device. If you have a smart P1 meter you can even see the consumption of your entire house. There are several options to see this, for example, Homey has Insight where you can request graphs. In addition, there is an energy panel to view your current consumption.
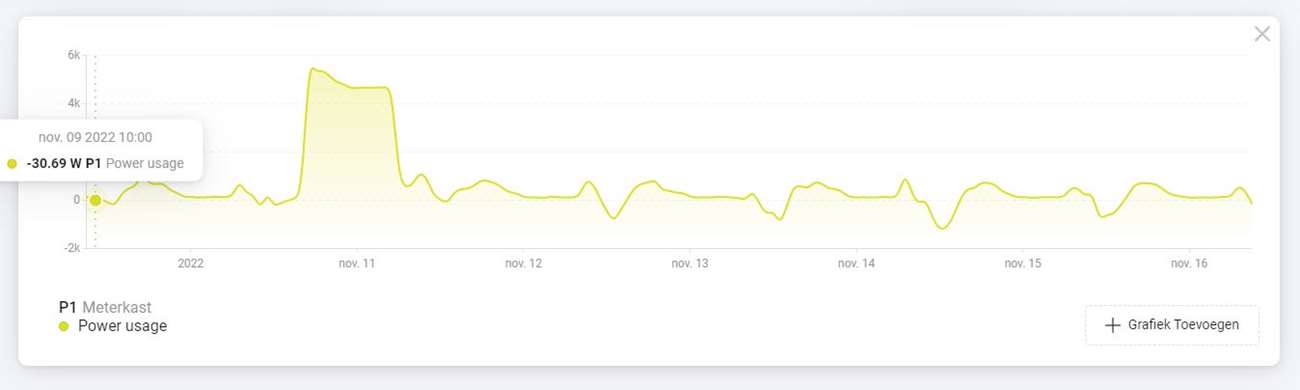
You can also send notifications via a flow to, for example, get a day's consumption. This is of course all very extensive. But what is missing is getting the data to a sheet. In a sheet you can make overviews and do a calculation just a little easier.
In this guide we will look at the possibilities for this.
Goal:
Our goal is to get our meter readings of the total electricity consumption of our house and the readings of the charging of my electric car in Google Sheets. To log this I use 2 Youless meters. There are of course other ways to do this, such as using a smart plug or using the HomeWizard P1 meter. For this guide it doesn't matter what you use as long as you only have one device to log.
Of course, with the Youless you only have the meter readings. We could forward this to Google and then calculate the kWhs per month ourselves by subtracting values from each other. This is of course somewhat cumbersome and is an easier way. You can use the "Power by the hour" APP of the Homey.
It automatically collects the values. Very easy
Google sheets link:
From Homey there is no possibility to send data directly to Google Sheets. So we will have to find a middle ground. To get data externally, Homey does have the option to send an "http request". Simply put, you request a url to which you give values. So we could use this.
But where are we going to send it then? Well, there are several solutions for this. You could send it to Google with a script, but this requires some programming knowledge. An easy way is to use www.make.com. With this website all kinds of things can be automated. And here you can also send an http request.
The steps:
Step 1:
Make sure to create an account at www.make.com. This is free and is a reliable platform so you don't have to worry about your data being shared.
Step 2:
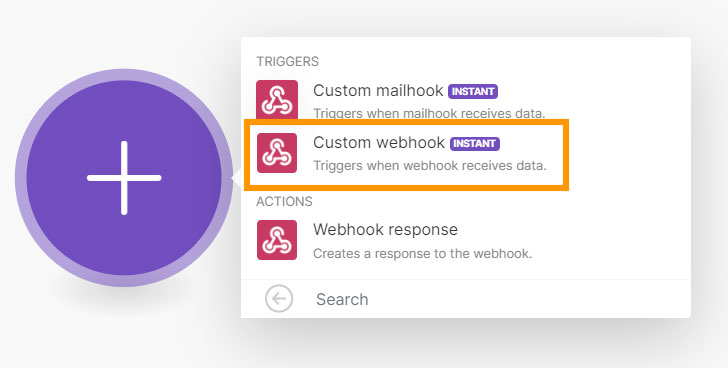
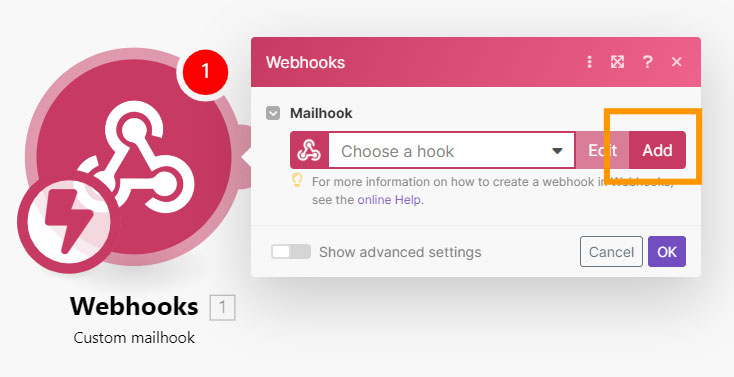
Now that we have an account we create a "new scenario". Make.com works with a drag and drop system, so it works a bit like you make the flows on the Homey. We choose "webhooks" as the trigger.
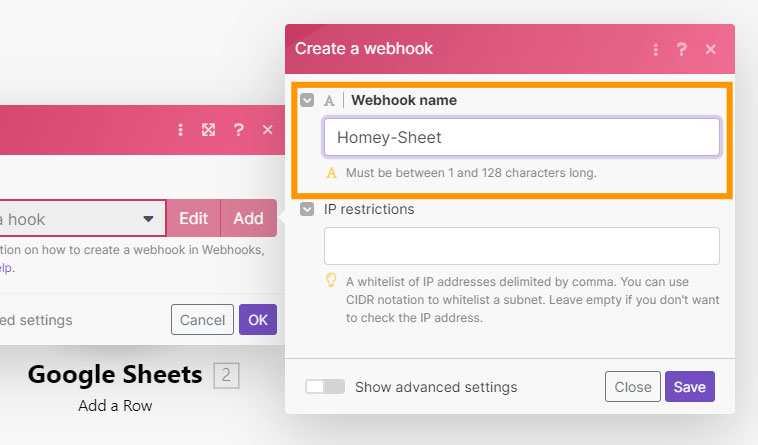
We then choose "custom webhook" and create a new one via "add" and give it a name.
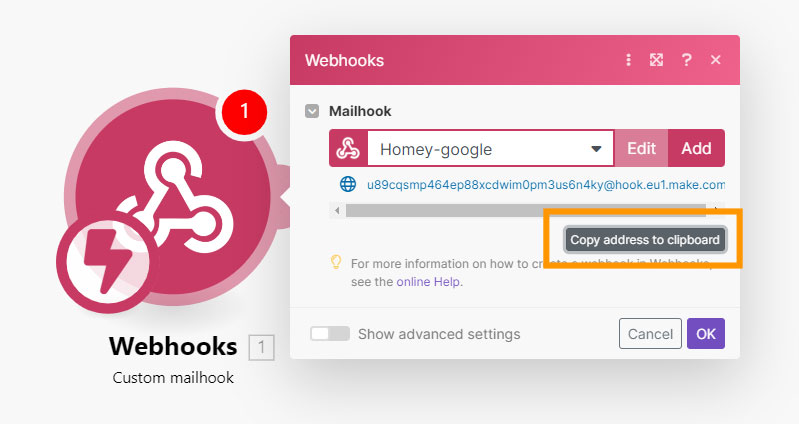
Now we have to copy the url to activate it. This will look like this:
https://hook.eu1.make.com/9s043xlw3gfsdgfdso1a6f81p8eldkbi0qn3
Of course we want to pass values (P1 and EV) so we add this to this url:
?p1=1&ev=2
You then get this:
https://hook.eu1.make.com/9s043xlw3gfsdgfdso1a6f81p8eldkbi0qn3?p1=1&ev=2
We then request this in our browser and this activates it.
Step 3:
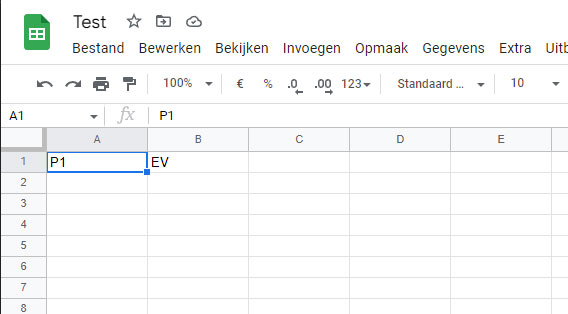
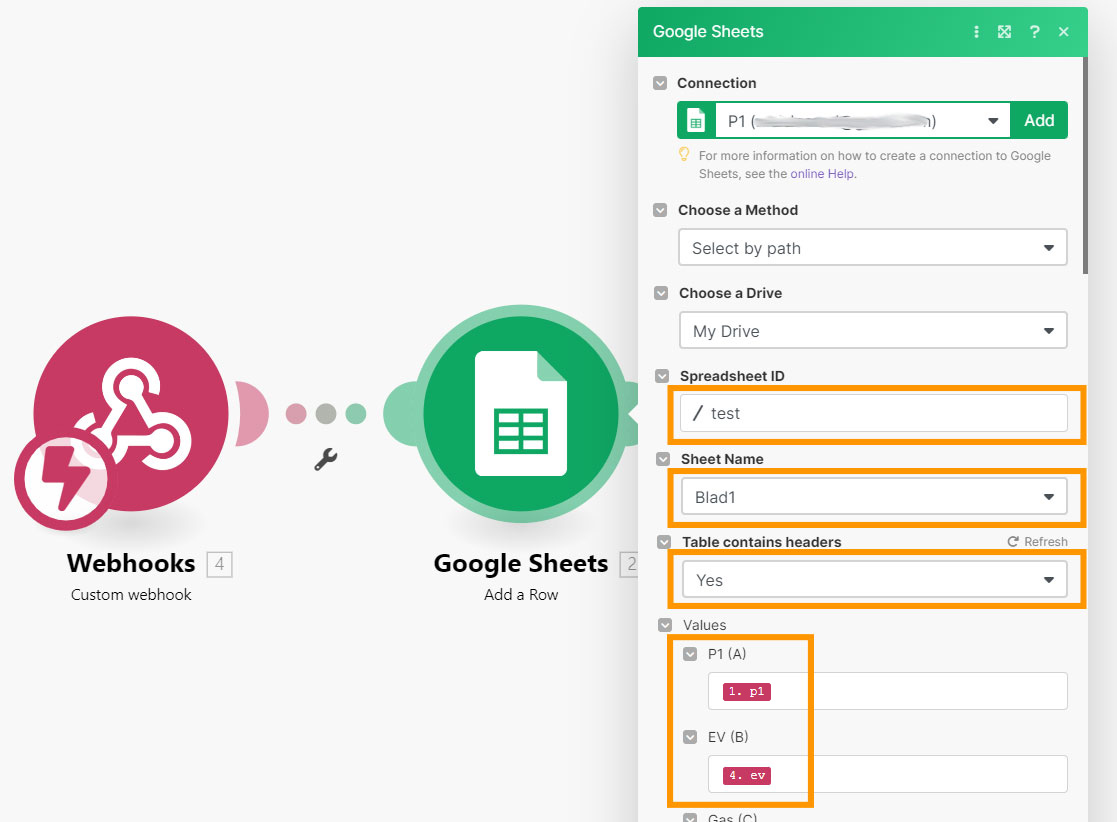
Now we have to make sure that he can send the values to Google sheets. For this it is best to first create a new sheet at Google and ensure that it has headings.
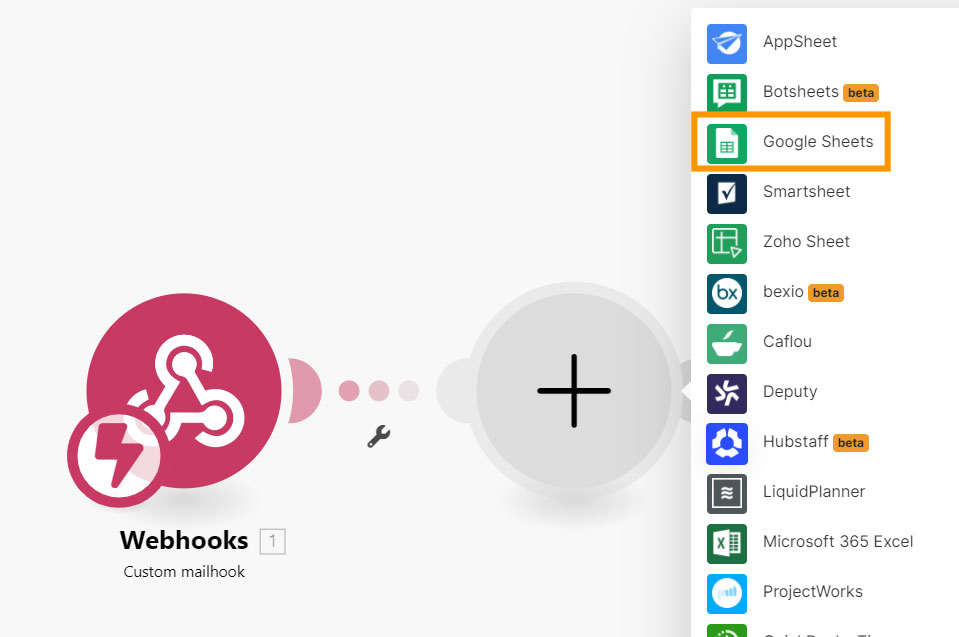
Once you've done this, go back to make.com to make the link. To do this, we move our mouse over the first ball (webhook) and press the plus sign, so that "add another module" appears. Now we search for "sheets" and give permission to make.com to make sure it can use it.
After this select "add row" because we want to add a new row. To ensure that it comes in the correct sheets, we select this at "spreadsheet ID" and the sheet name and indicate whether it has headers.
Our intention is to send multiple values (P1 and EV). So we link/select these at values.
We save it and to test whether it works, we request the url (https://hook.eu1.make.com/9s043xlw3gfsdgfdso1a6f81p8eldkbi0qn3?p1=1&ev=2) via our browser and check whether the values are in the Google Sheets .
Step 4:
Now that we have everything working, we still have to make sure that the Homey will send data to make.com. You can arrange this via an http reqeust. You create a new flow for this.
IF (Trigger):
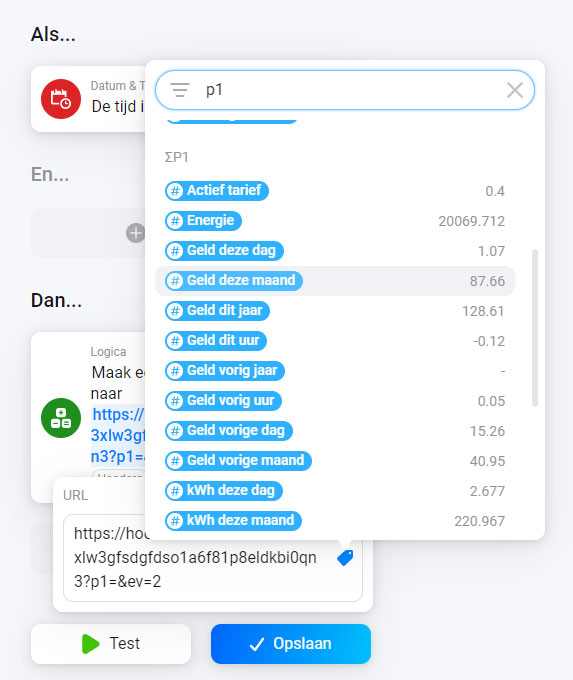
You can of course choose anything as a trigger. We choose to run it once a month. So we choose time/date and set the time to 1 AM and add the first day of the month to the "and".


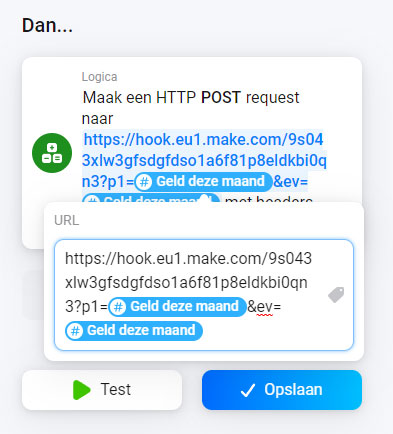
Then:
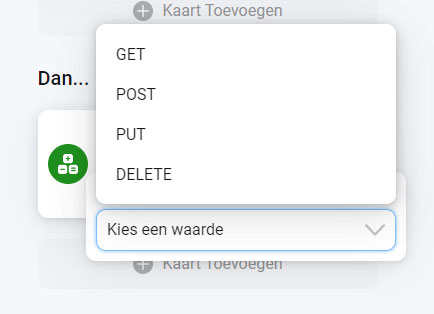
To send the http request we have to choose the card "logic" and "make an http request". For the method, we choose "POST" and specify the url of make.com
The values of the "power at hour APP" must be added to this. So we replace it at P1=<value>&EV=<value> by clicking on the label icon and looking up the value.

You don't have to fill in anything for the headers and body.
What else is possible?
If you have this link to make.com you can arrange even more through this platform. Such as sending e-mails to your employer to automatically have your settlement for charging your car. You can also connect to Telegram for sending messages.