

Review:
Home Assistant
Add devices:
So now we have the system running, but of course we can't do anything without devices. I will add a few different types to see how the system behaves.
Z-Wave:
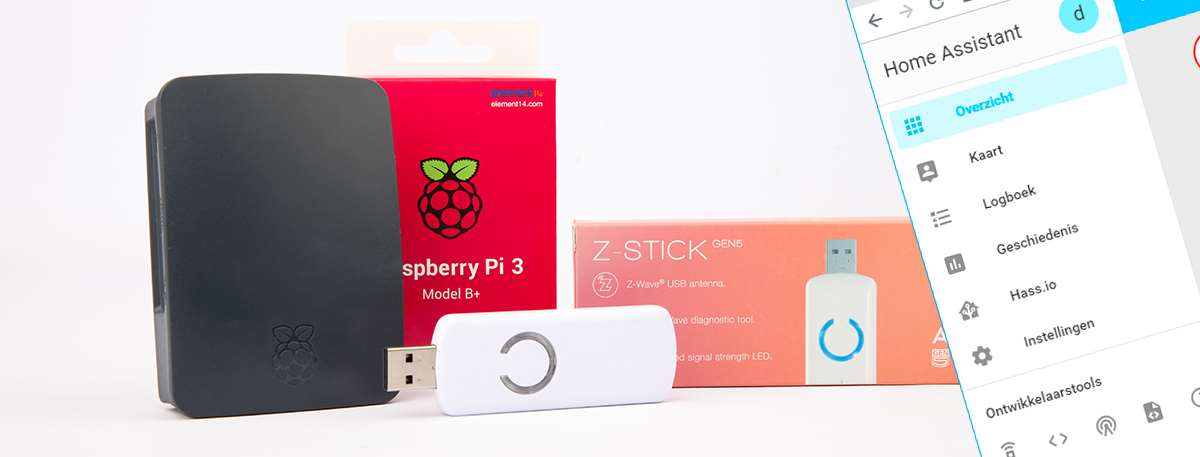
We first start with the wireless communication protocol Z-Wave. You need a Z-wave stick to use Z-Wave. I use the Aeon Labs USB Z-Wave stick for this.
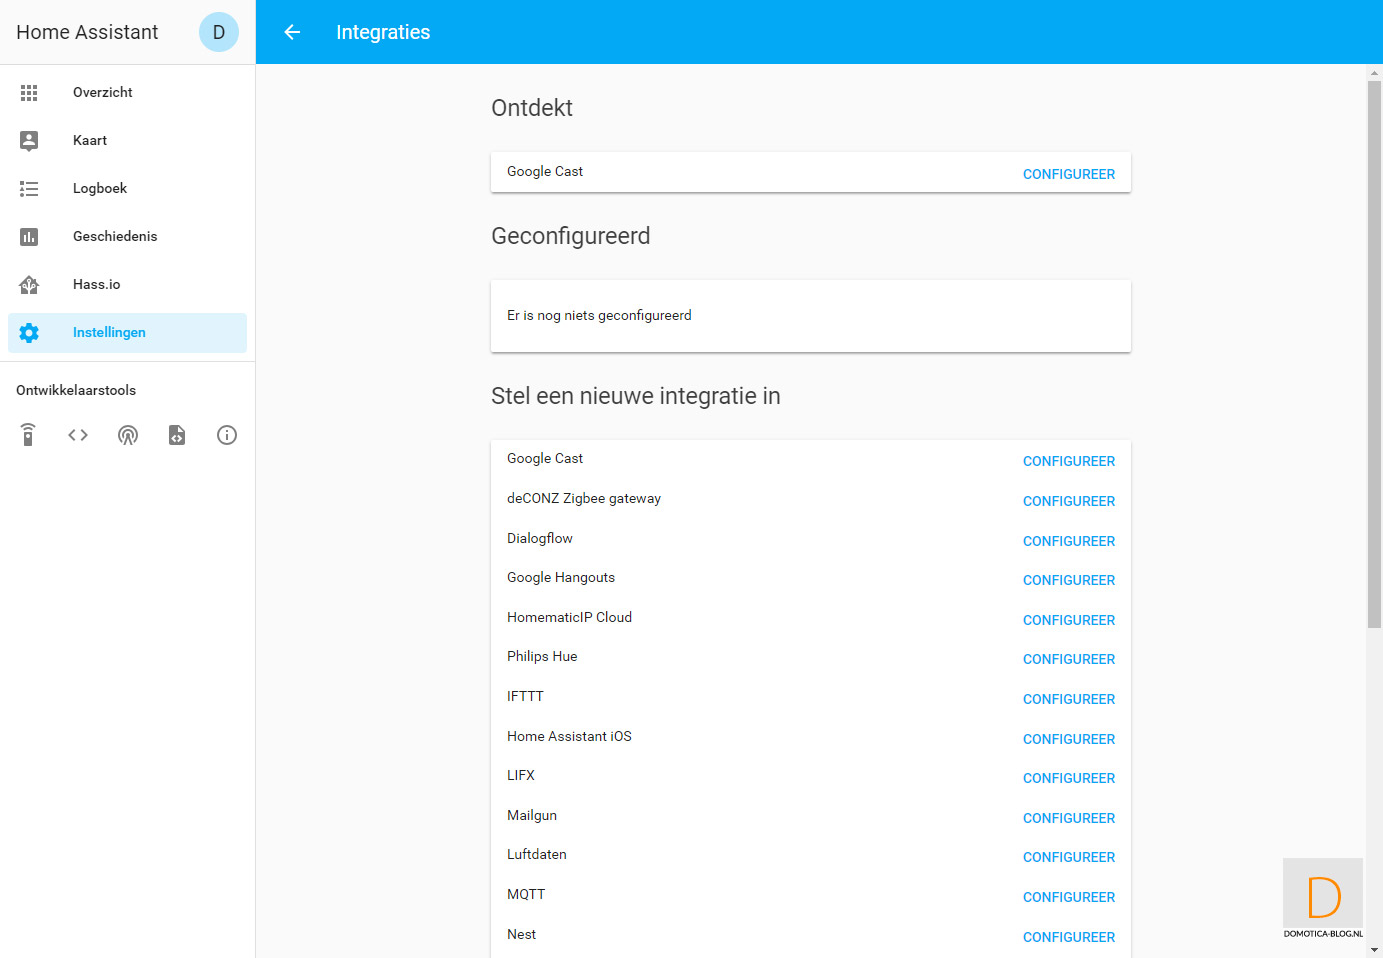
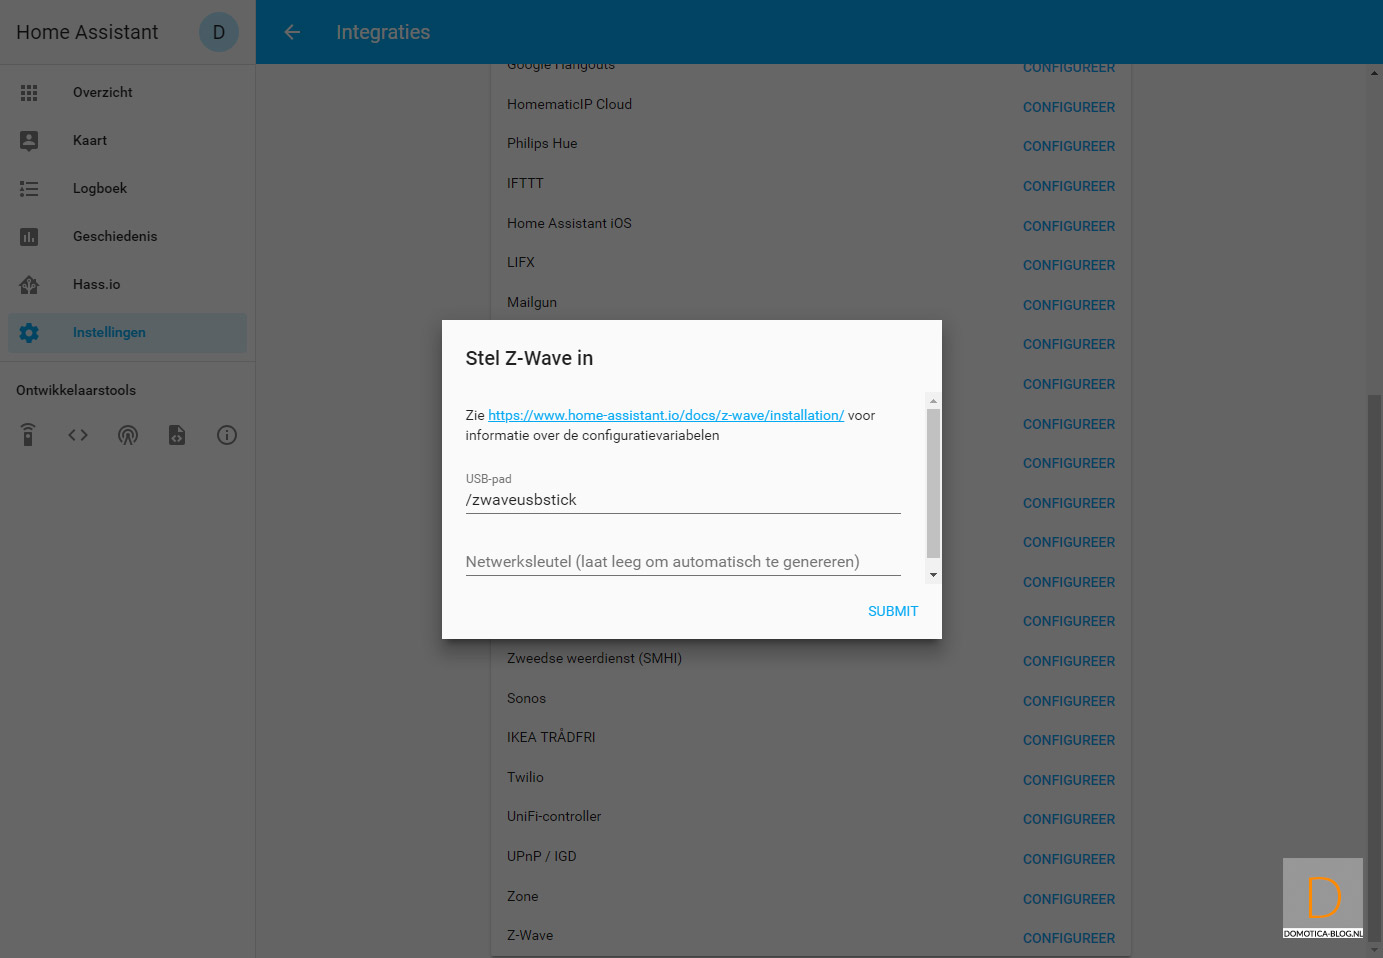
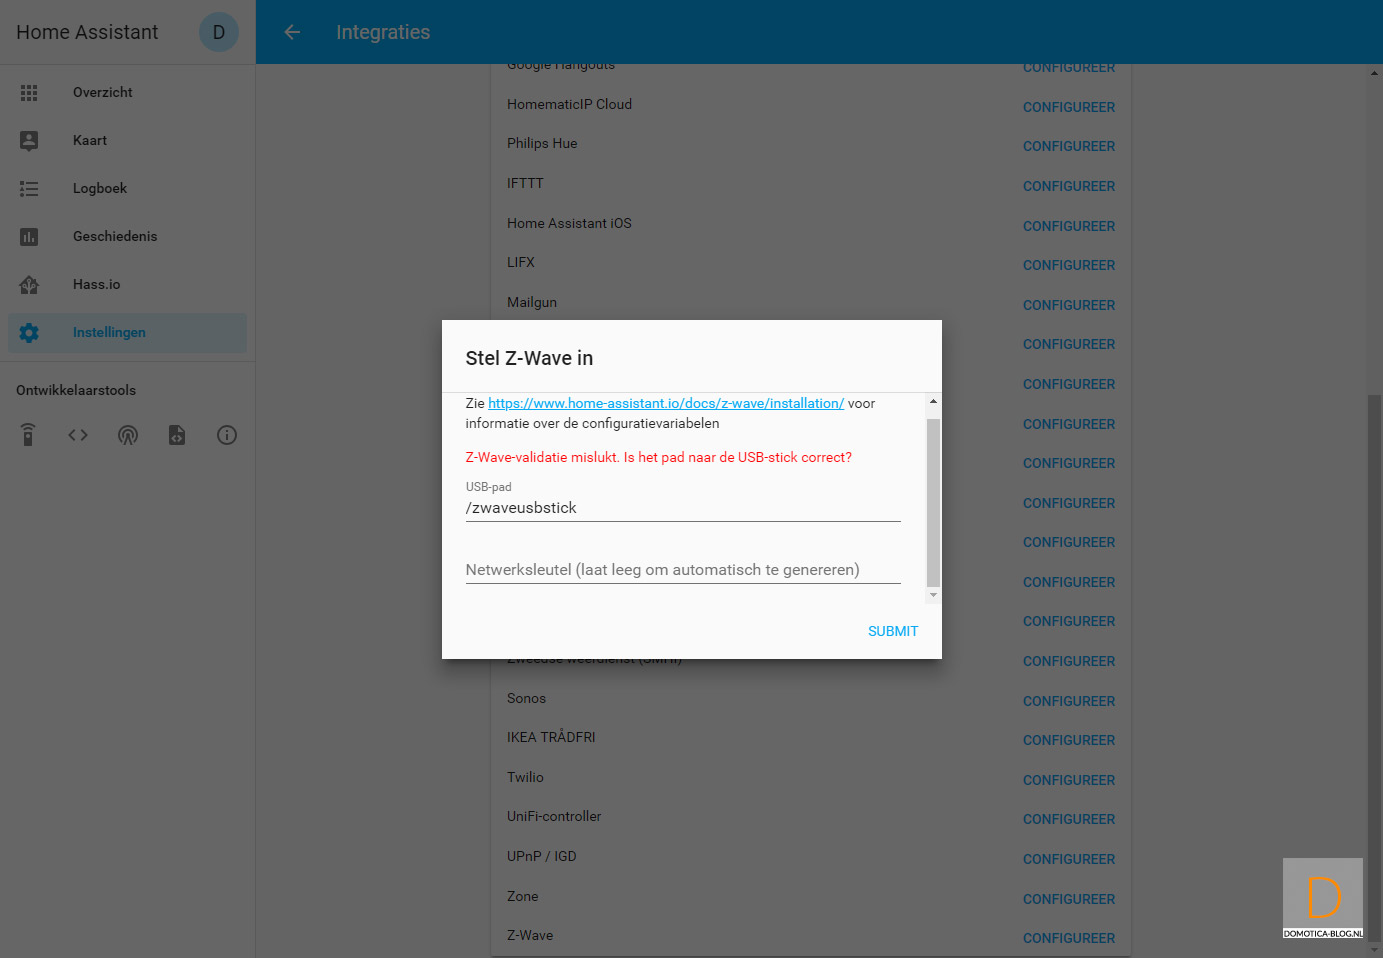
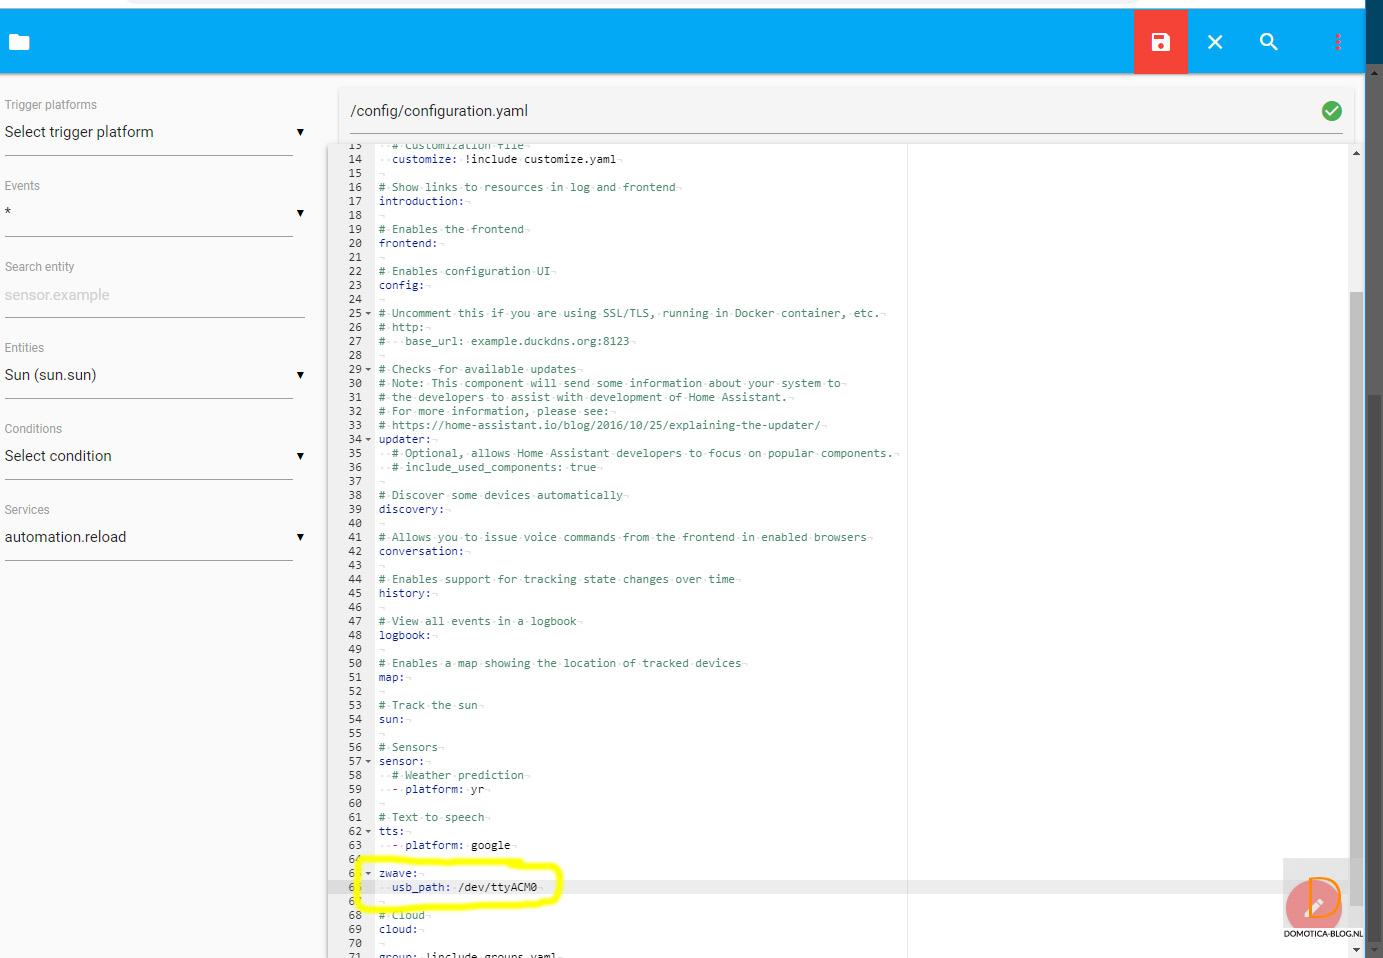
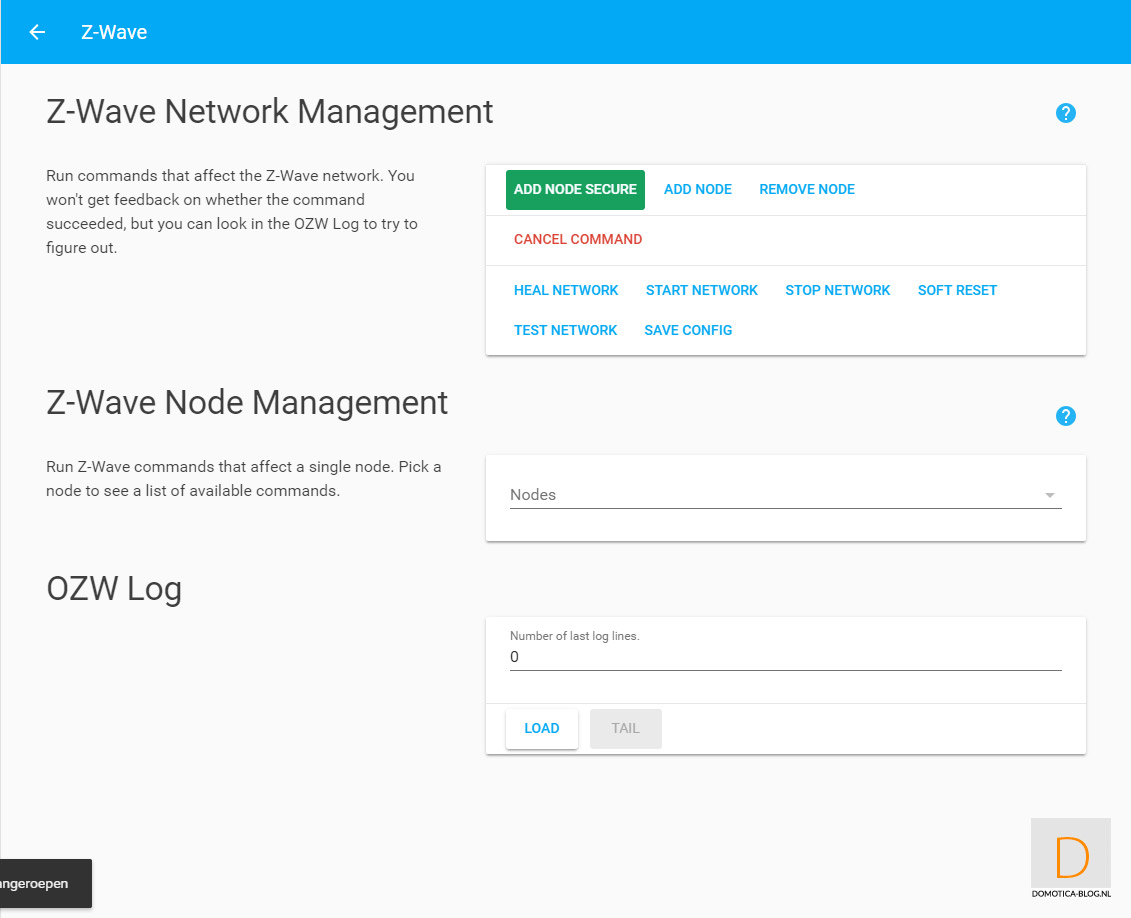
Because most users do not want to read a manual and sort things out first, I will first see for myself if I can work it out. Go to the settings and then integrations. When I scroll down, I see Z-Wave standing there. When I click on this I get a pop-up where I entered the path of the USB stick so far so good. But when I click submit I get an error that the path is not correct. After some google work I found that you have to add the following in the config file:
zwave:
usb_path: / dev / ttyACM0
Unfortunately it didn't work after this but after a reboot I saw my Z-Wave appear in the configuration and I can add devices. Good to report is that Open-Z-wave is used, this is a free-to-use database of "device descriptors" for Z-Wave devices. The disadvantage of this database is that it is not always up-to-date and not all devices are properly supported.

Fibaro Dimmer 2
First I add a Fibaro Dimmer 2. This is one of the most sold built-in dimmers and has been on the market for a while so this should not cause a problem.
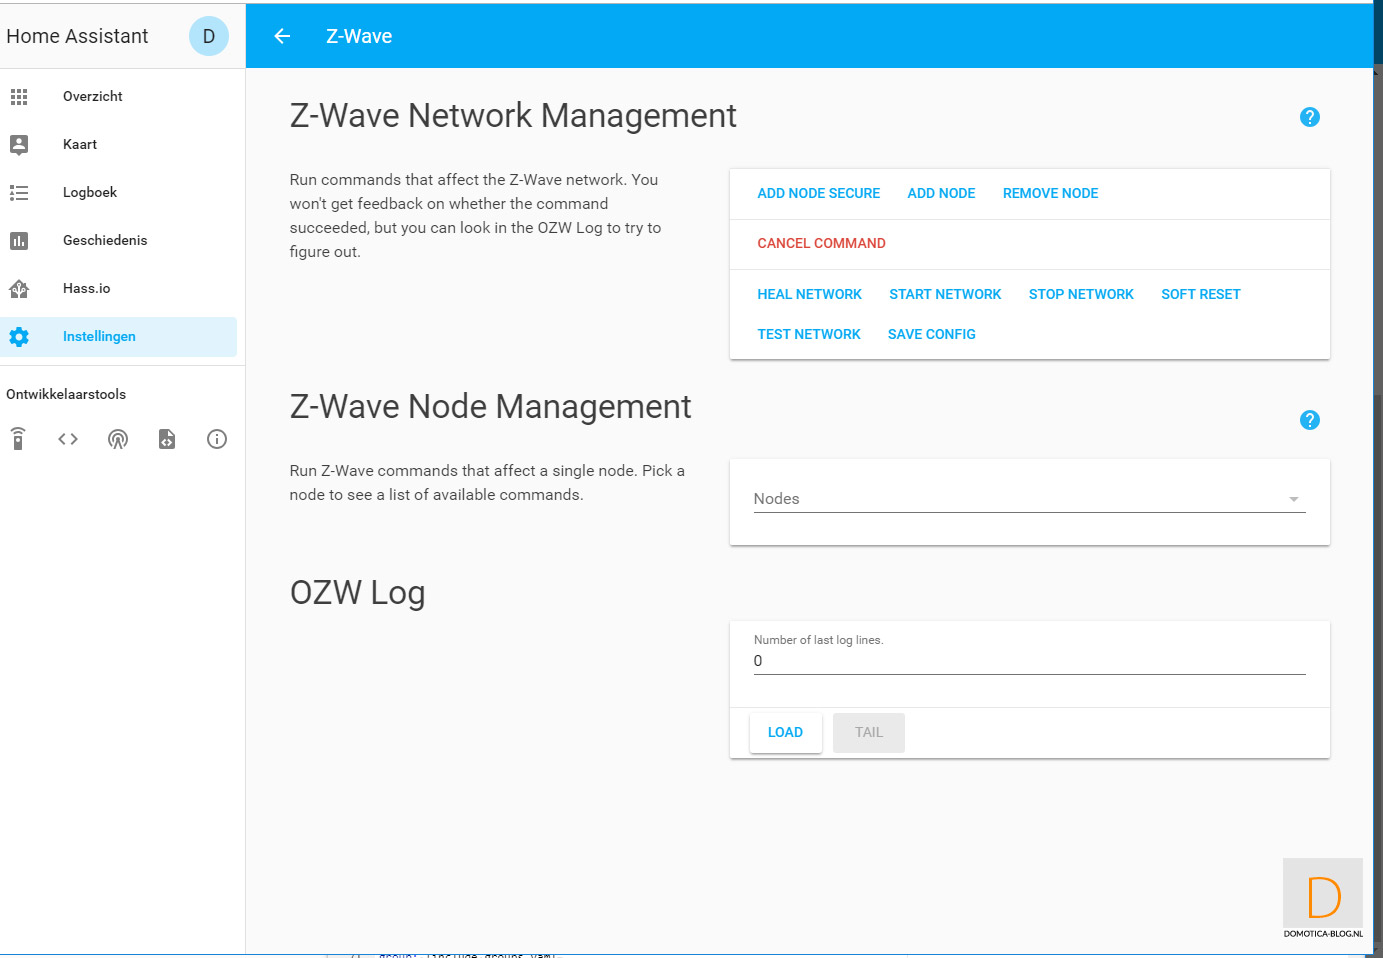
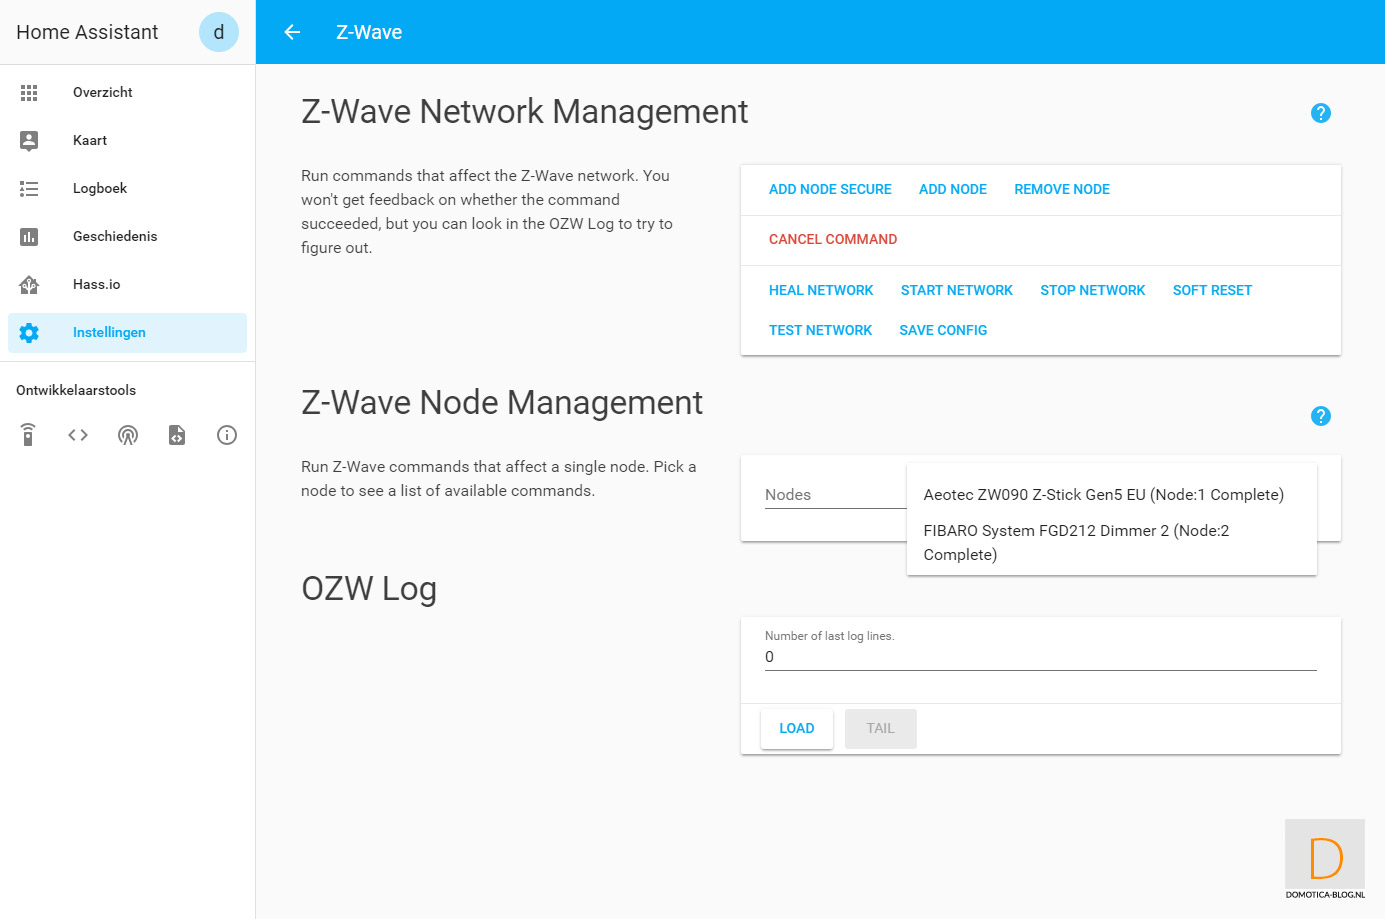
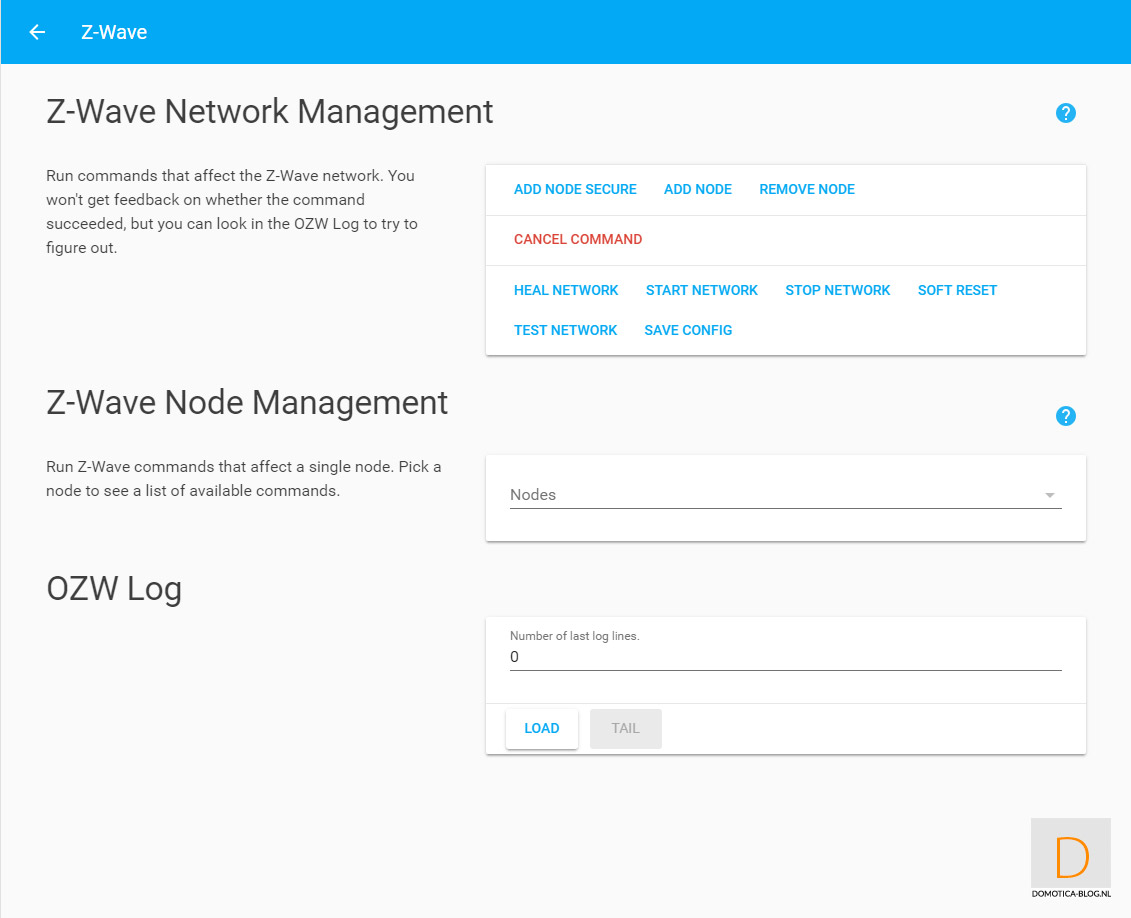
You can start adding by going to the configuration and then clicking on Z-Wave. Then click on "add node secure" to start adding. HASS gives a very short message that the addition has started. After this you must ensure that the add mode is started on the Dimmer. You can do this by quickly pressing the "B" button on the module 3 times. I did this a few times but there was no mention that the addition was successful. When I went back to my home screen, I suddenly saw the dimmer in the list of my devices. Apparently the addition was successful. It was strange that after a reboot the dimmer was no longer visible in the configuration but on my start screen (and also to operate). After another reboot, I saw it again in the configuration.
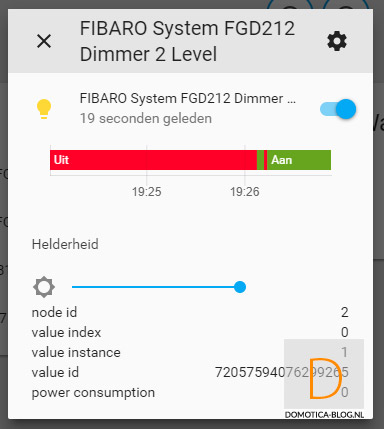
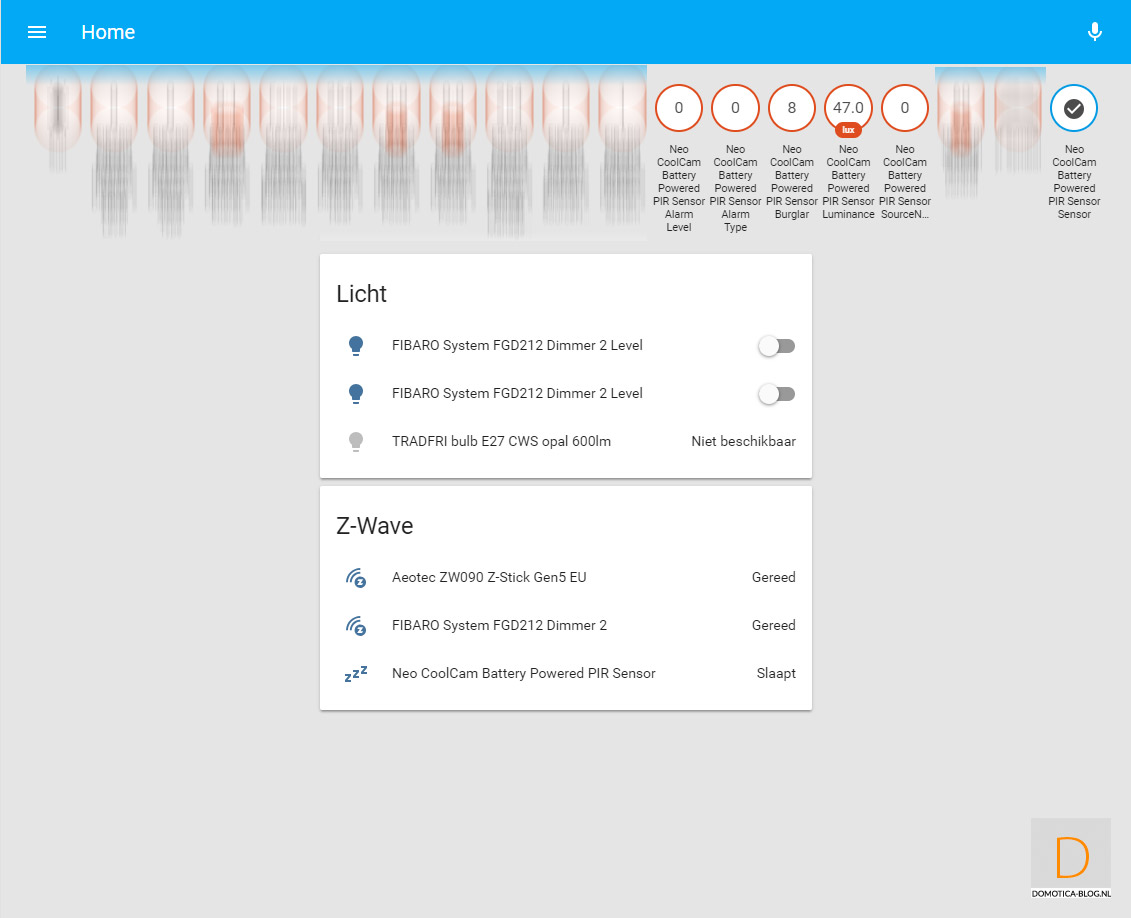
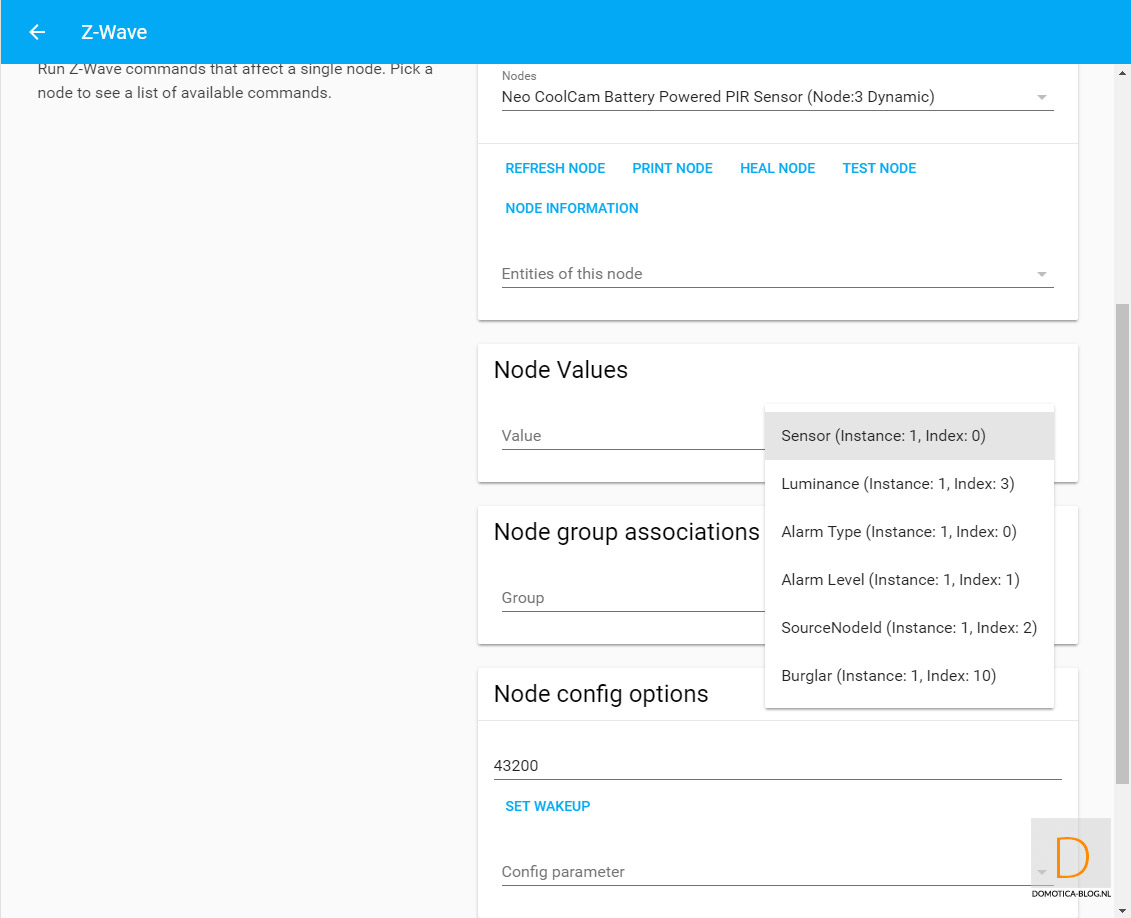
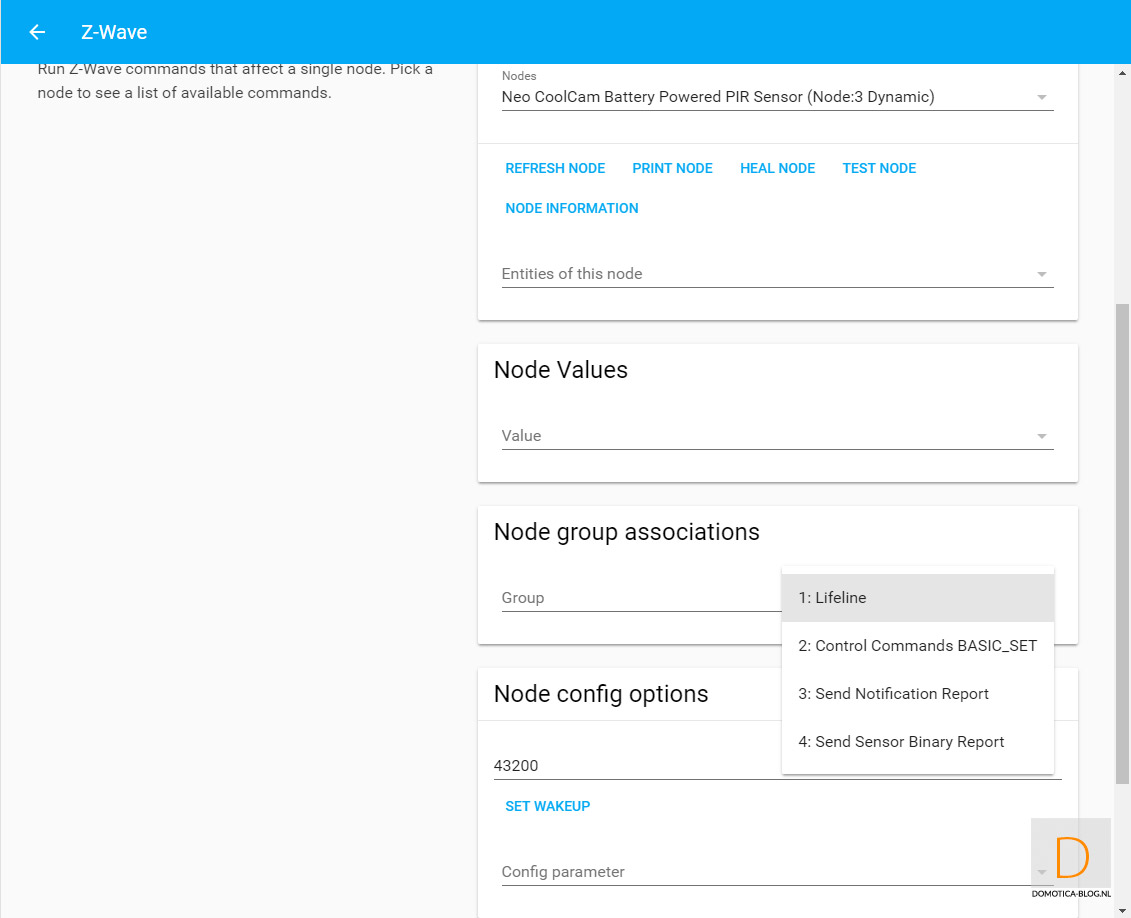
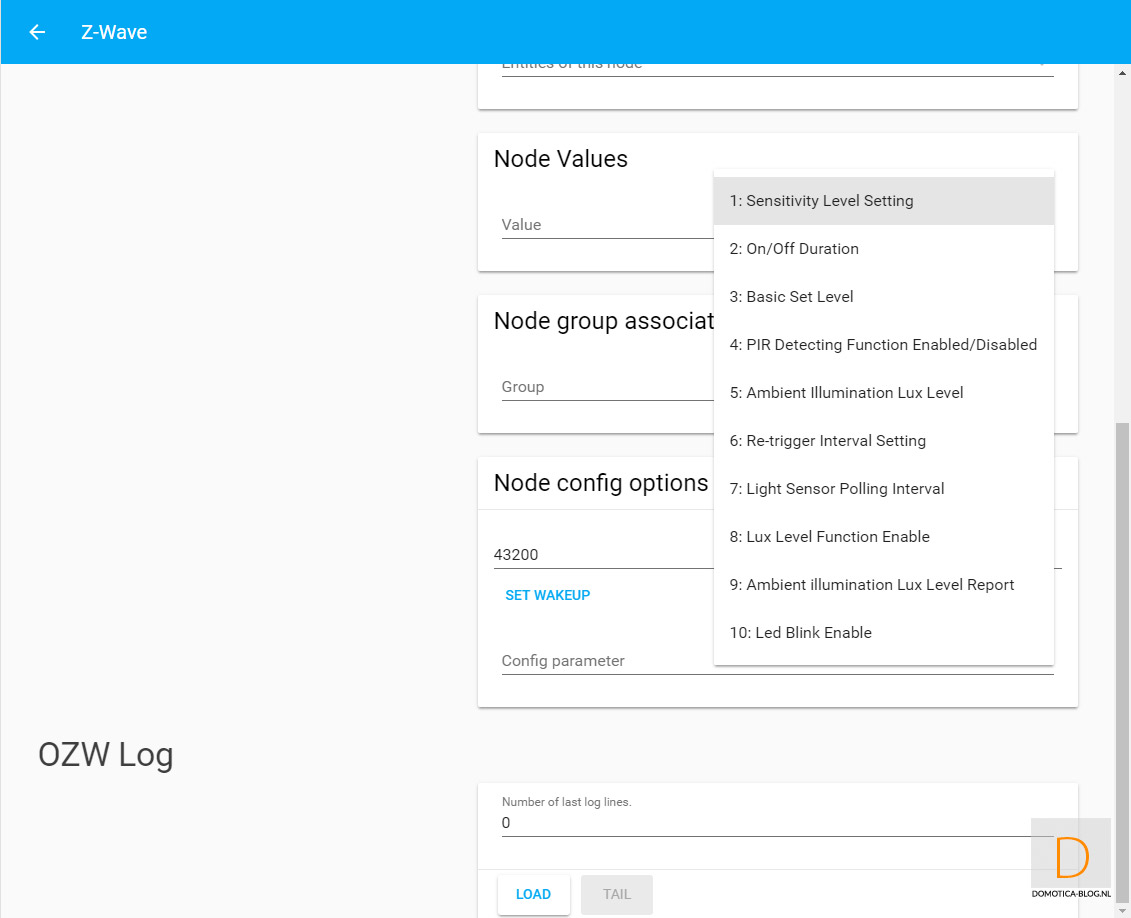
I see 2 switches of the dimmer, current consumption and total consumption. Completely complete and he also works on the command commands. I also see the parameters appear nicely. This allows you to arrange a number of things on the module itself, such as how often an energy report must be sent. Handy that this is all there.
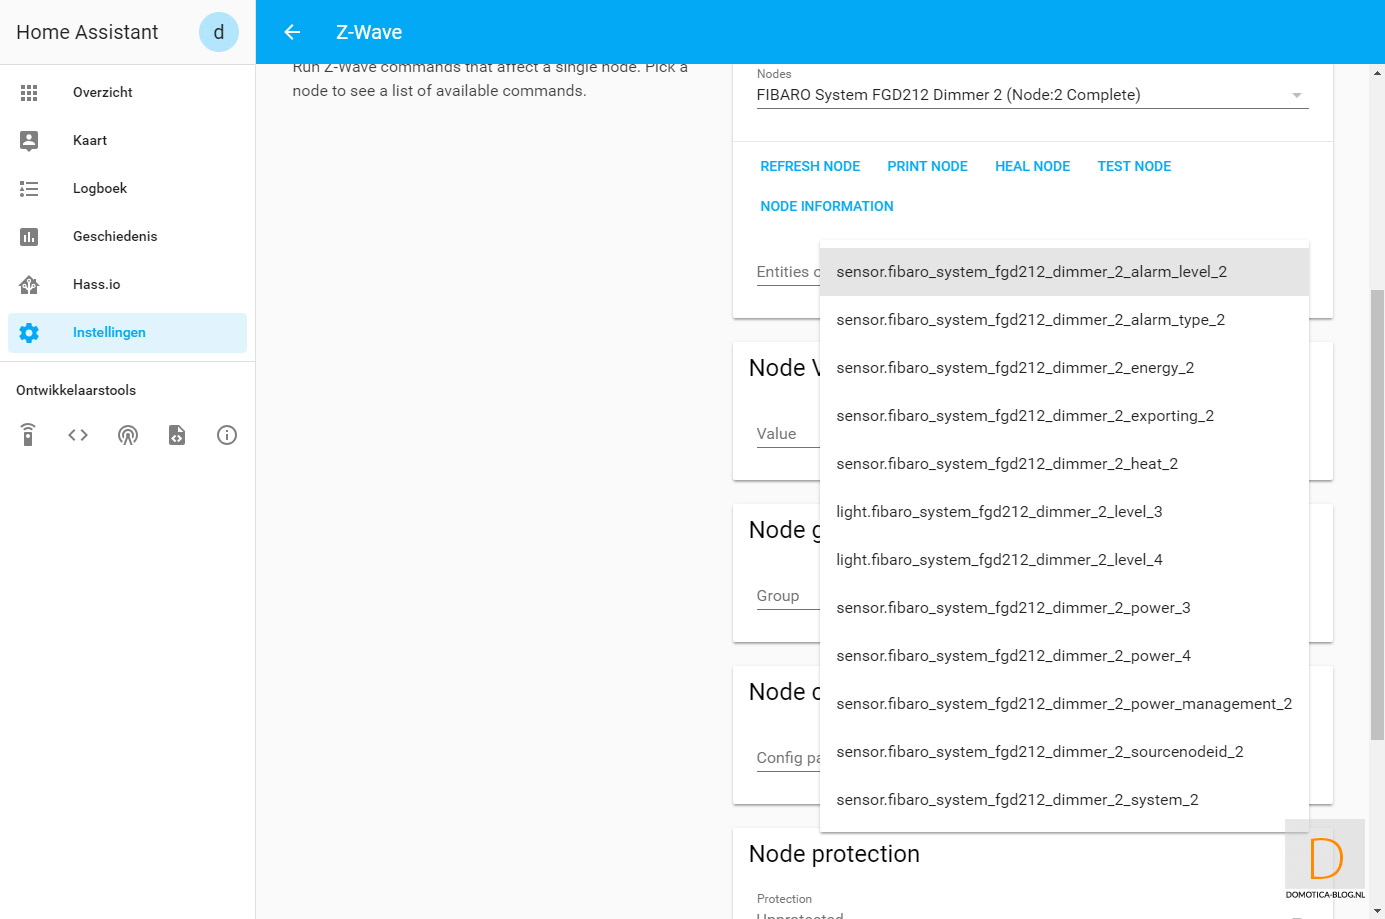


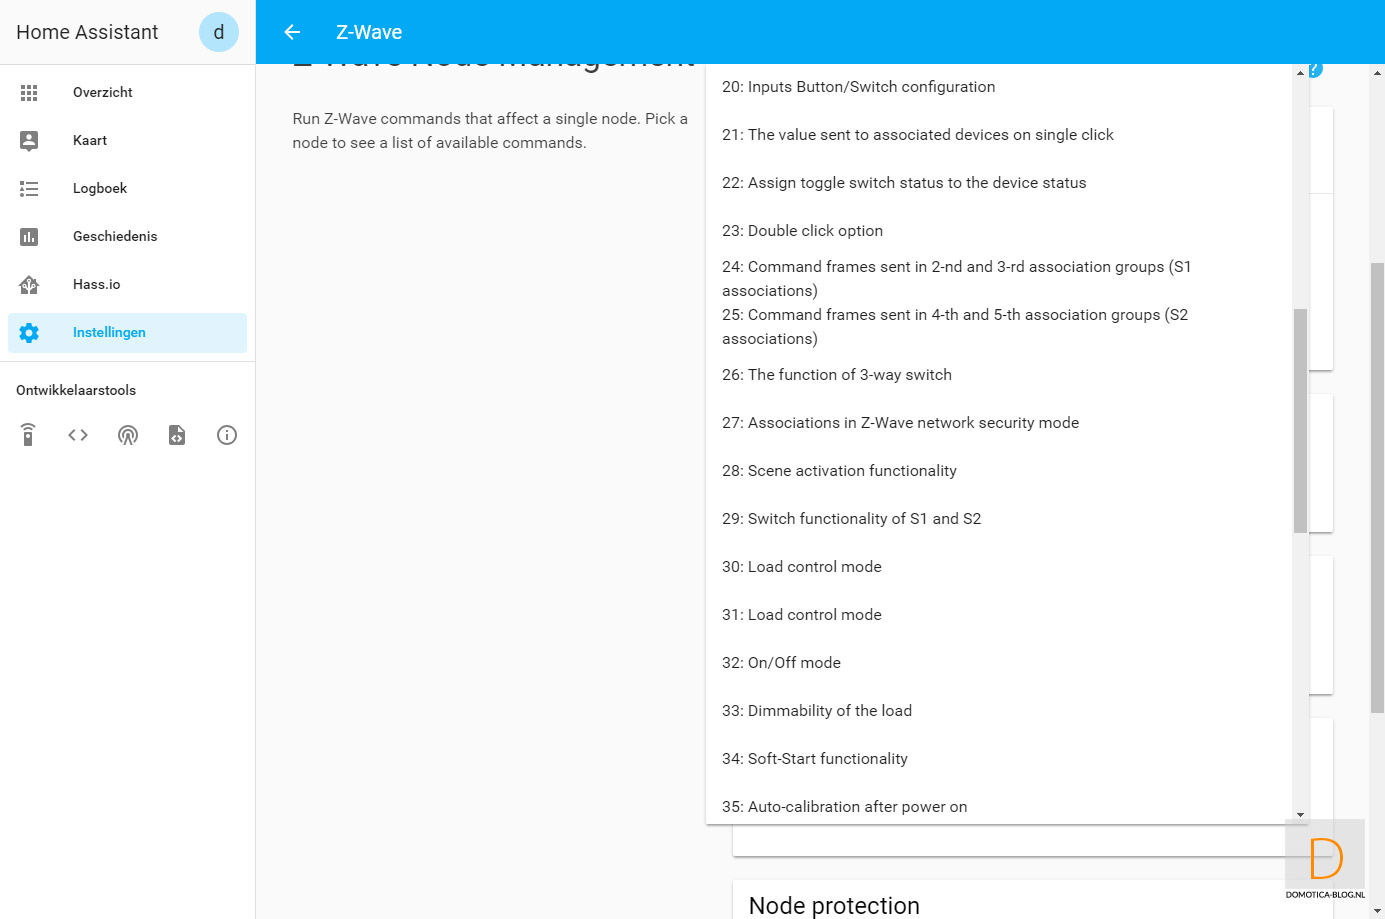
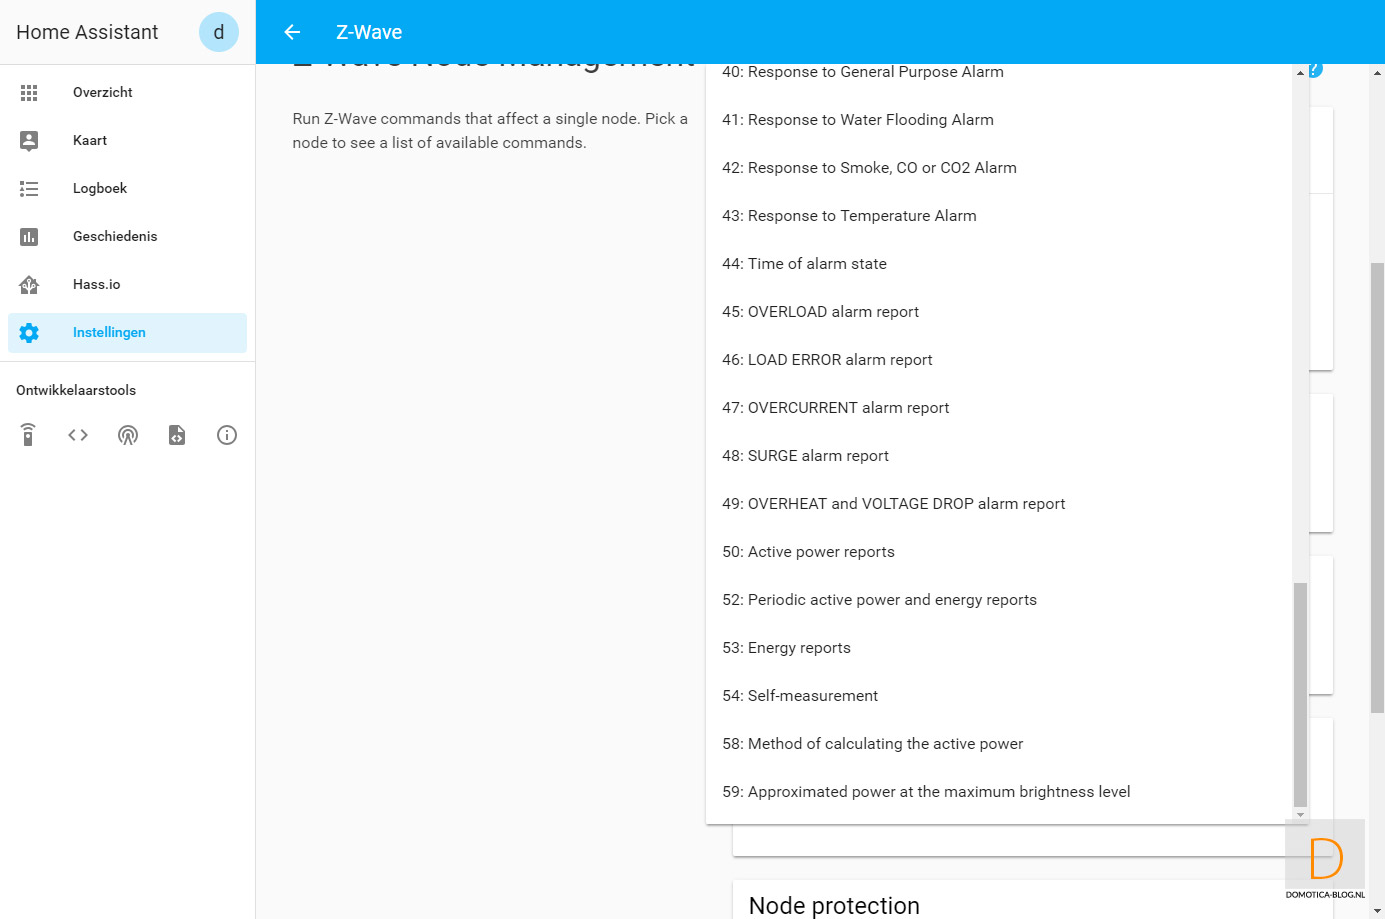
As you can see, all configuration options are present and you no longer have to add them manually.
Dashboard:
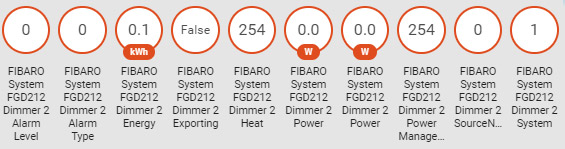
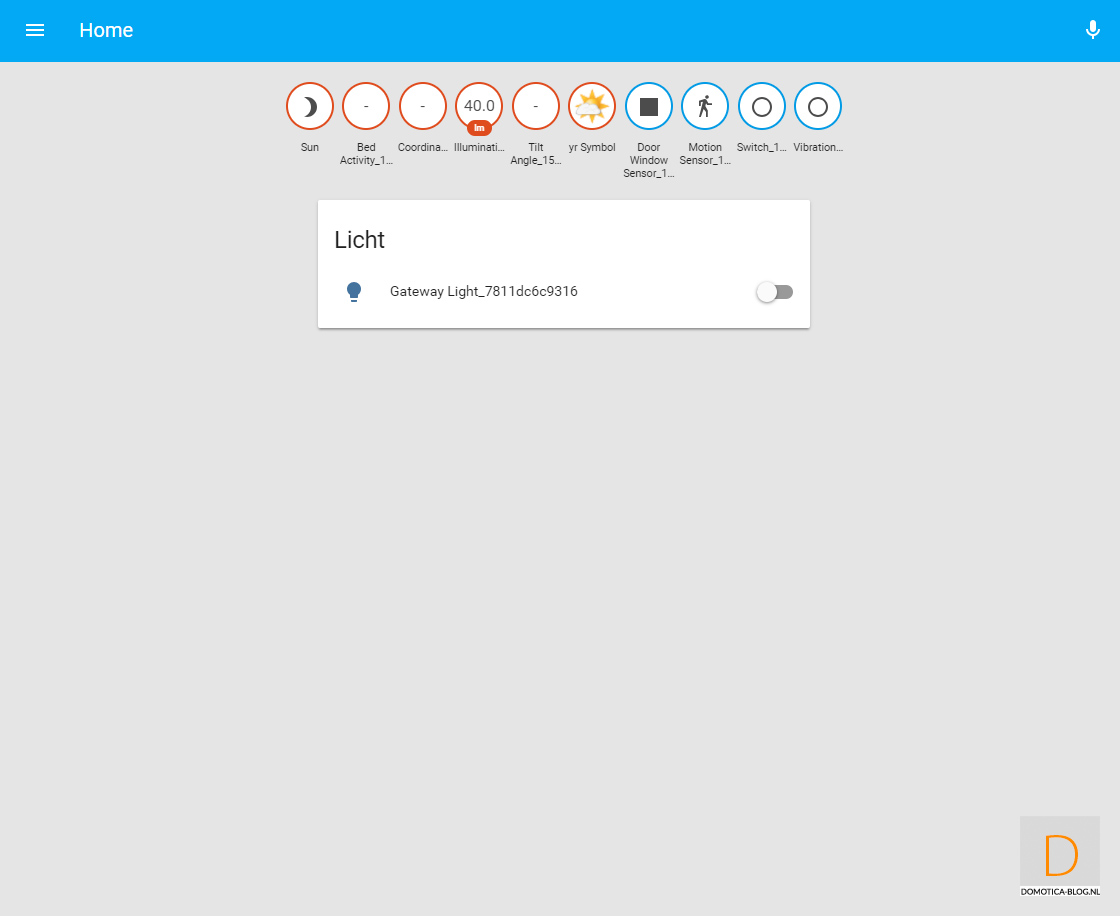
On the dashboard you see 2 switch, the current consumption, total consumption and the heat/alarm. So totally complete.
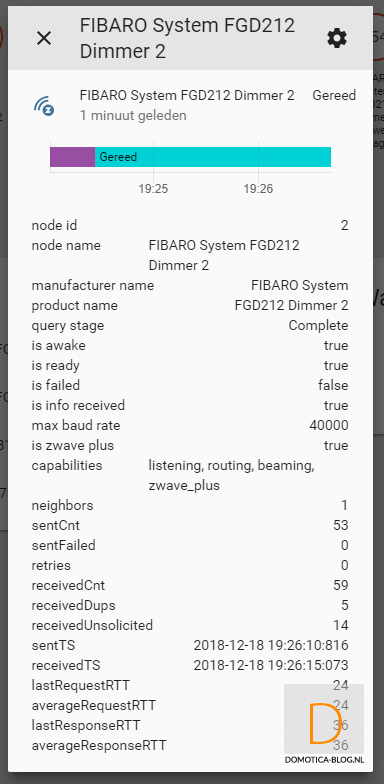
Node information:

Neo Coolcam Motion Sensor
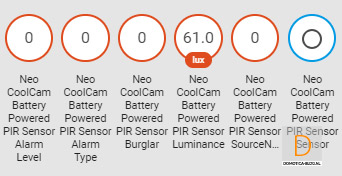
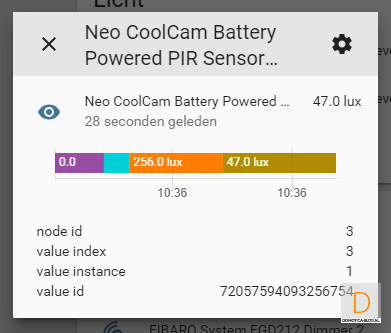
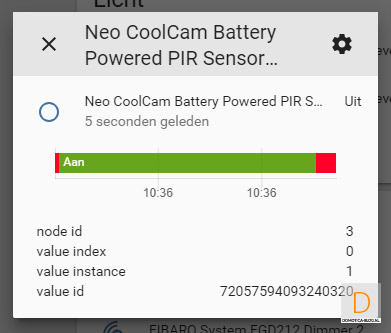
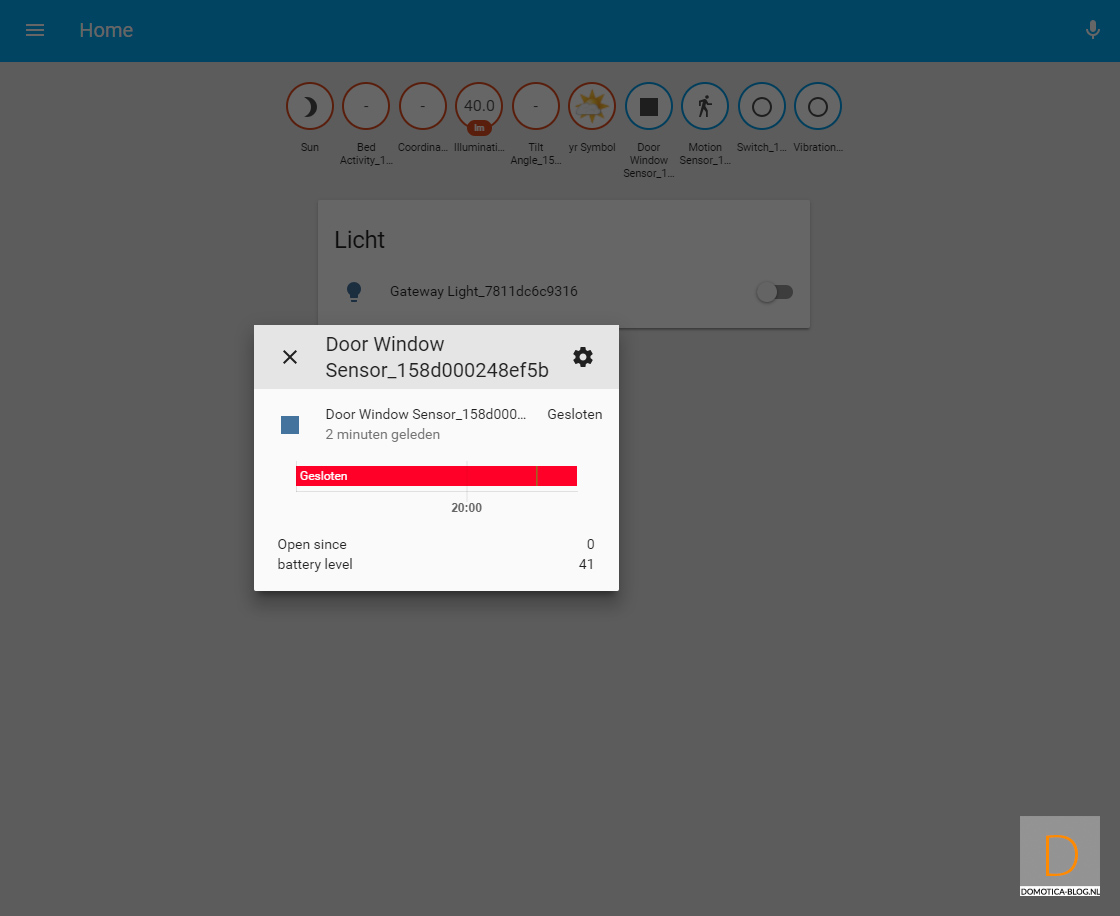
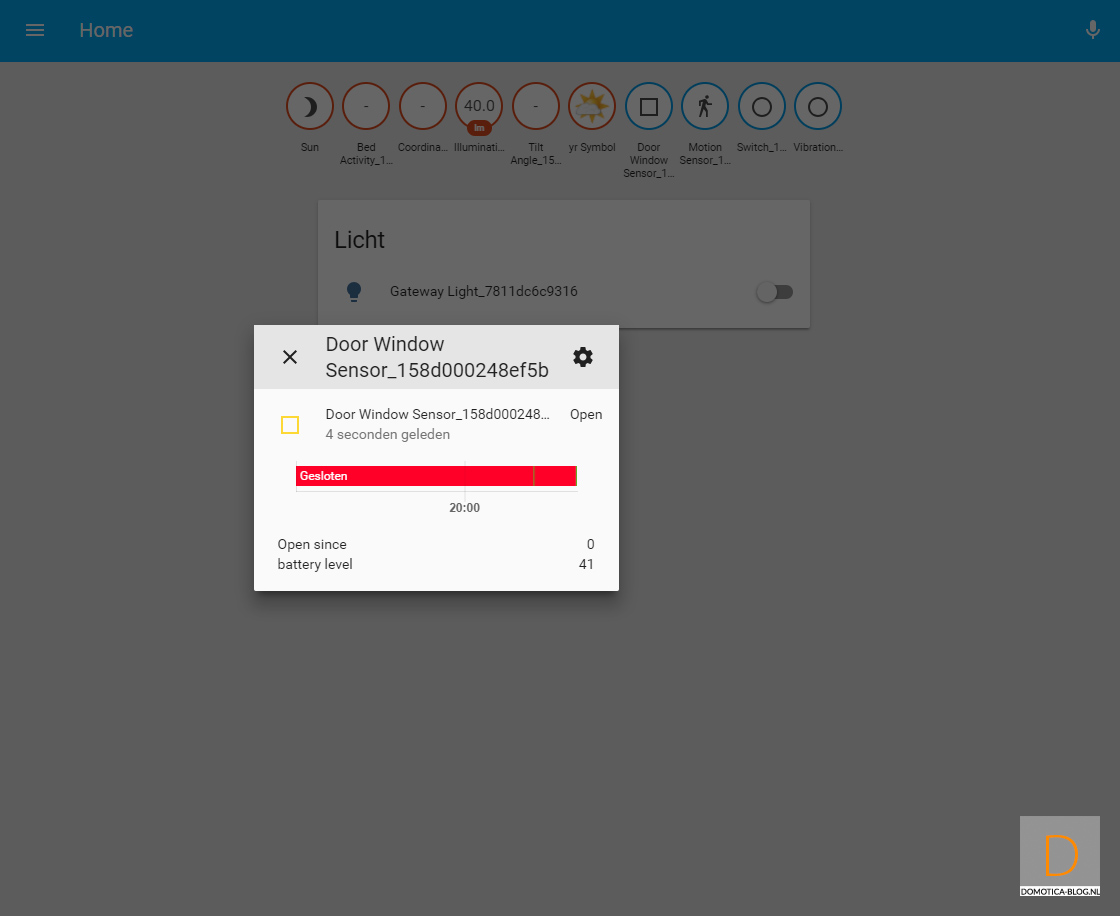
As a 2nd product we add the Neo Coolcam Motion sensor. Adding goes again like the dimmer without notification but also without problems. I see the LUX meter, motion detector and tamper alarm appear. The only thing I miss is the battery level. If I hold my hand in front of the sensor for a moment to trigger the movement, I see him coming in on the dashboard. Which indicates that the system responds quickly. I am pleasantly surprised by the response time. What is also striking is that all configuration options are present. This saves you looking up yourself in the manual.
Installation screens:

Configuration:
Dashboard:
Node info:
The Z-Wave devices that I have added all seem to work fine.
Zigbee
If you buy a Zigbee stick you can use Zigbee products directly with HASS. You then do not need a gateway. Unfortunately I don't have such a stick yet. As soon as I have this I will update this section. You can also use Zigbee with a gateway such as the Xiaomi Gateway and the Ikea TRÅDFRI gateway. I have already installed this so I can now add.
Xiaomi Gateway
As already mentioned, we are starting to link the Xiaomi Gateway to HASS.
You can do this by adding this to the configuration file:
# You can leave MAC empty if you only have one gateway.
xiaomi_aqara:
discovery_retry: 5
gateways:
- key: xxxxxxxxxxxxxxxx
The key of the gateway can be found in the APP of Mi Home by tapping the gateway> about> 3x in the screen and then going to "wireless communication protocol".
After adding to the configuration, I gave the HASS a reboot again. Unfortunately he came up with the message that the xiaomi_aqara was not configured properly. So once again checked the key and just added the IP address of the gateway to be sure. Unfortunately he didn't do it afterwards. After this I added the MAC address and gave a reboot. After this the system did not want to start anymore. It may of course be that I have entered something incorrectly somewhere. After a complete re-installation of HASS, I tried again.
This time I added the following code:
# Xiaomixiaomi_aqara:
discovery_retry: 10
gateways: - host: 192.168.1.9
mac: 3497566EBG60
key: rnzb4cc1unguuo4
And now I saw my Xiaomi products coming in. And more importantly when I trigger something, I also see this on the home screen. What is striking when the gateway has been out is that sometimes the connection is no longer established. After rebooting a few times, he usually finds him again.

Ikea TRÅDFRI
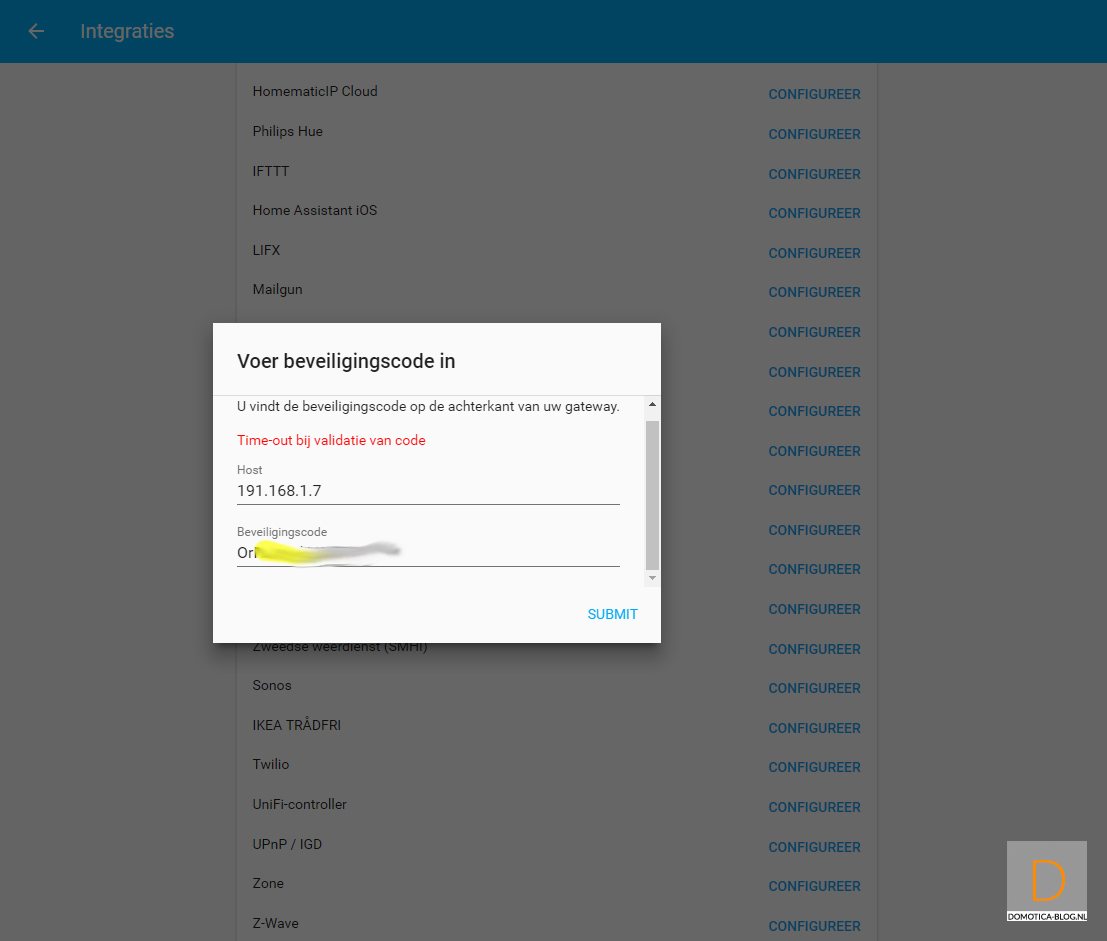
Ikea also uses Zigbee but you have to add this in a different way. You can do this by going to institutions and then to integrations. Then scroll down and click on configure at Ikea TRÅDFRI.
Then enter the IP address of the Ikea Gateway. You can look it up in your router. You can then look up the security code on the back of the Ikea Gateway, which you have to transfer to HASS. After this it is a matter of pressing "Submit". Strangely enough, there is no message that it was successful, but when I go back to the integration screen I see the gateway there.
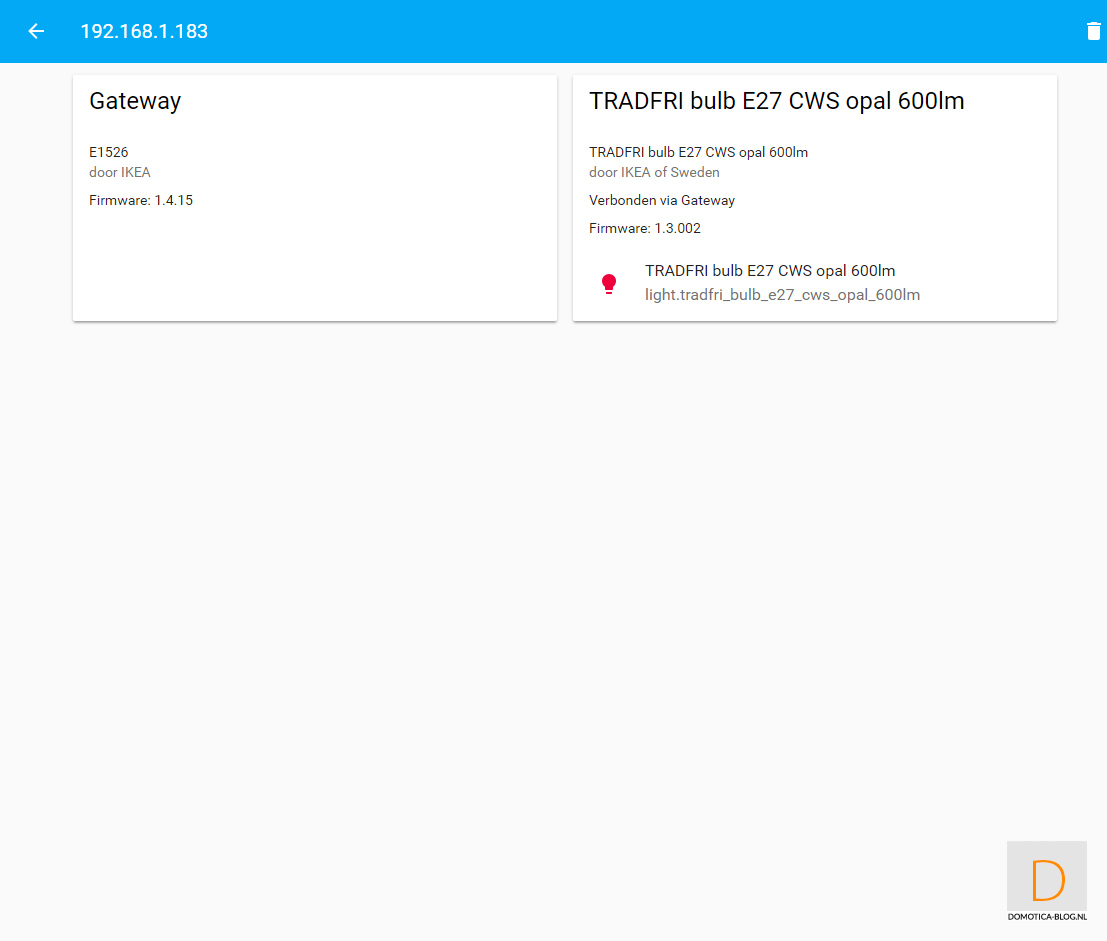
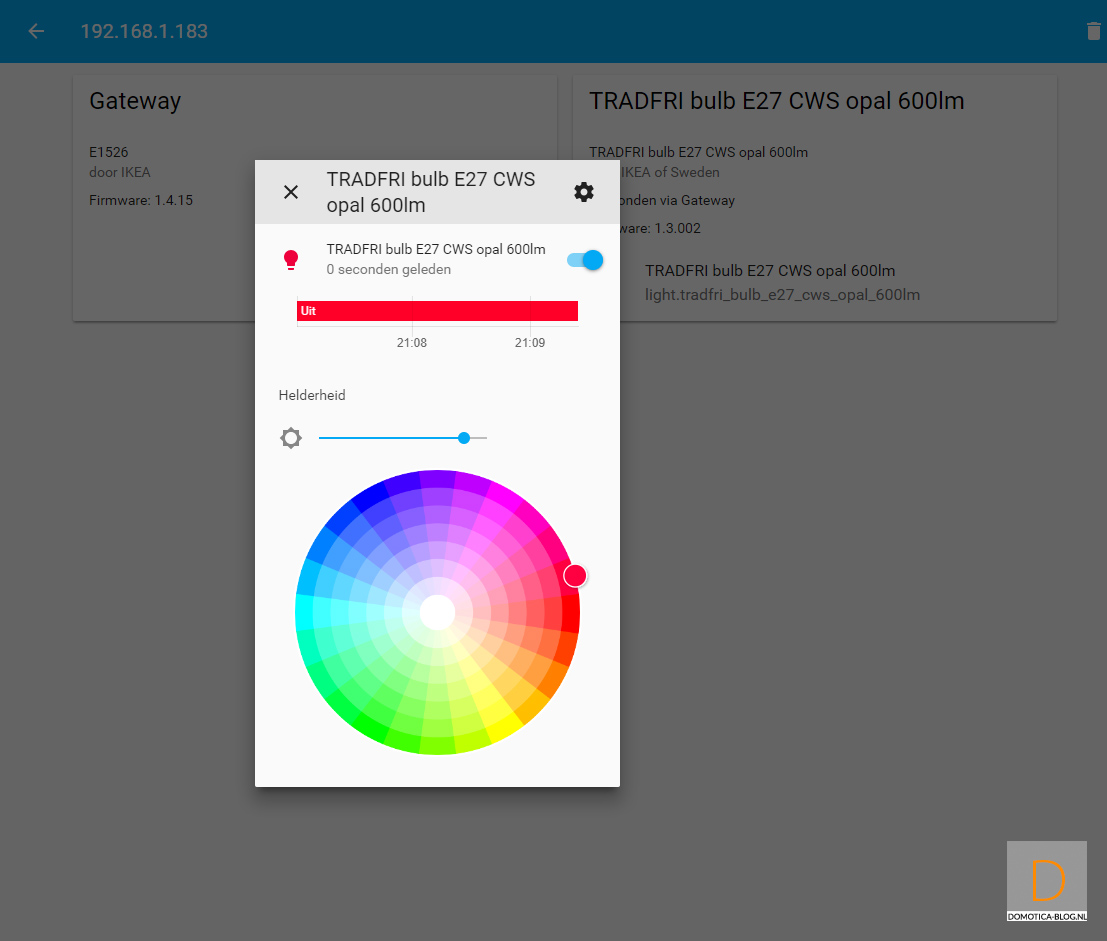
Unfortunately my lamp (which has been added to the gateway) does not come forward. You apparently have to press configuration again and enter the security code again. After this I see my lamp appear.


Nest:
Of course it would be handy if we could arrange our heating with HASS. I use the Nest Thermostat for this.
Unfortunately this is not just plug and play. You even have to go into your firewall to open ports.
You can read the whole story here: https://www.home-assistant.io/components/nest/
Google Cast:
If you have a google chromecast you can link it to HASS. You can then remotely switch on your chromecast and adjust the volume. But if you are handy you can also play music via a flow. After adding, I see my chromecast appear on the dashboard and I also see what is being played. So it works great.

Assistant:
A modern home automation system should of course not lack a link with Alexa and Google home. We don't have an Alexa yet, so testing is a bit tricky. We do have the google home so I will add this.
You can add the Google Home by using https://www.nabucasa.com/. This is an external party where you must create an account. This is of course a bit of a shame because you still have to open your system to the outside. This can of course still be overseen and you will have to do this with every controller. The Google Home simply communicates with the internet. What is more unfortunate is that this service is not free.
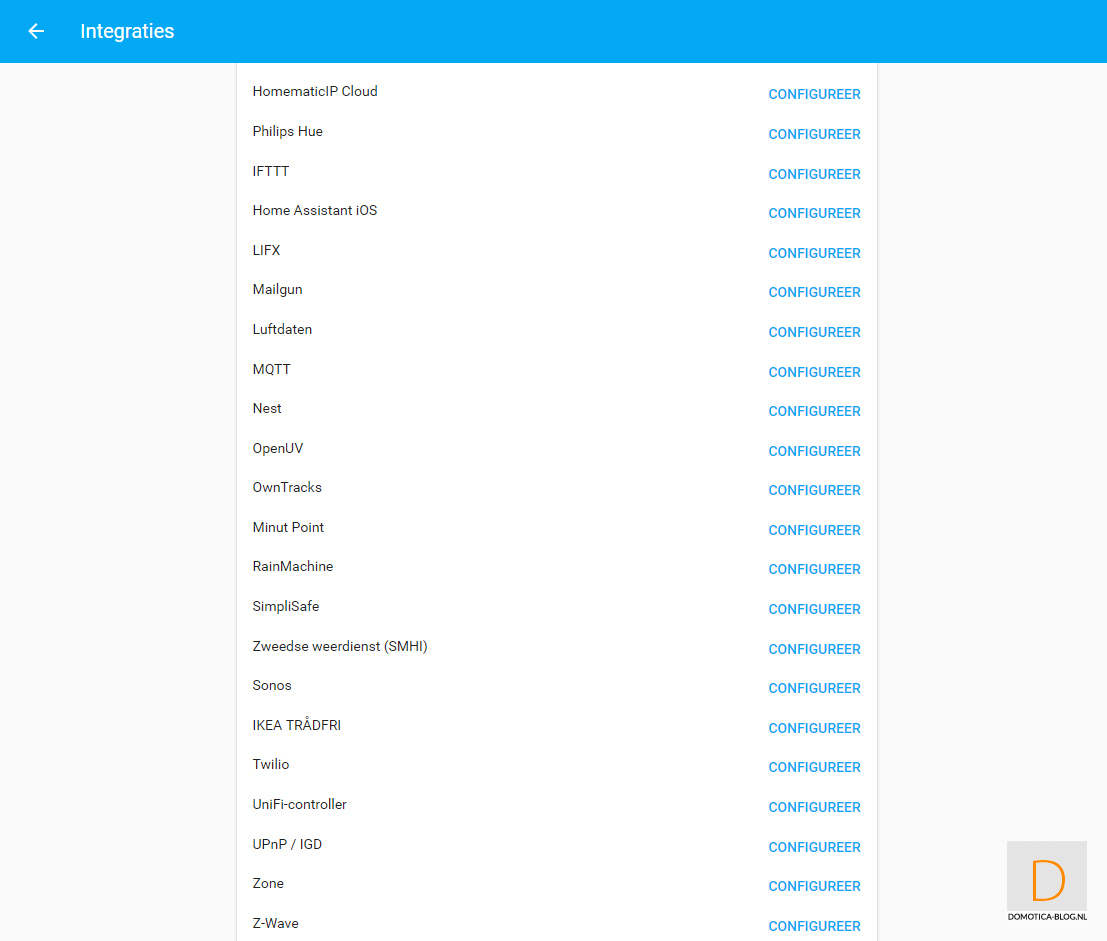
Other integrations:
There are many more devices that can be linked to HASS.
A complete overview can be found on this url: https: //home-assistant.io/components/