Review:
Home Assistant
Regels maken:
Nu we een aantal apparaten hebben toegevoegd zou het fijn zijn als zaken ook automatisch zouden gaan. Je wilt tenslotte een slim huis en niet een schakelaar om je lampen aan te zetten.
Er zijn 3 manieren om zaken te automatiseren.
Ik zal ze alle 3 even kort behandelen.
1) Via Code
Door het /config/automations.yaml bestand te openen kun je hier rechtstreeks je regels/code in typen.
Onderstaande is een voorbeeld als een sensor boven de 10 lux komt dat hij dan een notificatie stuurt.
automation:
- alias: Check sensor value and show notification
trigger:
platform: numeric_state
entity_id: sensor.random_sensor
above: 10
action:
service: persistent_notification.create
dates:
message: "Sensor value greater than 10"
Via de bovenstaande manier krijg je natuurlijk veel vrijheid maar je moet natuurlijk wel weten wat je doet. Dit zal niet voor iedereen even duidelijk zijn.
2) Via automation
De 2de manier is dat je gebruik maakt van de automation selectie. Dit is eigenlijk een grafisch waargave van de eerste methode. Geheel voor zichzelf spreekt dit niet. Zo moest ik behoorlijk puzzelen om als de deur open gaat een lamp aangezet wordt.
3) Node-RED
Wil je een beetje op een gemakkelijke manier regels maken dan kun je het best Node-RED installeren. Om deze te installeren ga je naar HASS.io en dan Add-ons. Vervolgens zoek je de Node-RED add-on op en installeer je deze. Als de installatie klaar is start je deze op en klik je op "open web UI". Hierna kreeg ik een error dat hij niet gevonden kon worden. Dit klopt omdat je hem eerst moet configureren. Vul een wachtwoord in bij de optie: en zet sll op "false" en start hem nogmaals op.
Met Node Red kun je dus je huis echt slim maken. De mogelijkheden zijn echt eindeloos en met Node -Red kun je dit ook echt realiseren. Als ik alles zou behandelen wat er allemaal mogelijk is, zou deze review 6 pagina's lang worden. Omdat er zoveel mogelijkheden zijn is het nog best wel complex, ondanks dat het een drag en drop systeem is. Je moet je er echt even in verdiepen. Goed om te melden is dat je aan de linkerkant je "Nodes" hebt en bovenin de tabs met de flows.Onderstaand geef ik even wat voorbeeld regels.
1) Deur open > Lamp aan en Deur dicht > Lamp uit
Ik gebruik hiervoor:- Xiaomi Door/window sensor- Fibaro Dimmer 2
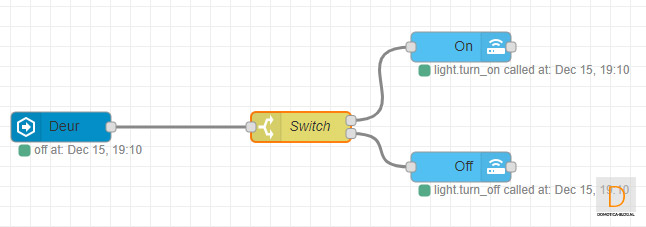
Of course you are the first to start Node-Red and drag the "events: state" node into the flow plane. Then double click on it and enter the following value:
- Name: give a clear name
- Entity ID: This is the ID of the sensor.
Every device in Hass has its own ID / name. You can look it up at your states in the start screen of HASS (bottom left).
So I enter: binary_sensor.door_window_sensor_123d000248ef5b. Then click on "Done". So we have now created a trigger. But we would like the lamp to go on and off. So we have to ensure that there are conditions.

We can arrange these conditions with a switch. So make sure that the "Switch" node is also on the flow. Double-click it again and enter the following value:
- Name: give a clear name
- on (note is case sensitive)
- off (note is case sensitive)
So now we have a condition if the sensor is on and the sensor is off. But now we still want the lamp to go on/off.

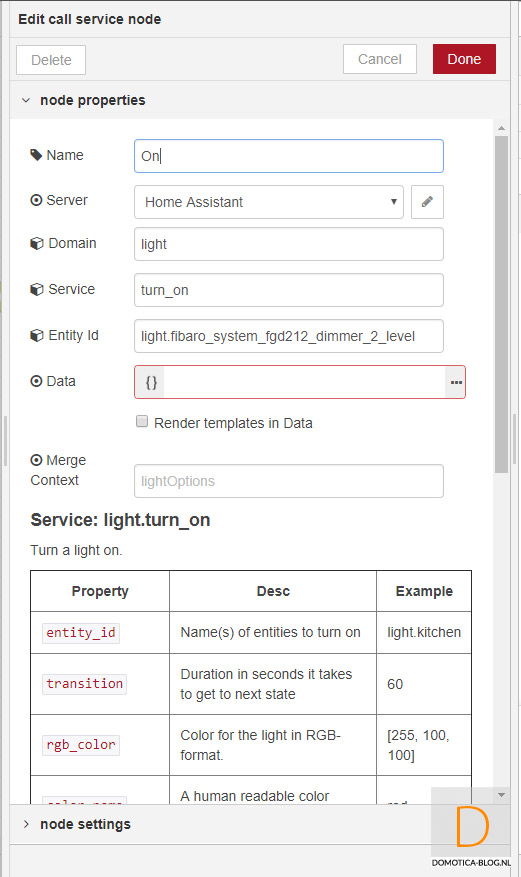
For this we use the "Call service" node. This allows you to provide a service to, for example, turn things on / off. Retract it again and enter the following value:
- Name: give a clear name
- Domain: Light. Here you indicate what kind of device you are going to switch.
- Service: turn_on. With service you indicate what the device should do. In our case, it must be turned on (turn_on).
- Entity ID: this is again the ID / name of the device. I enter here: light.fibaro_system_fgd212_dimmer_2_level
574/5000
Then copy the node (via CTRL + C and CTRL + V) and provide an off (off) version.
After this you give the flow a name and you have to deploy the flow to the Hass. Then of course you check if everything works properly by opening and closing the door. If something does not work then there is a debug option. You can use this by putting the debug node in your flow and checking what goes wrong via the beetle icon.
2) Dark in the hall and lights on when moving and off:
I use for this:
- Fibaro Dimmer 2 (lamp)
- Neo Coolcam Motion Sensor
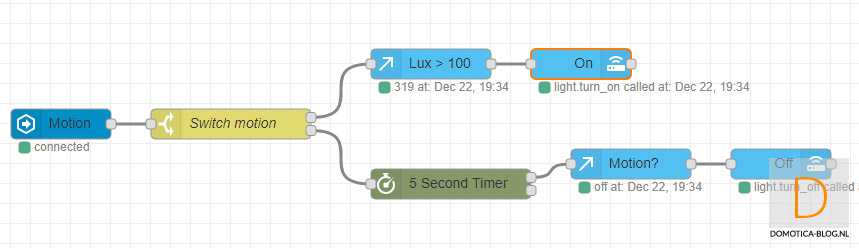
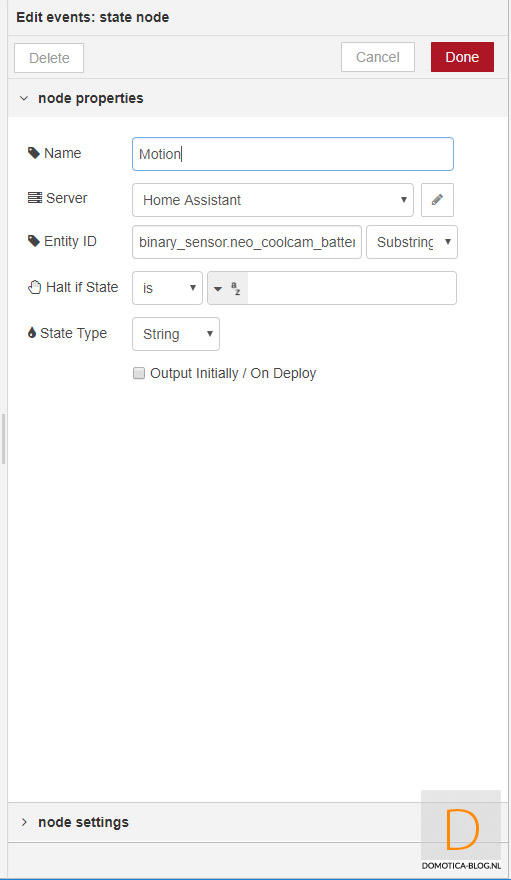
First, drag the "events: state" node into the flow plane. Then double click on it and enter the following value:
- Name: give a clear name
- Entity ID: This is the ID of the sensor. So I enter: binary_sensor.neo_coolcam_battery_powered_pir_sensor_sensor. Then click on "Done". So we have now created a trigger. But we would like the lamp to go on and off at a certain lux value. So we have to ensure that there are conditions.
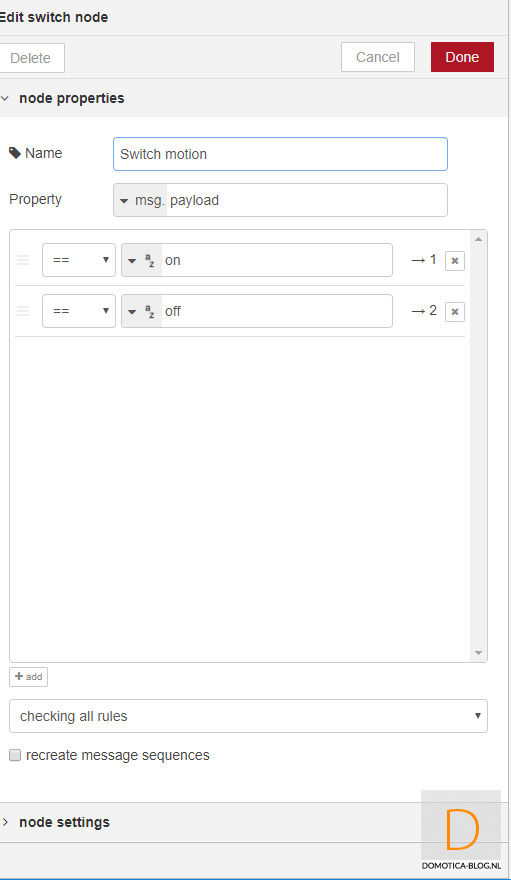
We can arrange these conditions with a switch. So make sure that the "Switch" puzzle also appears on the flow. Double-click it again and enter the following value:
- Name: give a clear name
- on (note is case sensitive)
- off (note is case sensitive)
So now we have conditions when the sensor goes on and the sensor goes off. But now we still want the lamp to go on / off and of course the lux value.
We will first ensure that the lamp comes on. We use the "Current state" node for this. This allows you to check a specific status of a device. Draw it back into your flow plane and enter the following value:
- Name: give a clear name
- Server: Home assistant
- Entity ID: the PIR of the motion sensor
- Halt IF: We only want the lamp to go on at less than 100 lux. So we fill in that above 100 lux the rule may not go further (and therefore the light does not come on).

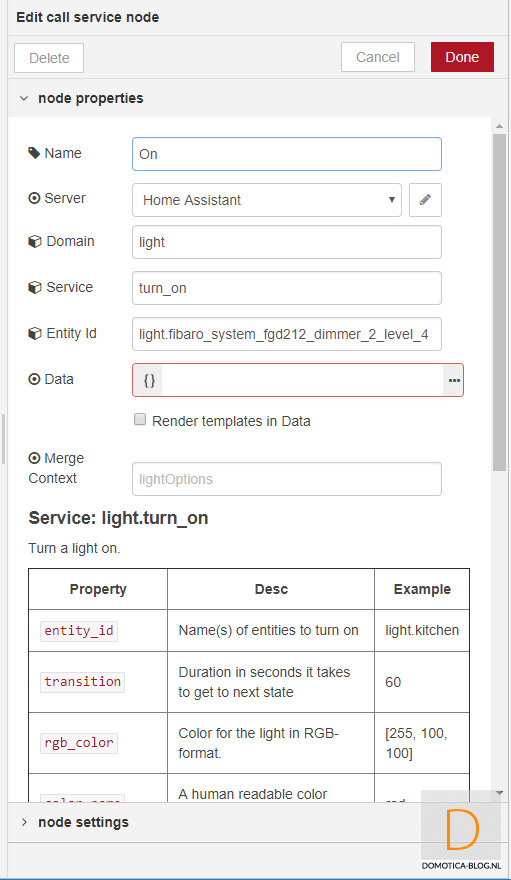
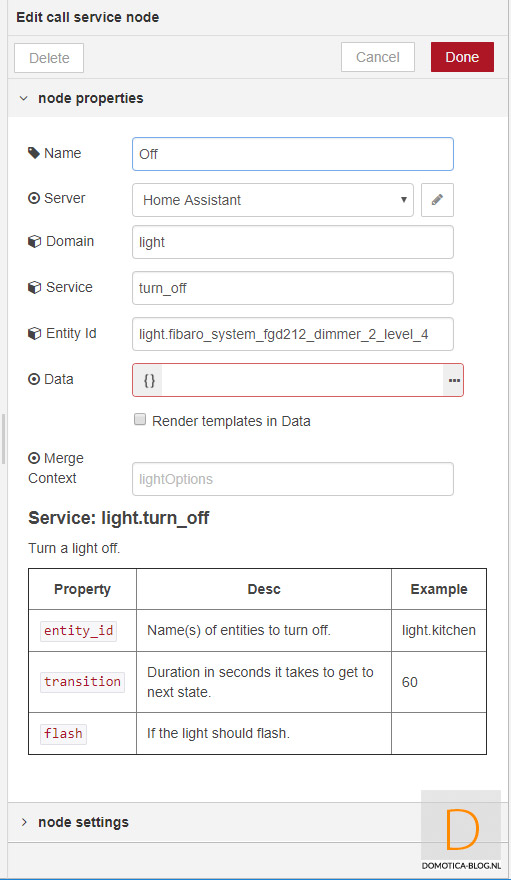
Then the lamp must still be on. We arrange this again with the "Call service" node. Enter the following:
- Name: give a clear name
- Domain: Light. Here you indicate what kind of device you are going to switch.
- Service: turn_on. With service you indicate what the device should do. In our case, it must be turned on (turn_on).
- Entity ID: this is again the ID / name of the device. I enter here: light.fibaro_system_fgd212_dimmer_2_level
Now the lamp comes on when it moves and when the light intensity is lower than 100 lux. Now we want the lamp to go out again when there is no movement. We do this as follows:
The switch we had divided into 2 outputs. One when the motion detector goes "on" and 1 when it goes "off". We are now going to make a node connection with the "off" because we do not want the light to go out with any movement.
We start with the timer node. And filling in a 5-second timer. The flow now waits 5 seconds before continuing thereafter.
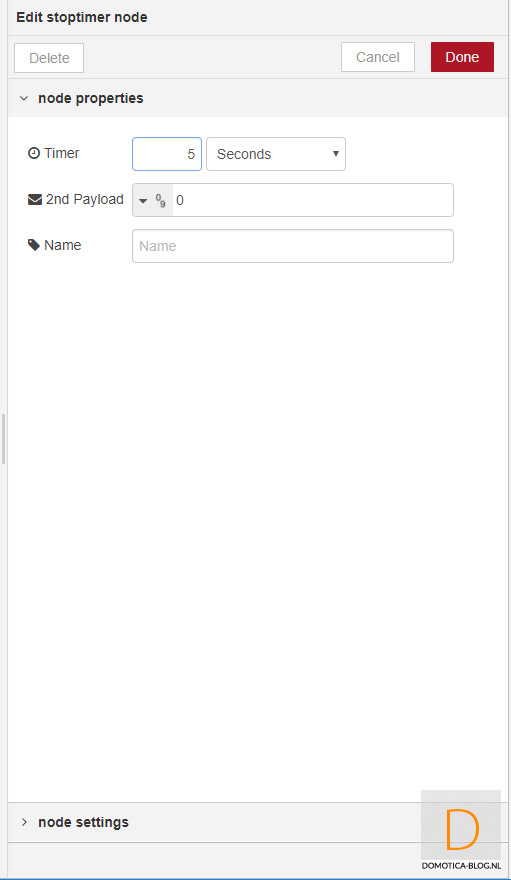
Because I want to be sure that there is no movement anymore, I check again that there is really no movement.

Then I turn off the lamp.
After this you give the flow a name and you have to deploy the flow to the Hass. Then of course you check if everything works properly.
As you can see, it is not super easy to create rules / flows. Fortunately, there are many YouTube videos available to get you started, but for an inexperienced user it will still be a bit of a search. Certainly if you compare this with the competition (Domoticz, Homey, Zipato).
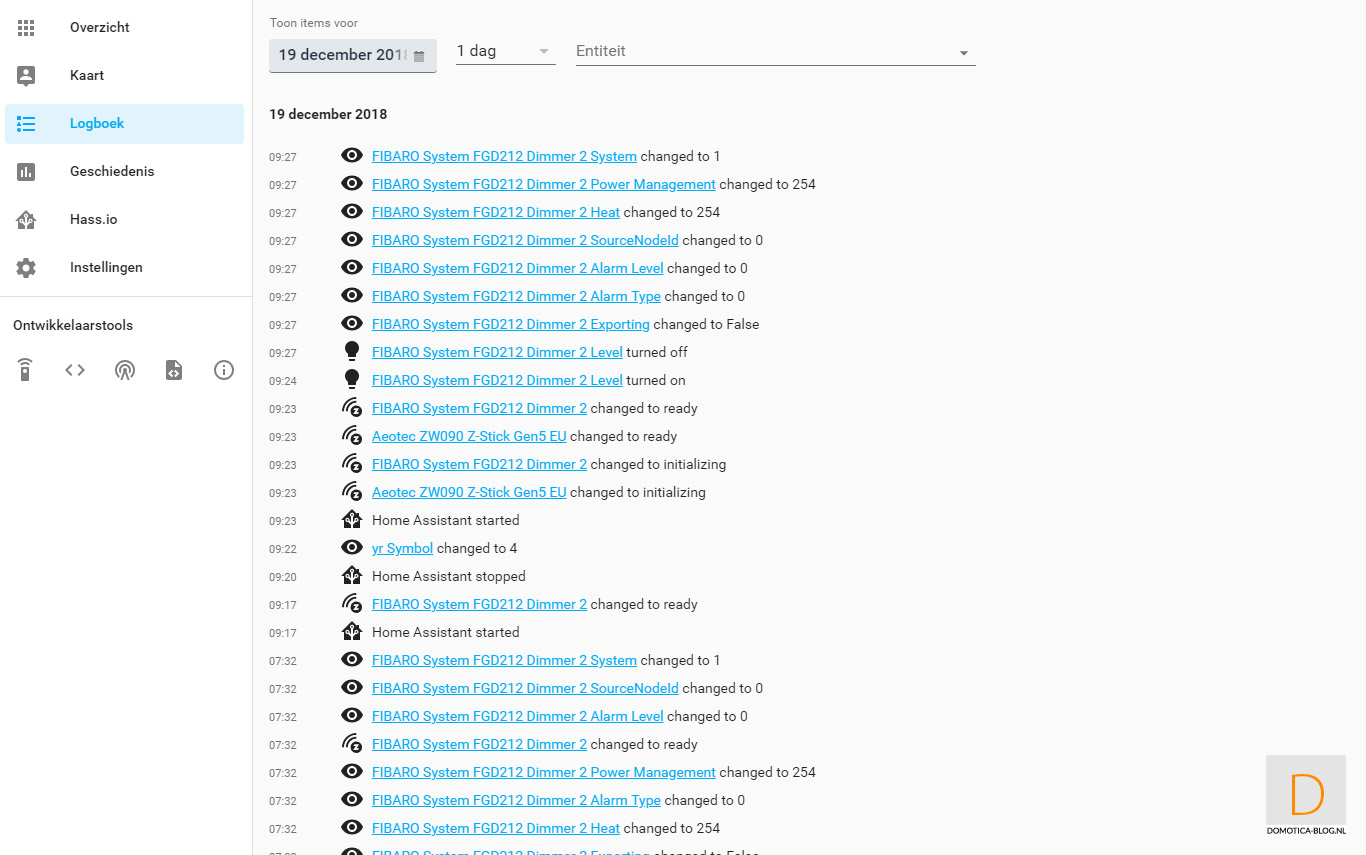
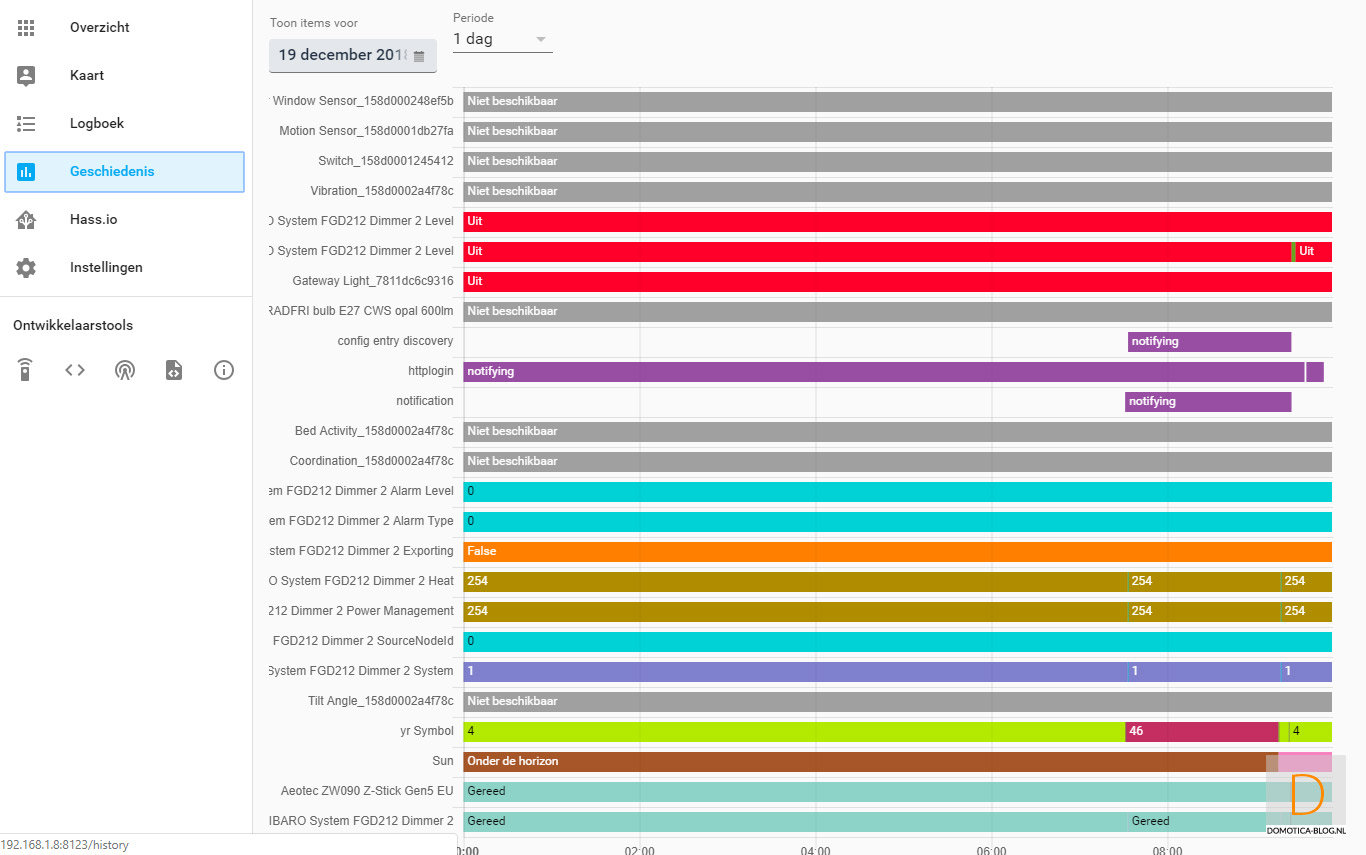
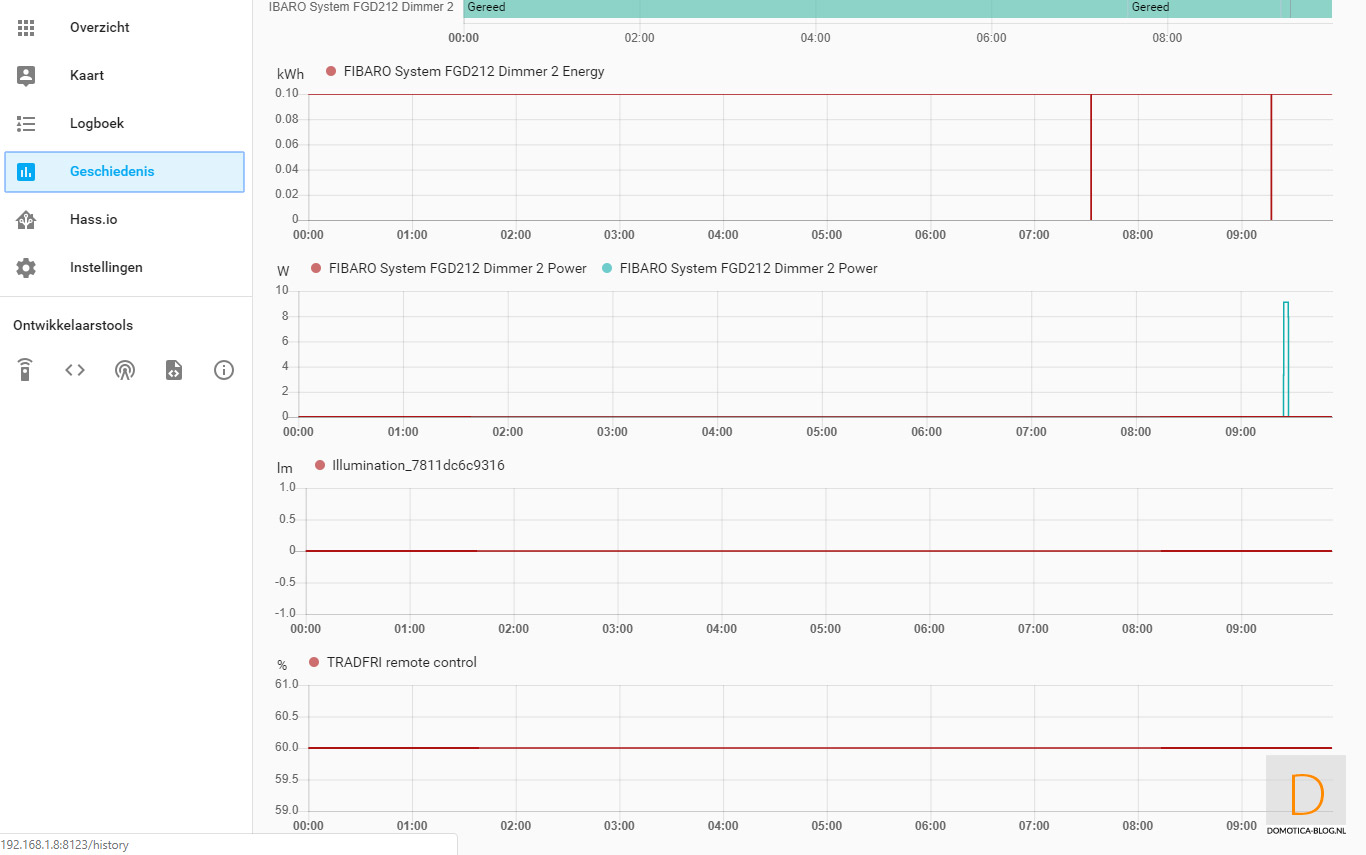
Logbook and history:
Through the logbook and history section you can keep track of what your system is doing. This is nice to properly determine whether everything works as it should and to be able to identify any problems. This is well arranged in HASS. This way you can see if a device is switched on and if it is available. In addition, there are also graphs of, for example, energy consumption or light measurement. So good arranges.
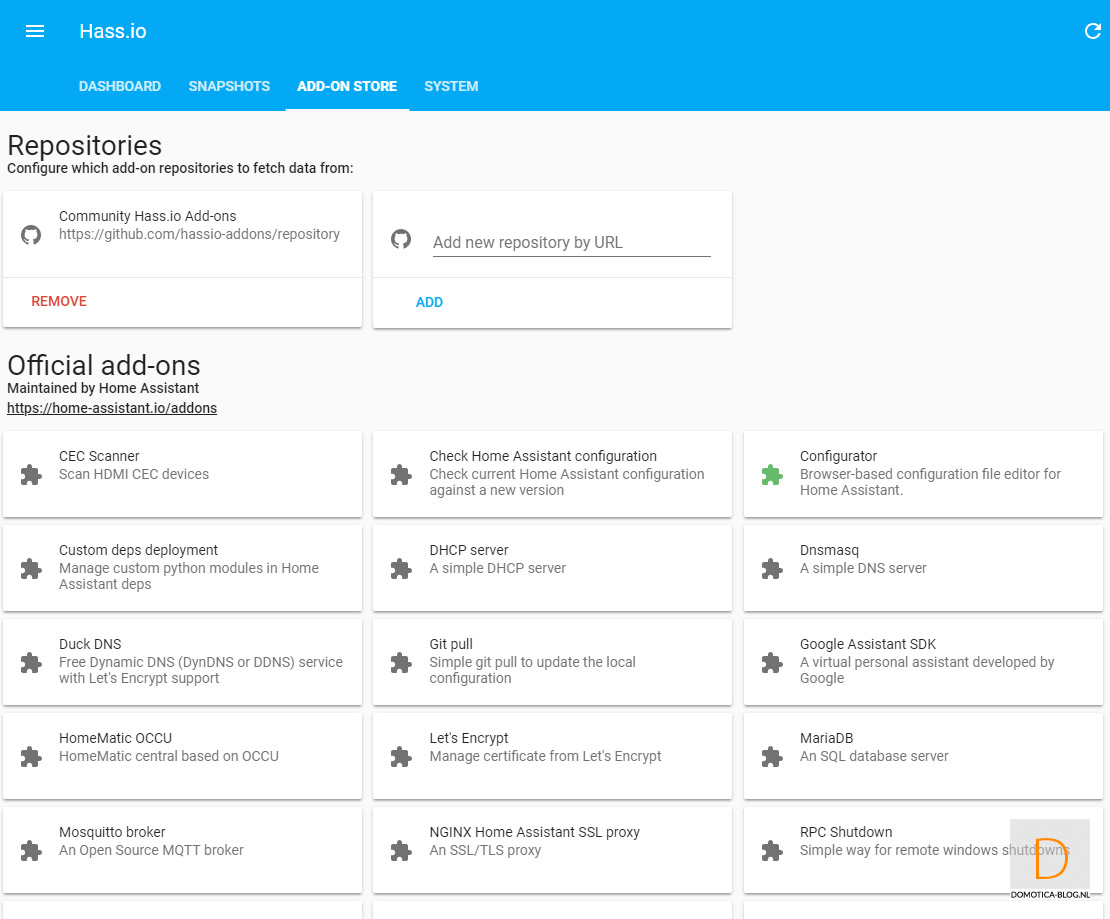
Add-ons:
In addition to the standard items that are processed in HASS, you can also install various Add-ons. For example, there is an add-on to remotely turn off your HASS or manage your UniFi network. There are add-ons which are managed by HASS itself and which are managed by the community.

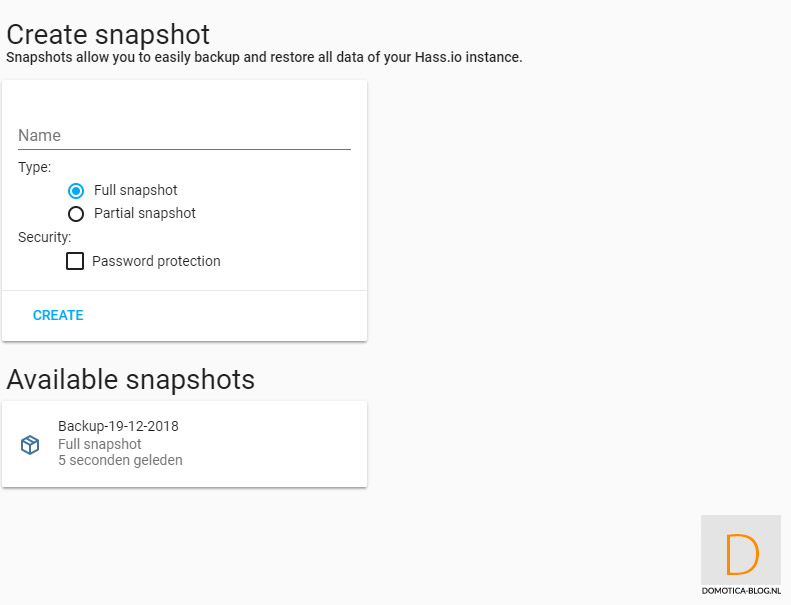
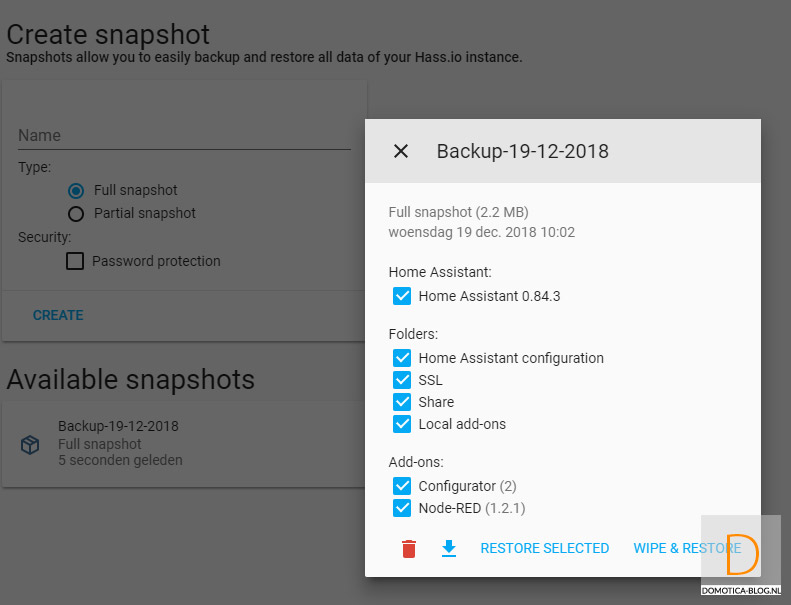
Backup/snapshot:
In every home automation system a backup is of course essential because something can always go wrong. HASS has built in a snapshot function for this. It makes a backup of your entire system and you can easily restore it. It is a pity that this cannot be set automatically.