Review
Fibaro Walli Switch

Installation on the Vera Edge/Plus:
The next controller is the Vera. The first step is to connect the installation wires. A diagram is included in the manual for this. Of course, first make sure that you disconnect the power from the whole.
When we have screwed everything back on, we supply the switch with power and turn it on for a while to see if it works. In my case the lamp came on so we can start adding.
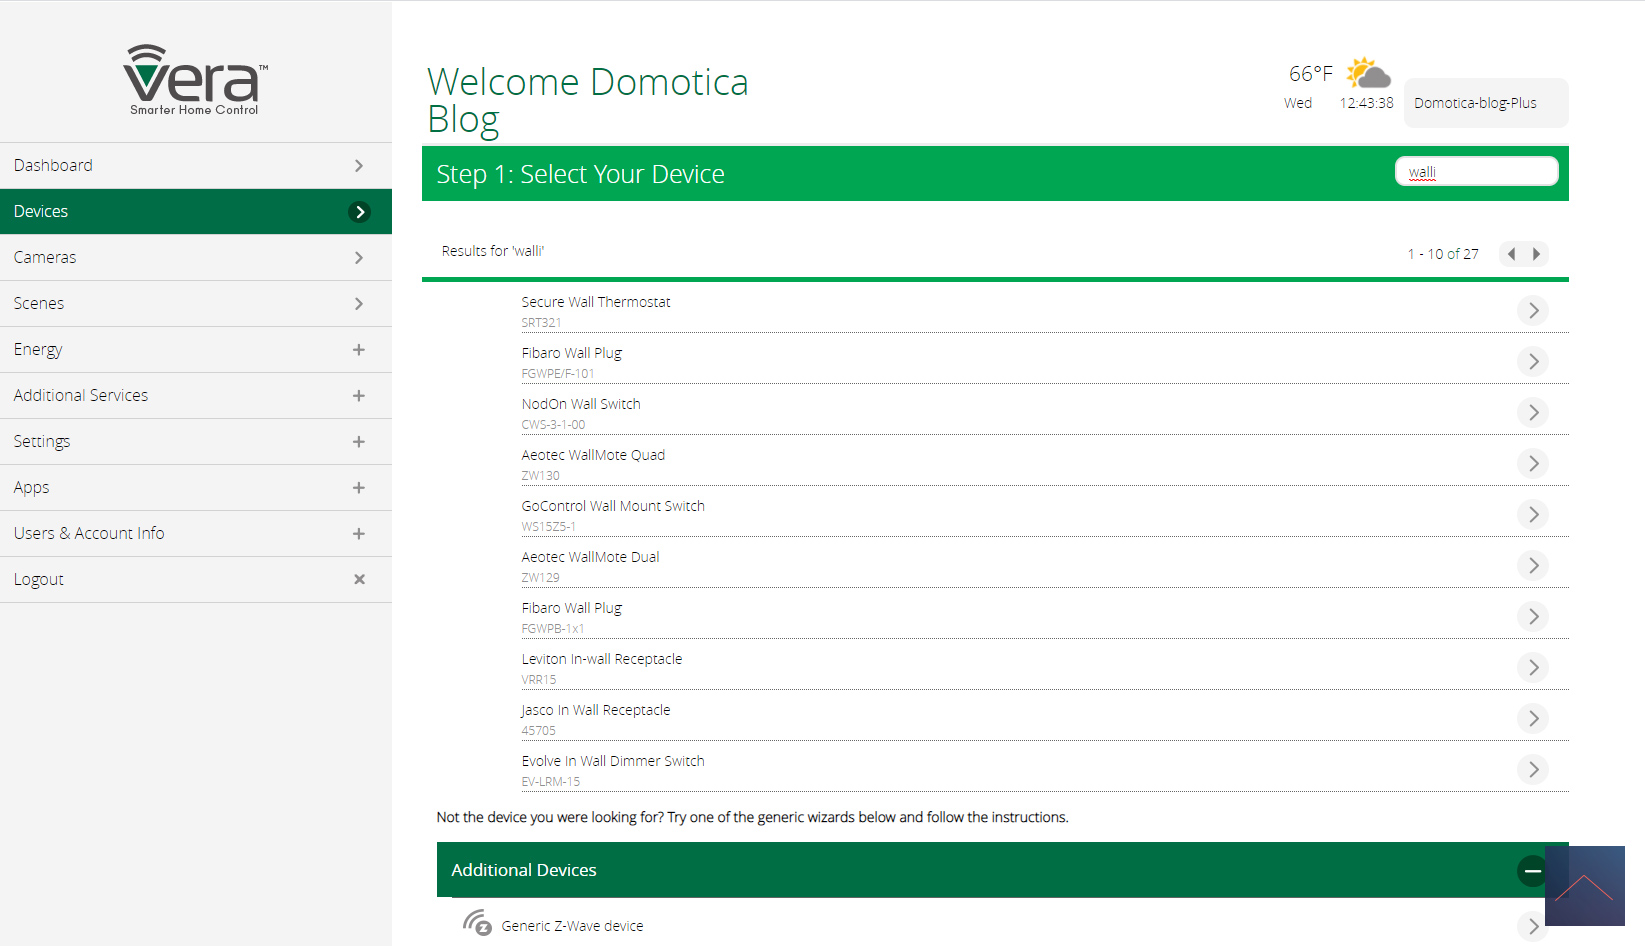
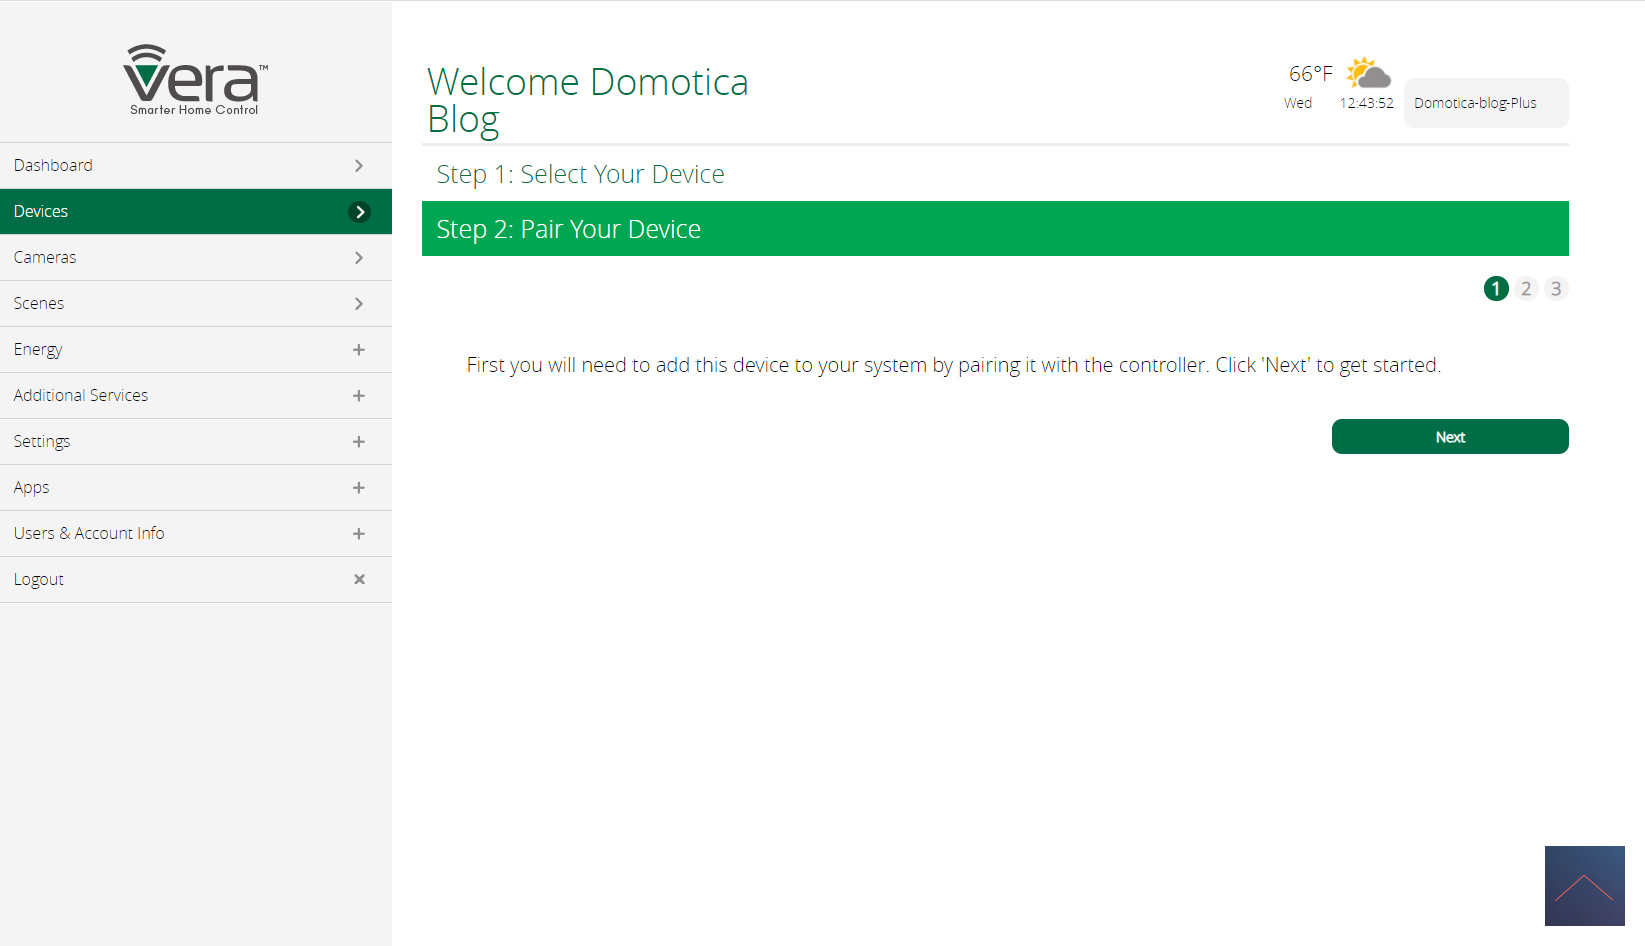
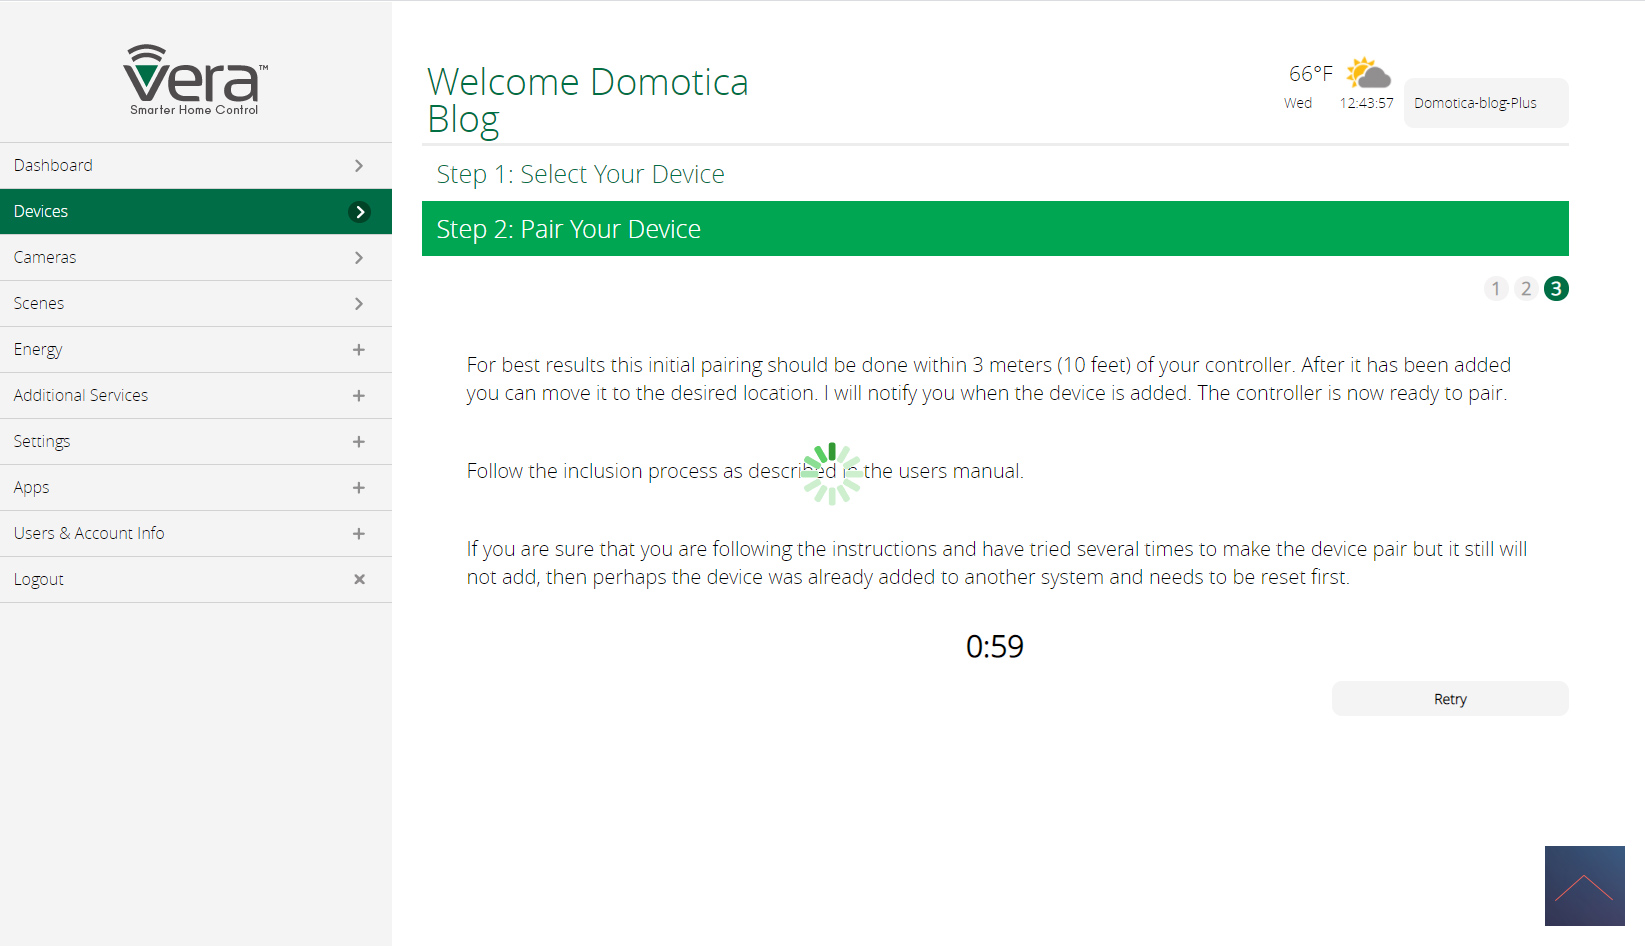
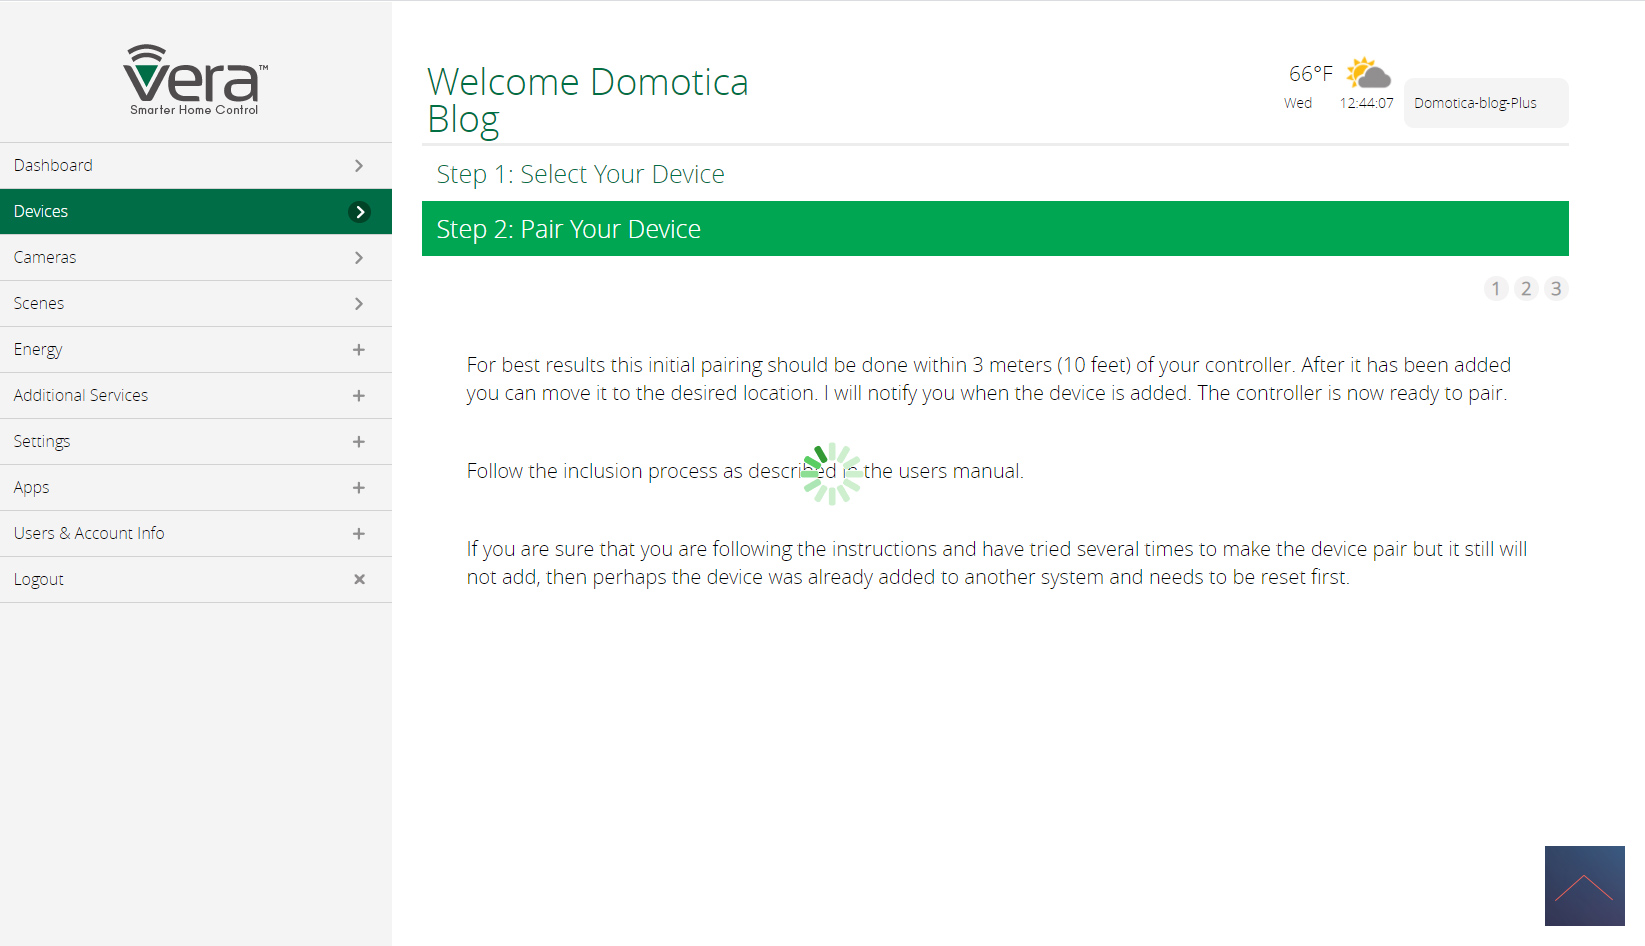
To do this I log into the Vera and go to my devices. Then click on "add device" and click on "generic z-wave" because if you search for Walli it is not in the list. Then press next a few times until you reach the screen that asks to put the switch in learning mode.
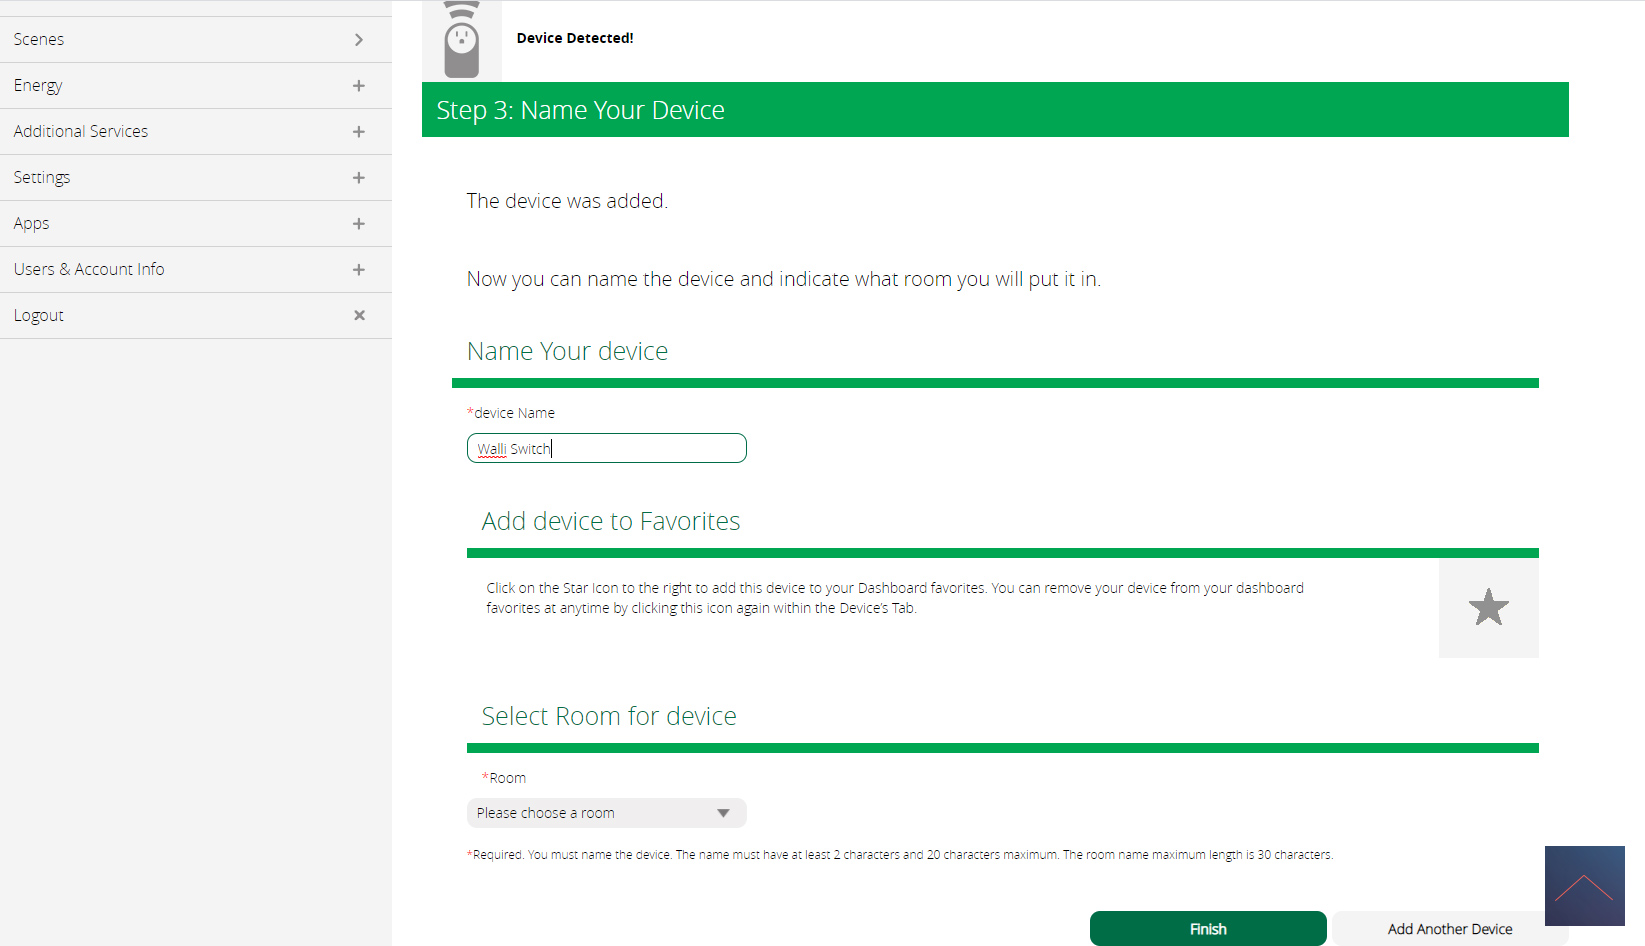
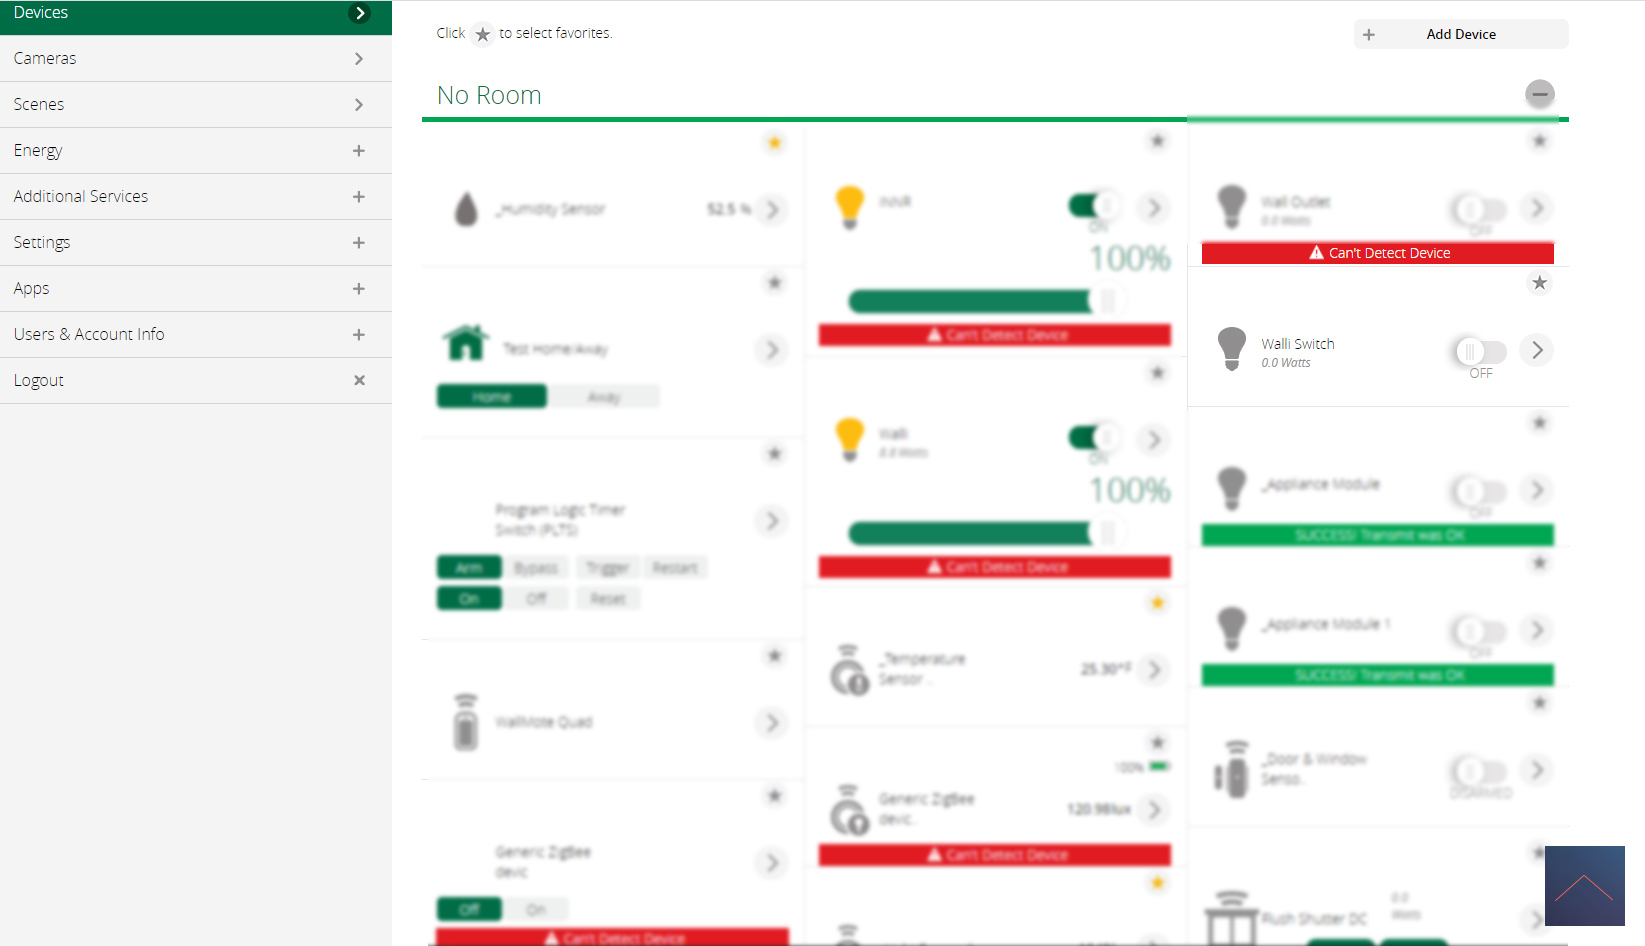
You can do this by clicking the on button 3 times. The LED will flash yellow and then turn green. The Vera indicates that it has found the dimmer. After a while I see at my devices, it is striking that 3 switches appear. These are the switch for the 2 different lamps. I also see the total consumption.
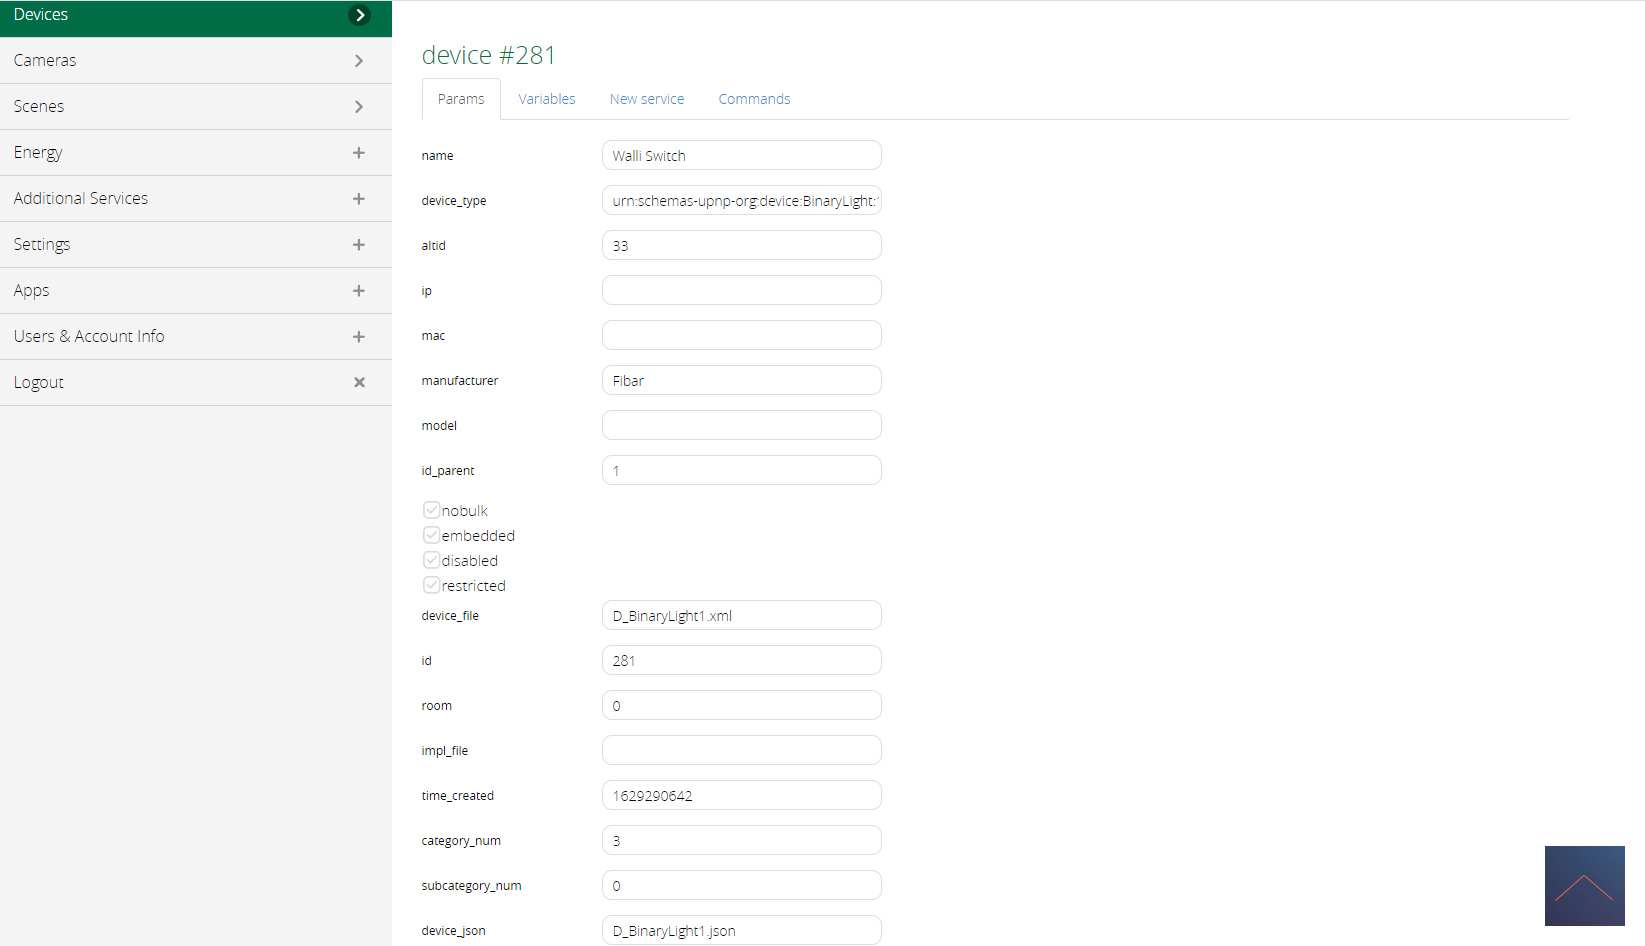
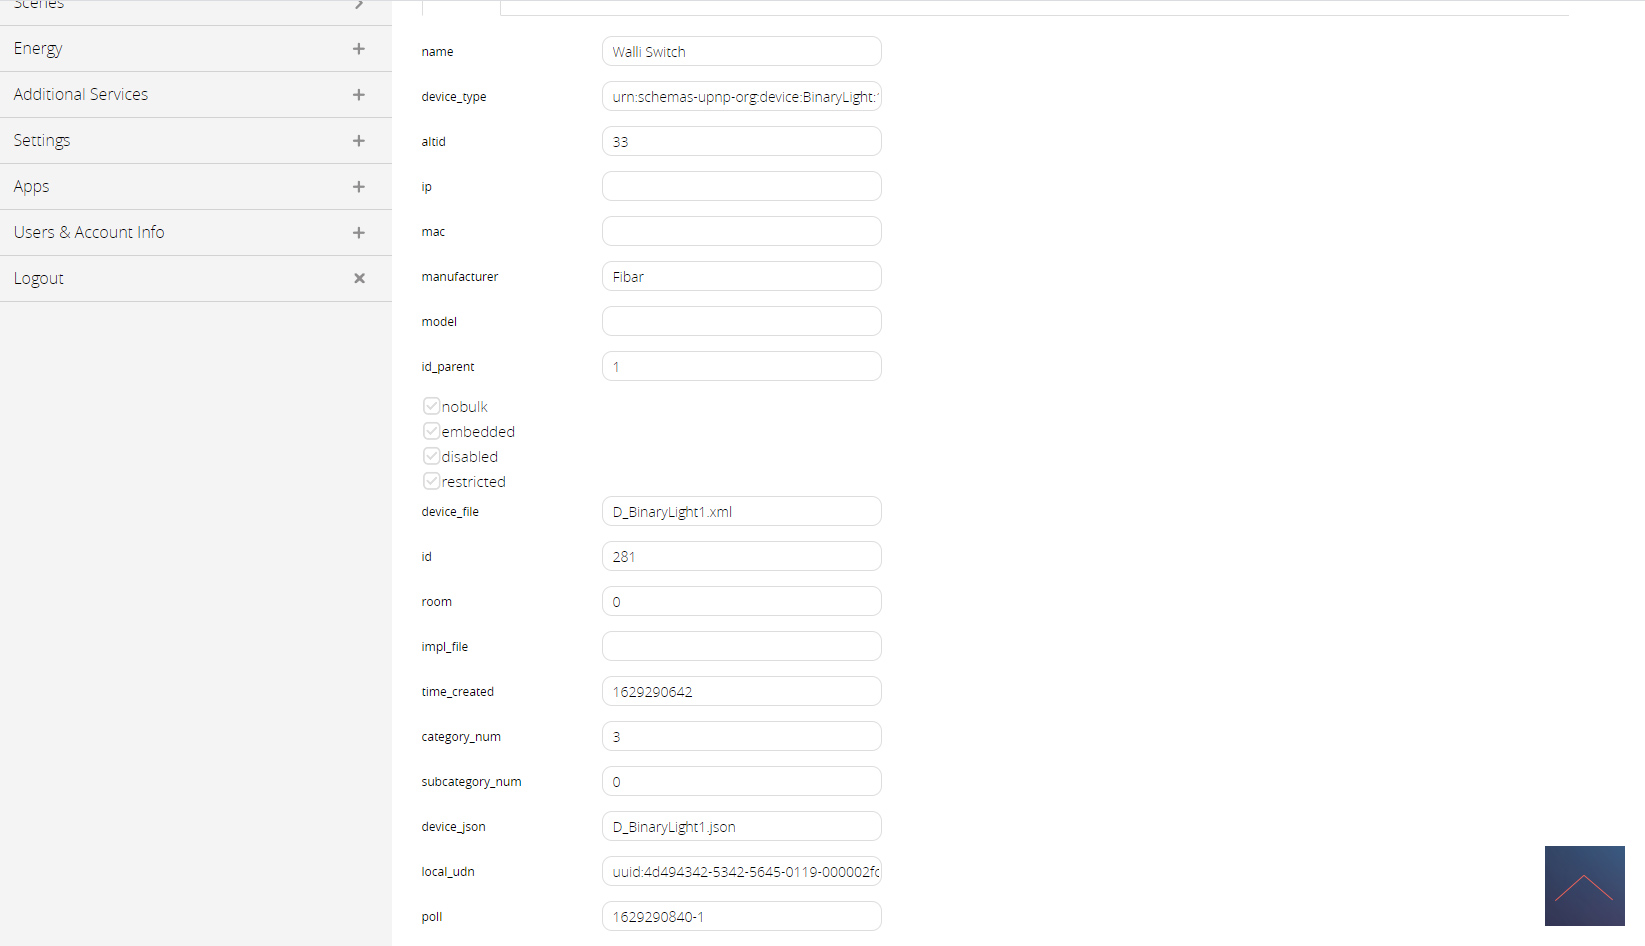
Installation screens:

Configuration:
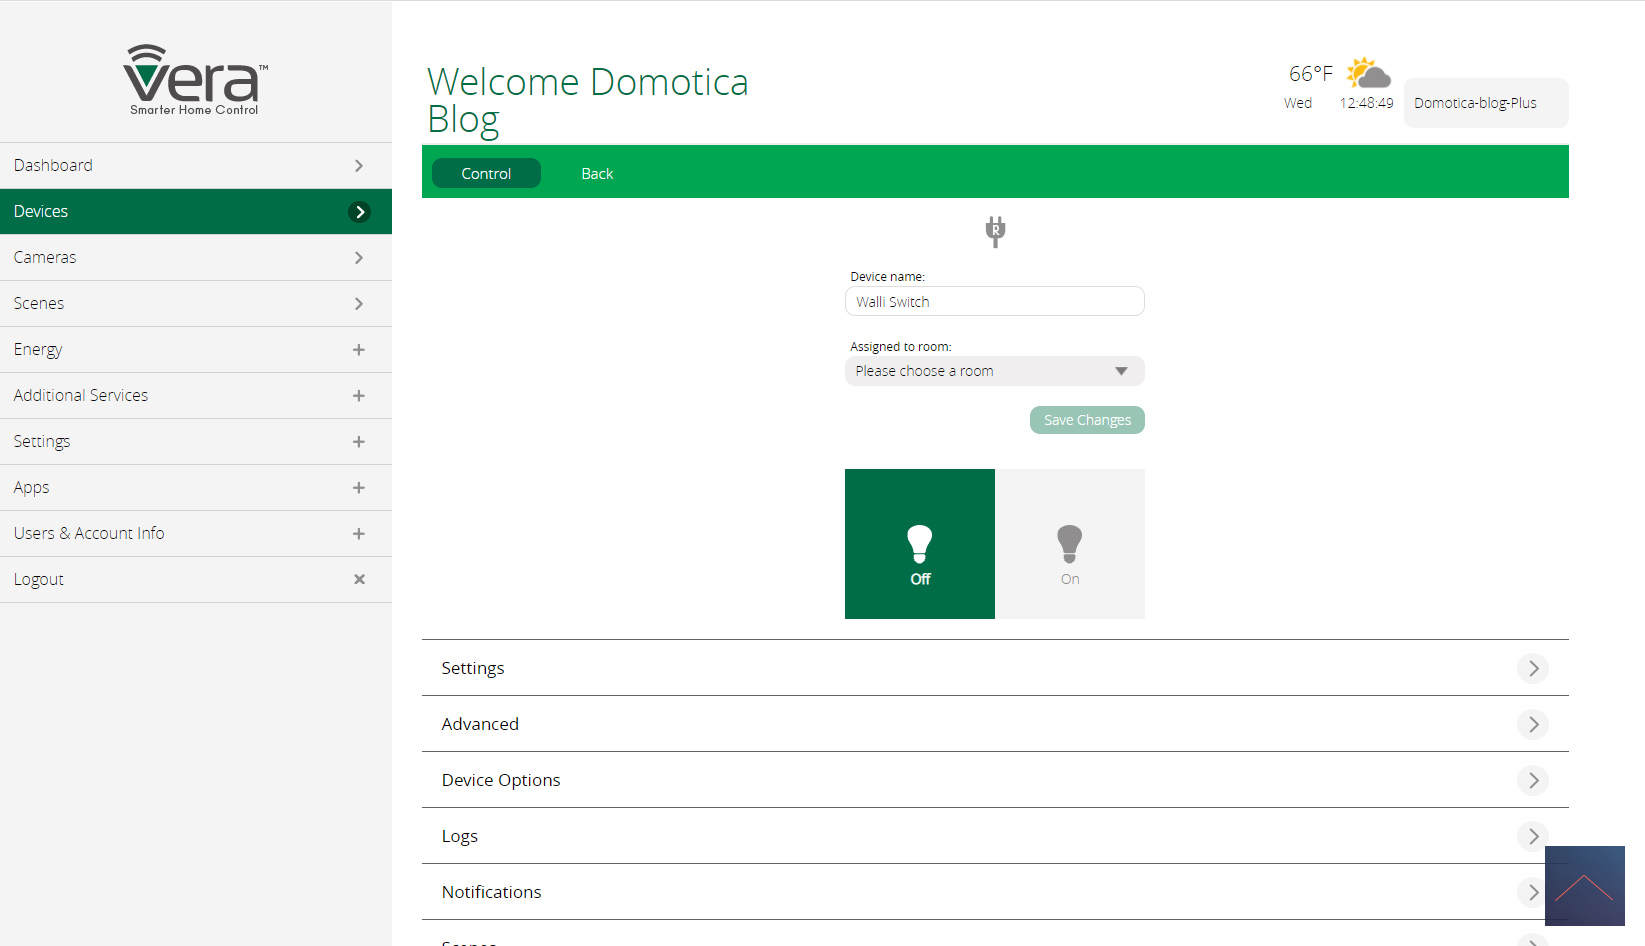


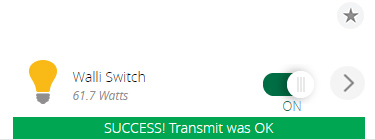
Control:
Unfortunately you only get 1 switch, so I miss the option to also operate the 2nd lamp via the Vera. You also see the total consumption and current consumption.
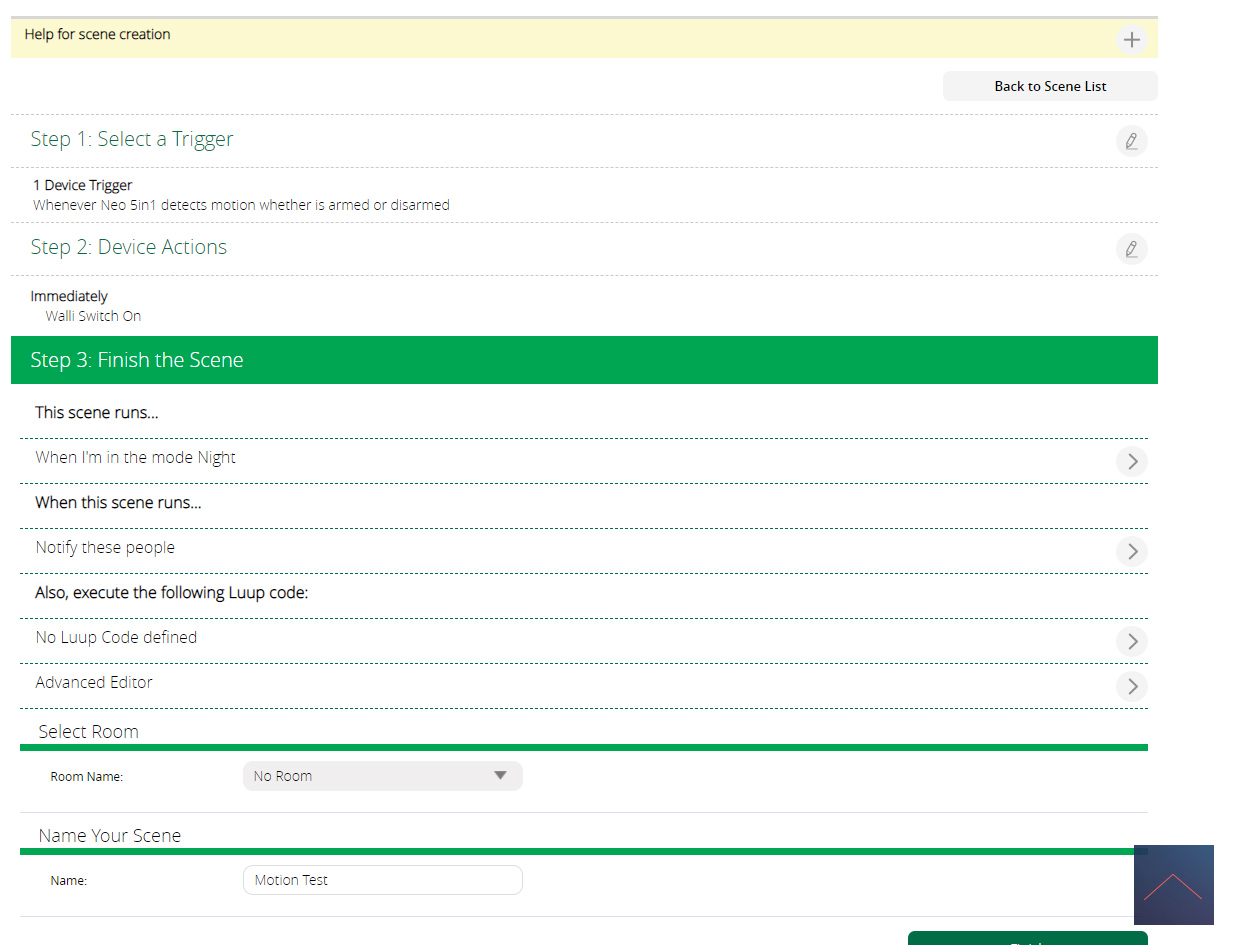
Example scene:
As an example, we show that if there is movement in the hall, the Walli must be switched on.