

Review
Fibaro Home Center 3 Lite
Panels:
Fibaro has built in a few standard panels. With these panels you can control the alarm, climate and sprinkler system. The nice thing about this is that you can quite easily click an alarm system together without having to make complex rules for this.
In addition to these panels, there is an energy dashboard, which we will look at first.
Energy dashboard:
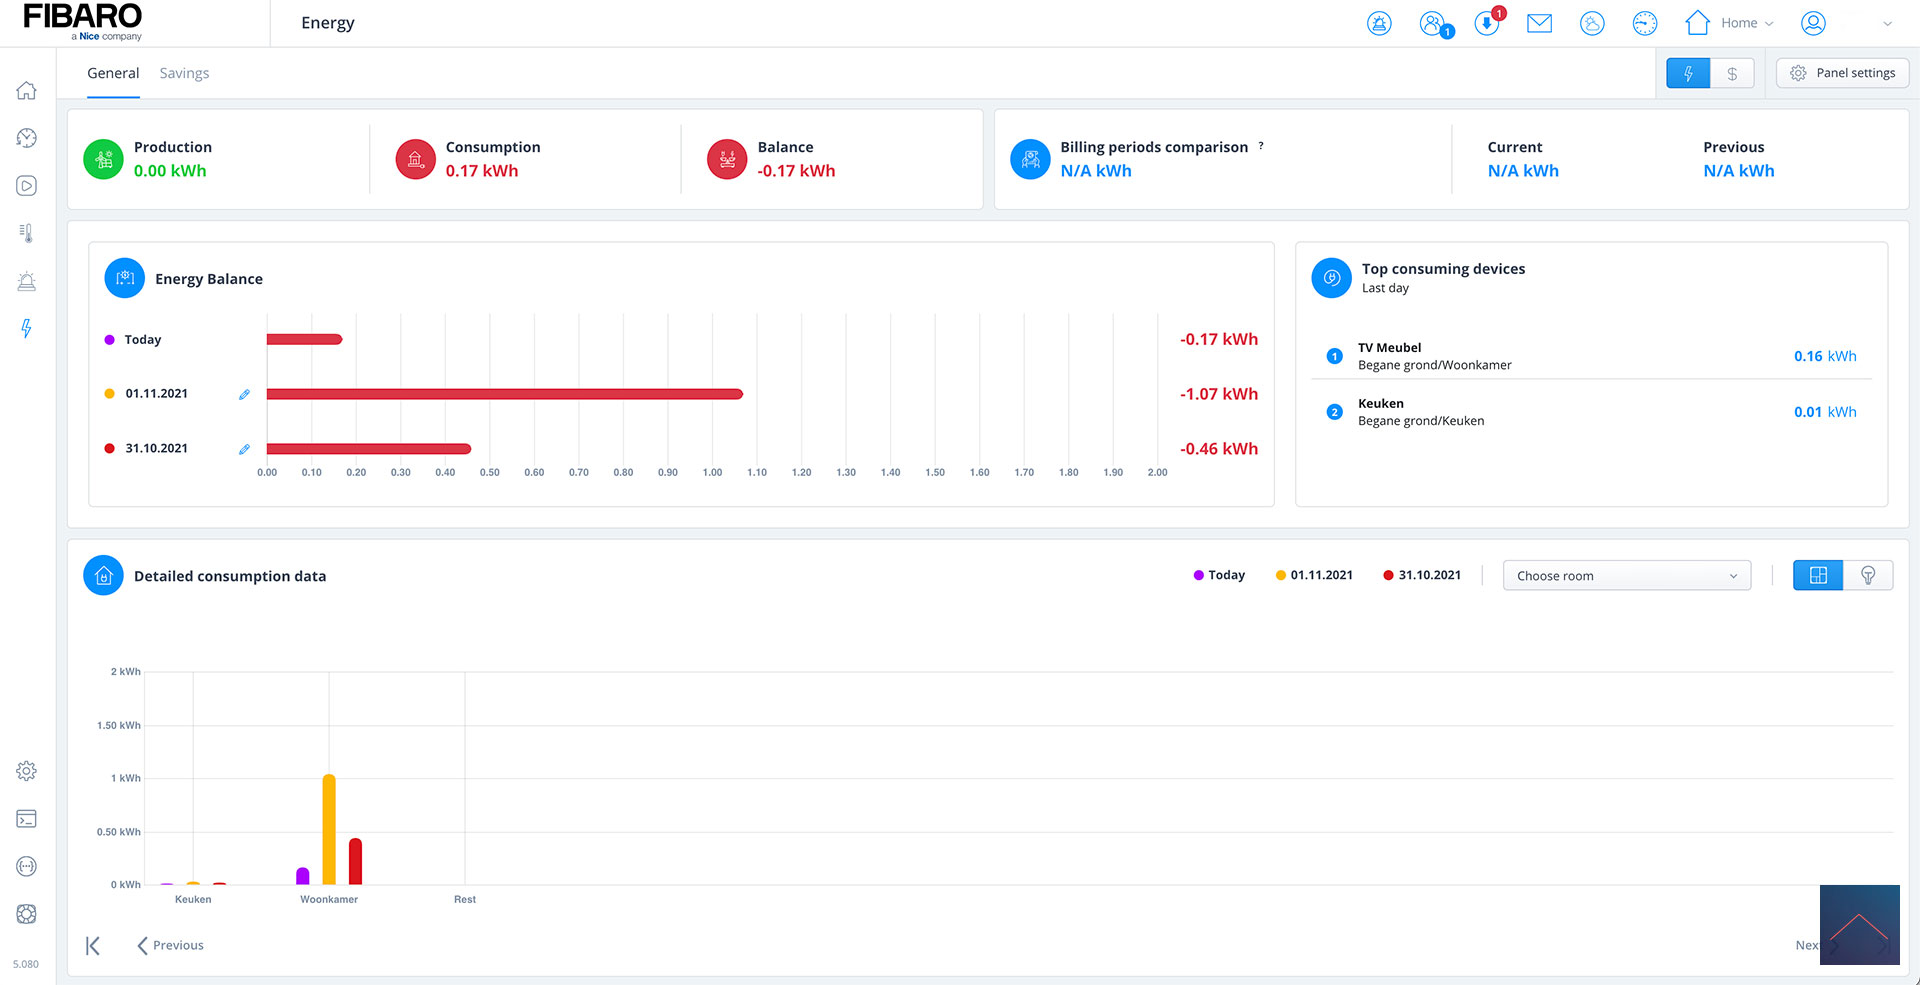
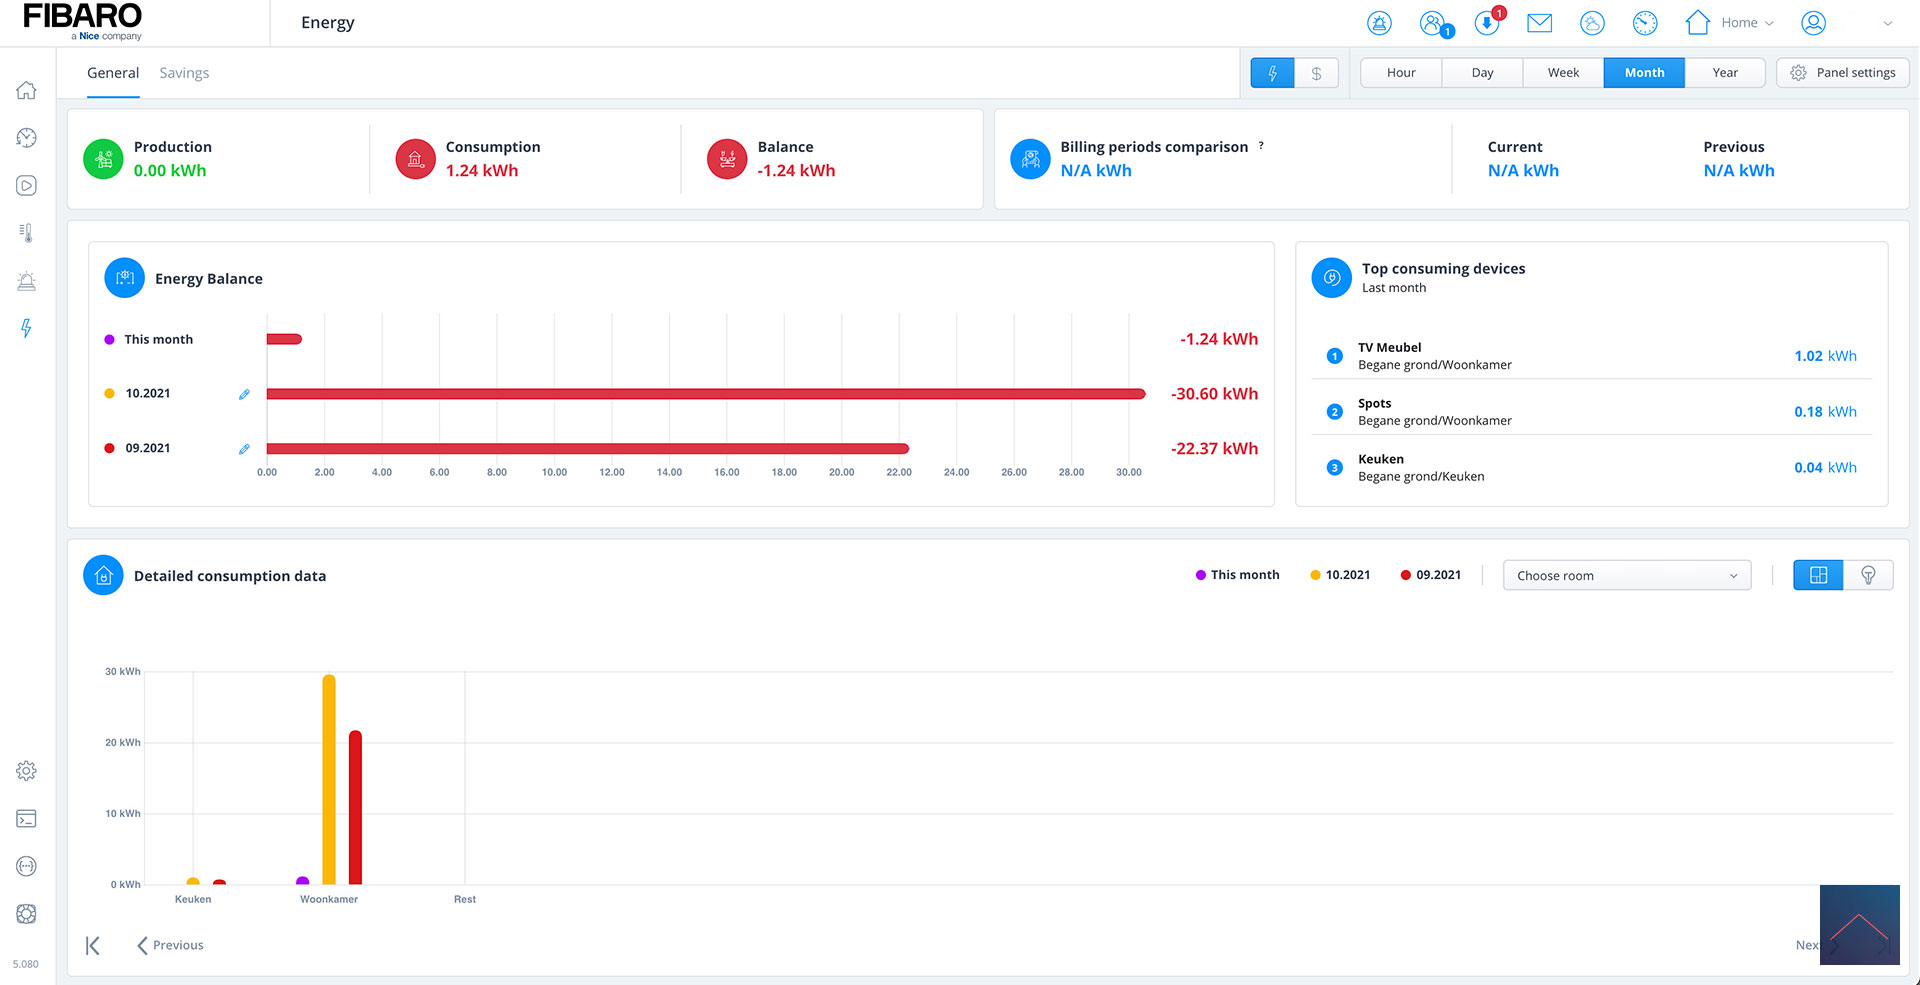
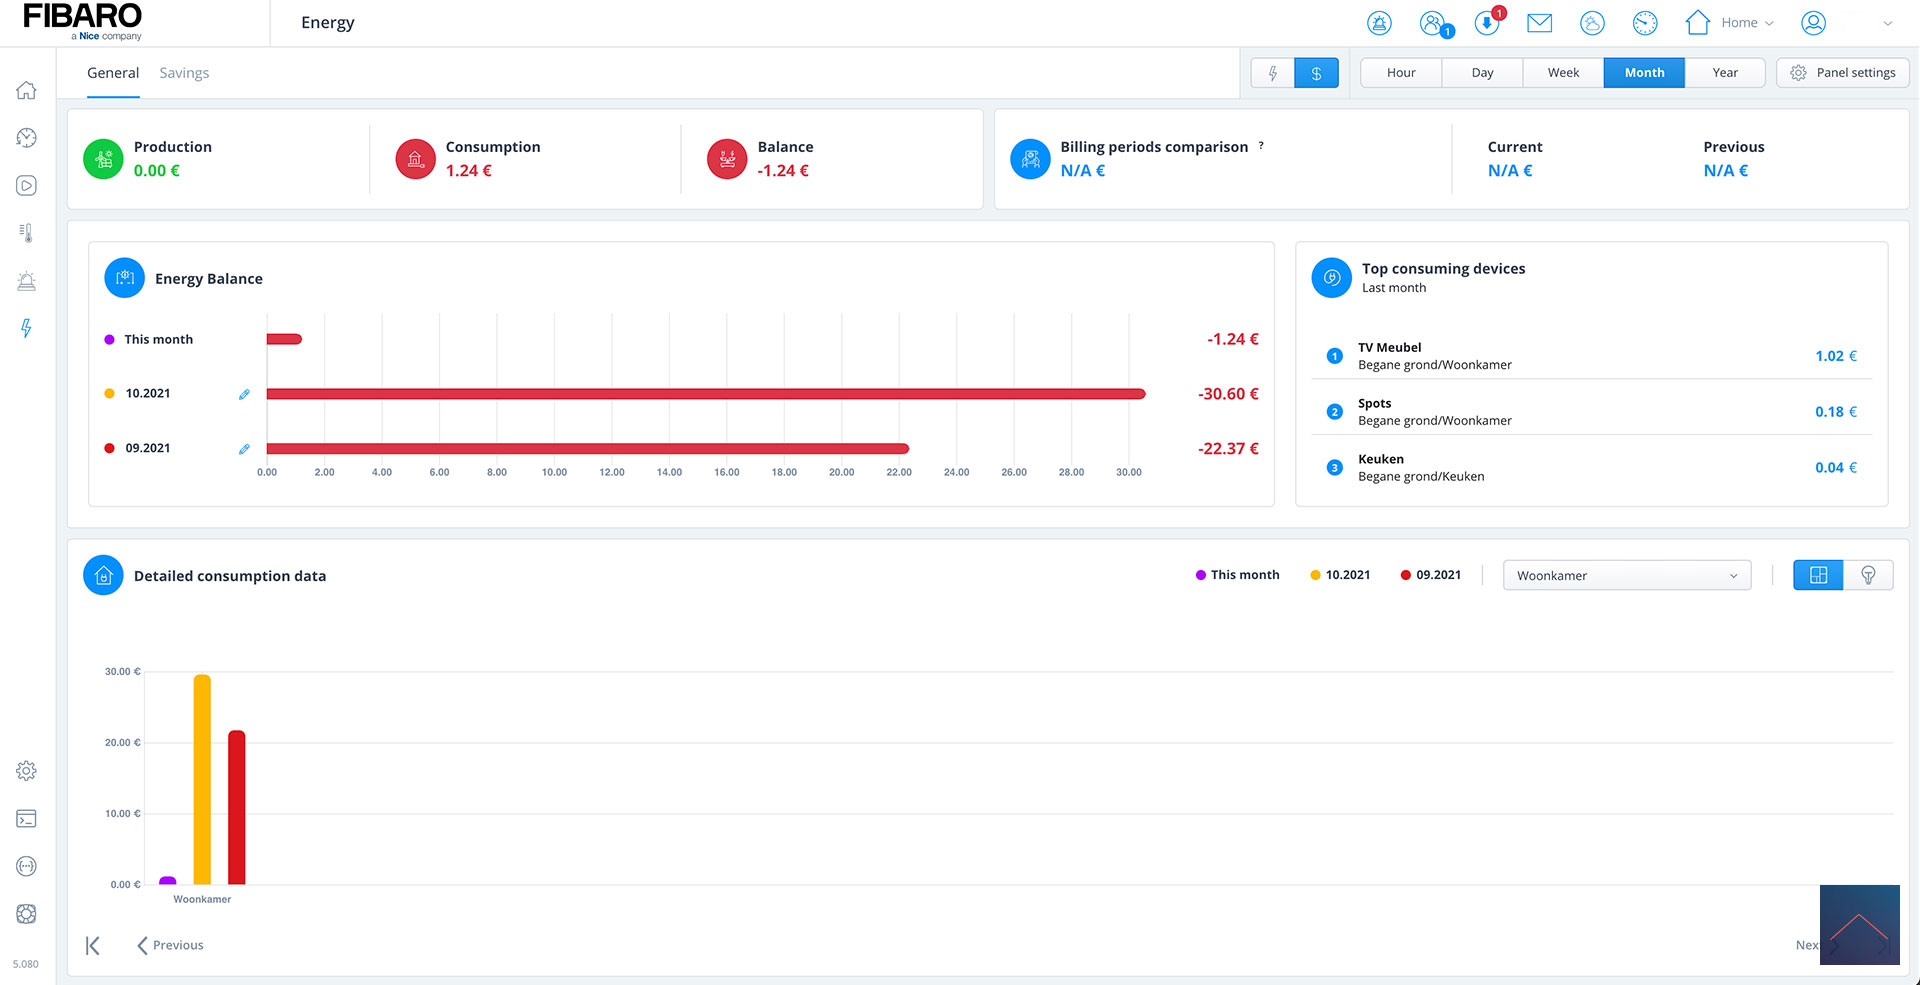
The great thing about a Smart Home system is that you can see exactly what different devices are using. Fibaro made the energy part for this. In this overview you can see what different devices are using. You can get insights per hour, day, month or per year. There is also an option to select a specific period. You can also compare periods with each other. So very complete.
In this way you can gain insight into your consumption and take measures to, for example, replace it with energy-efficient appliances or you could ensure that they are not continuously switched on.
To measure the consumption you need a device that measures the energy. You can do this, for example, with a Fibaro Wall Plug or a P1 meter to measure your entire consumption.
Main screen
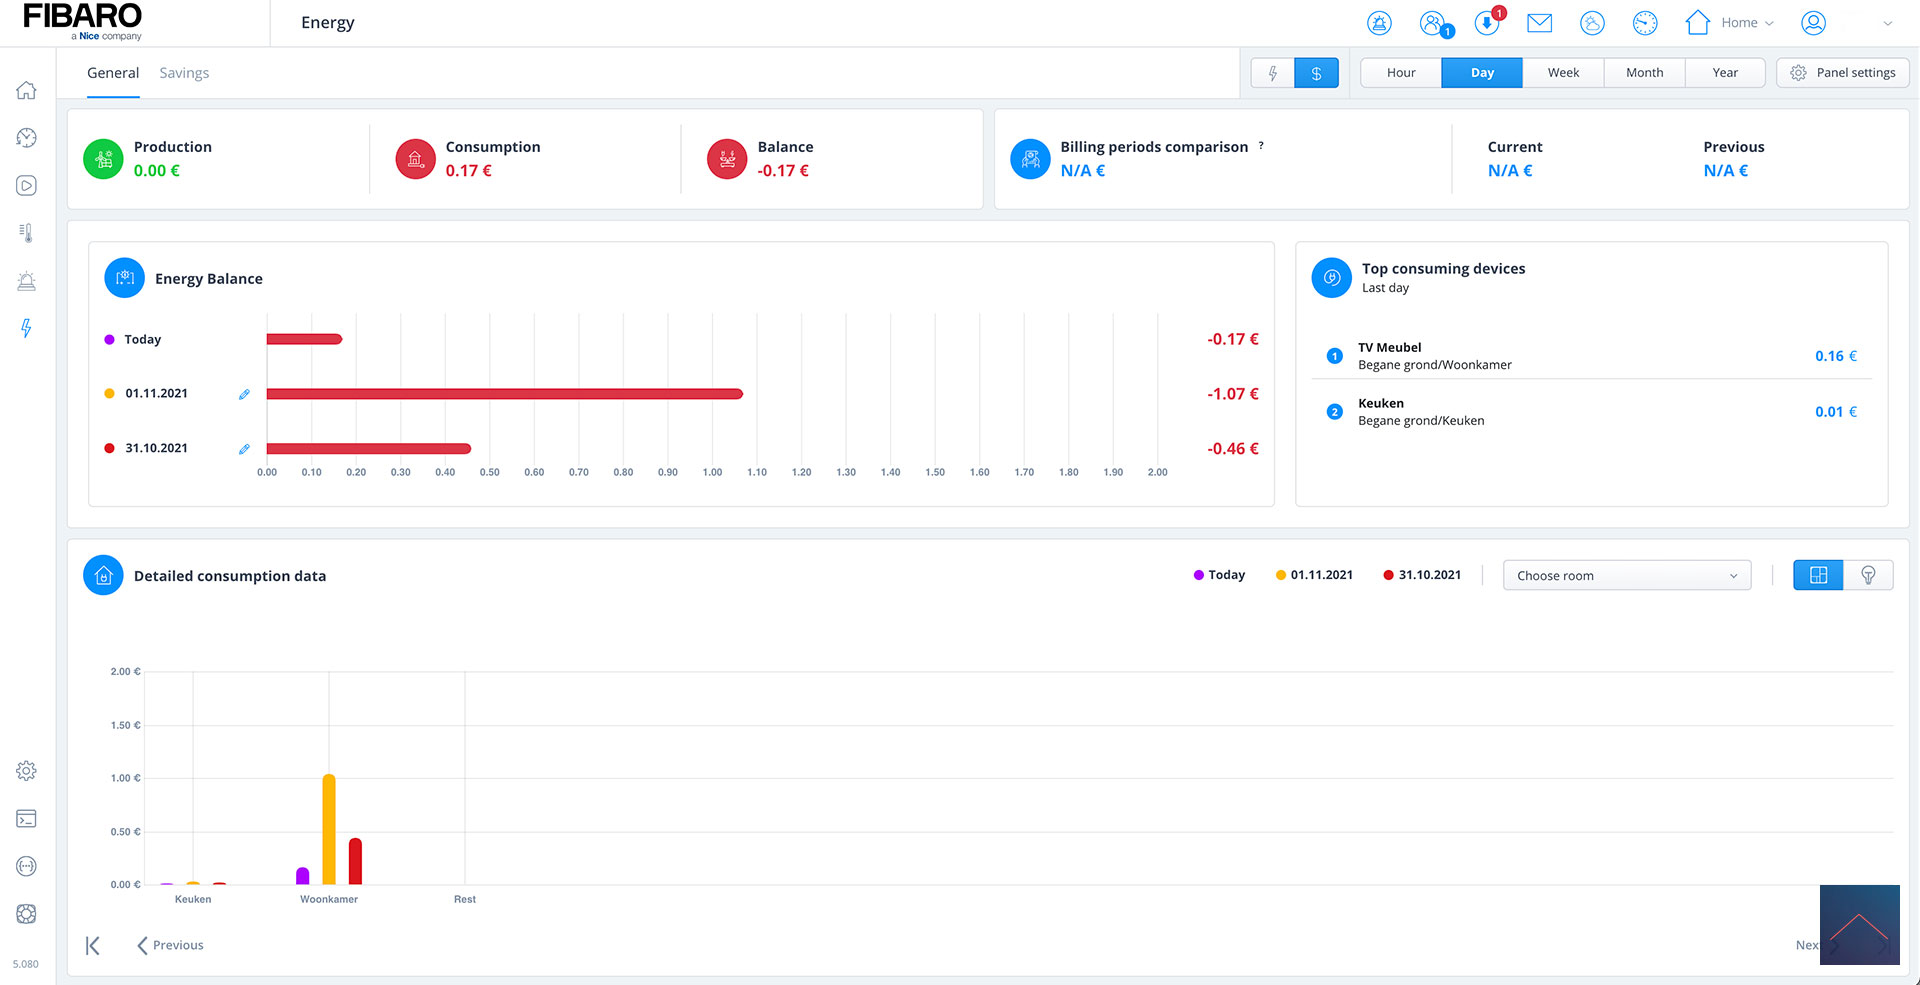


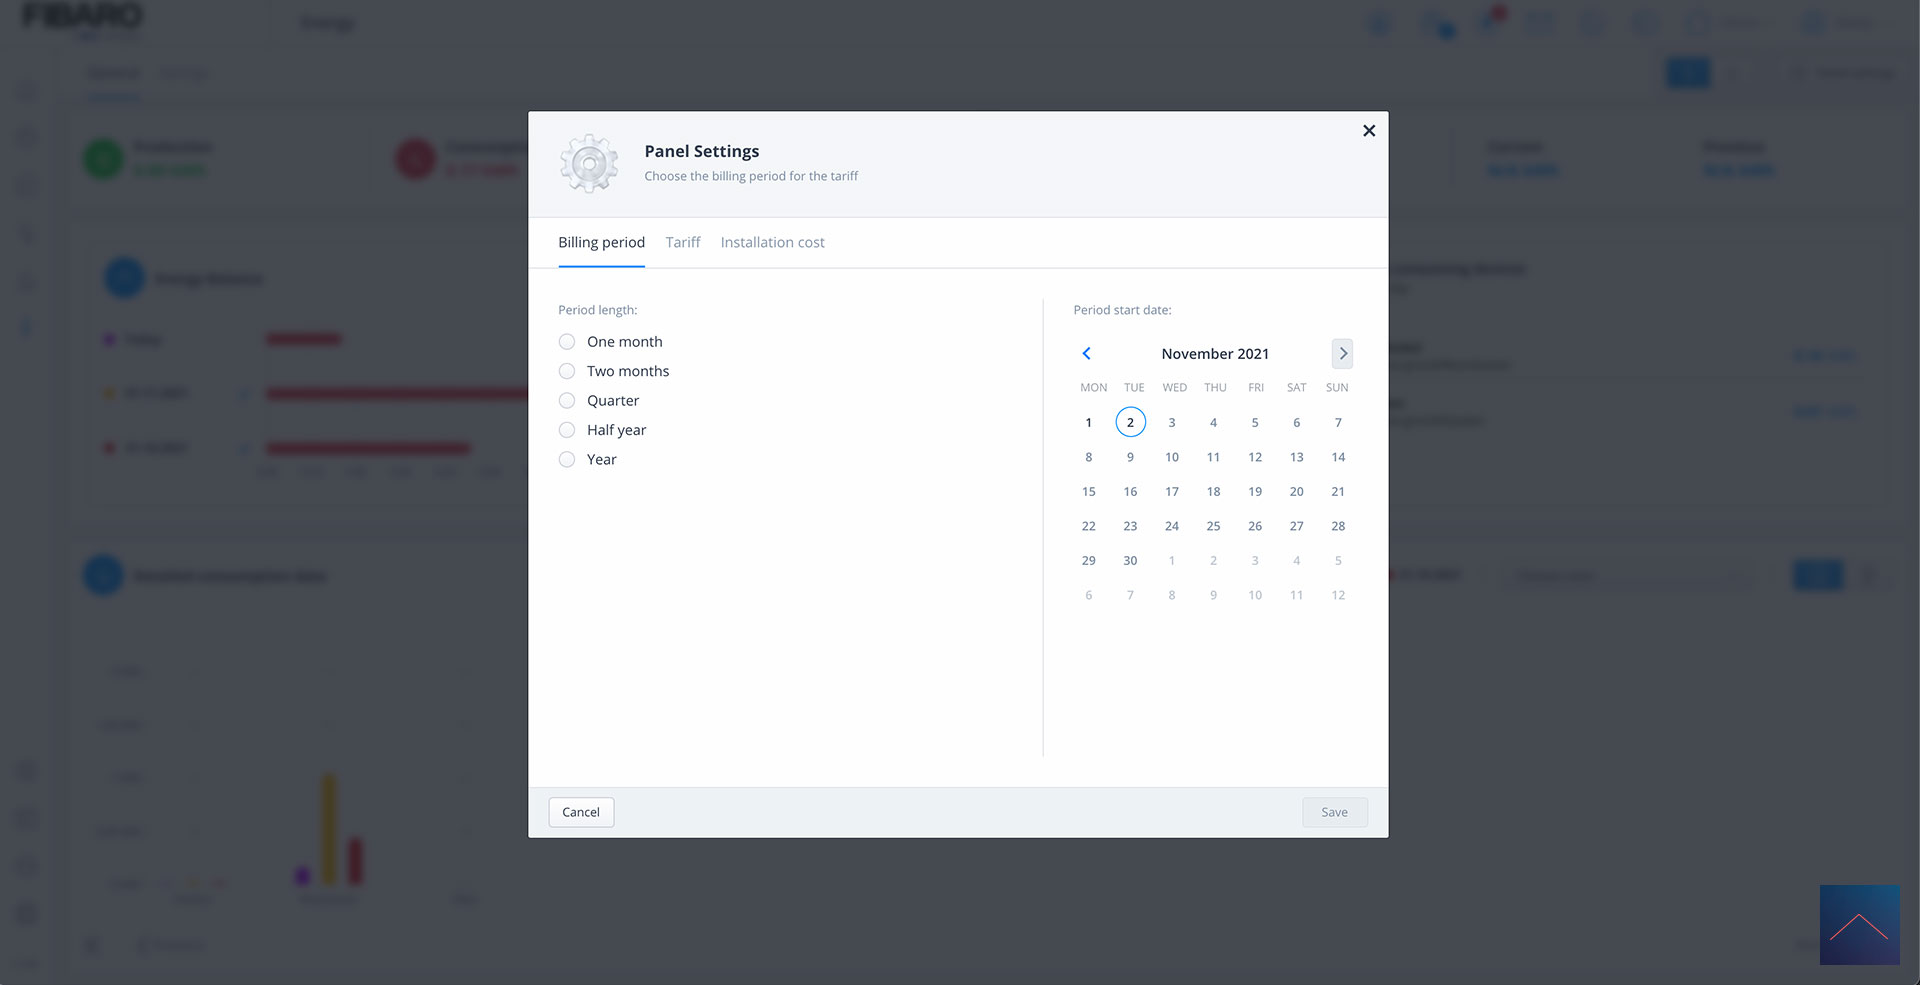
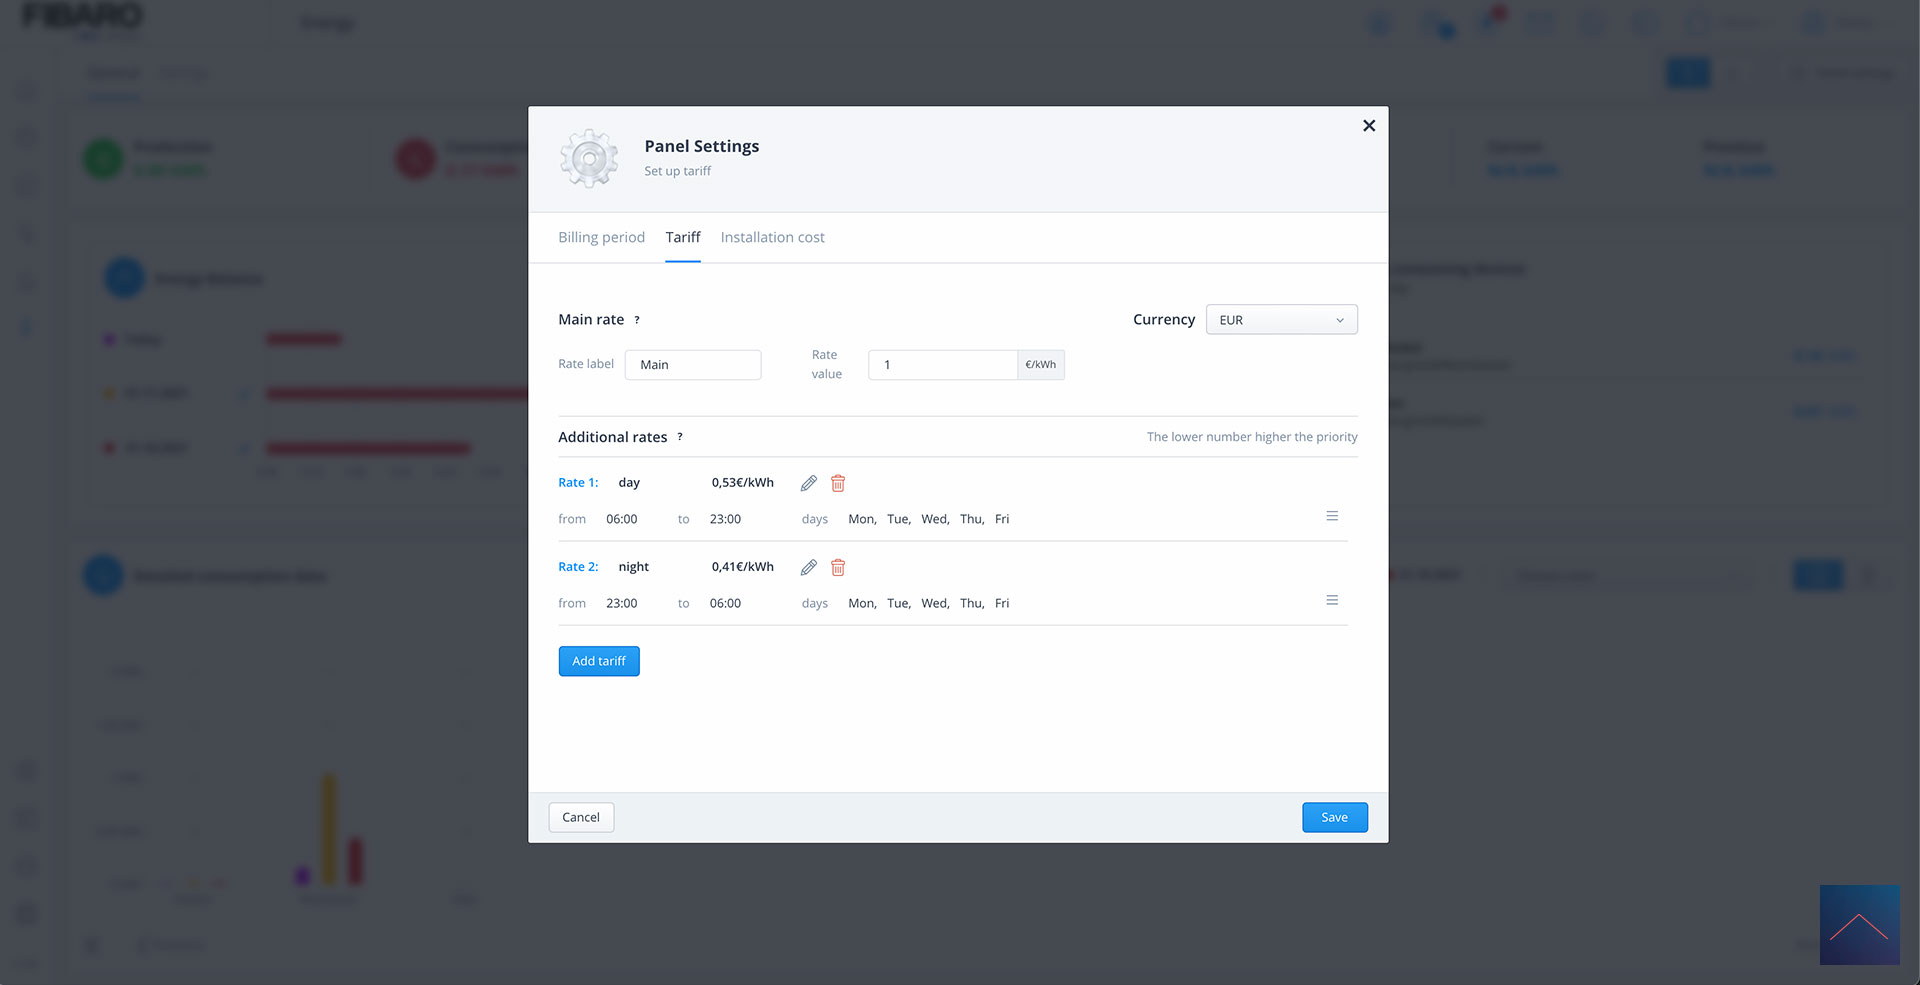
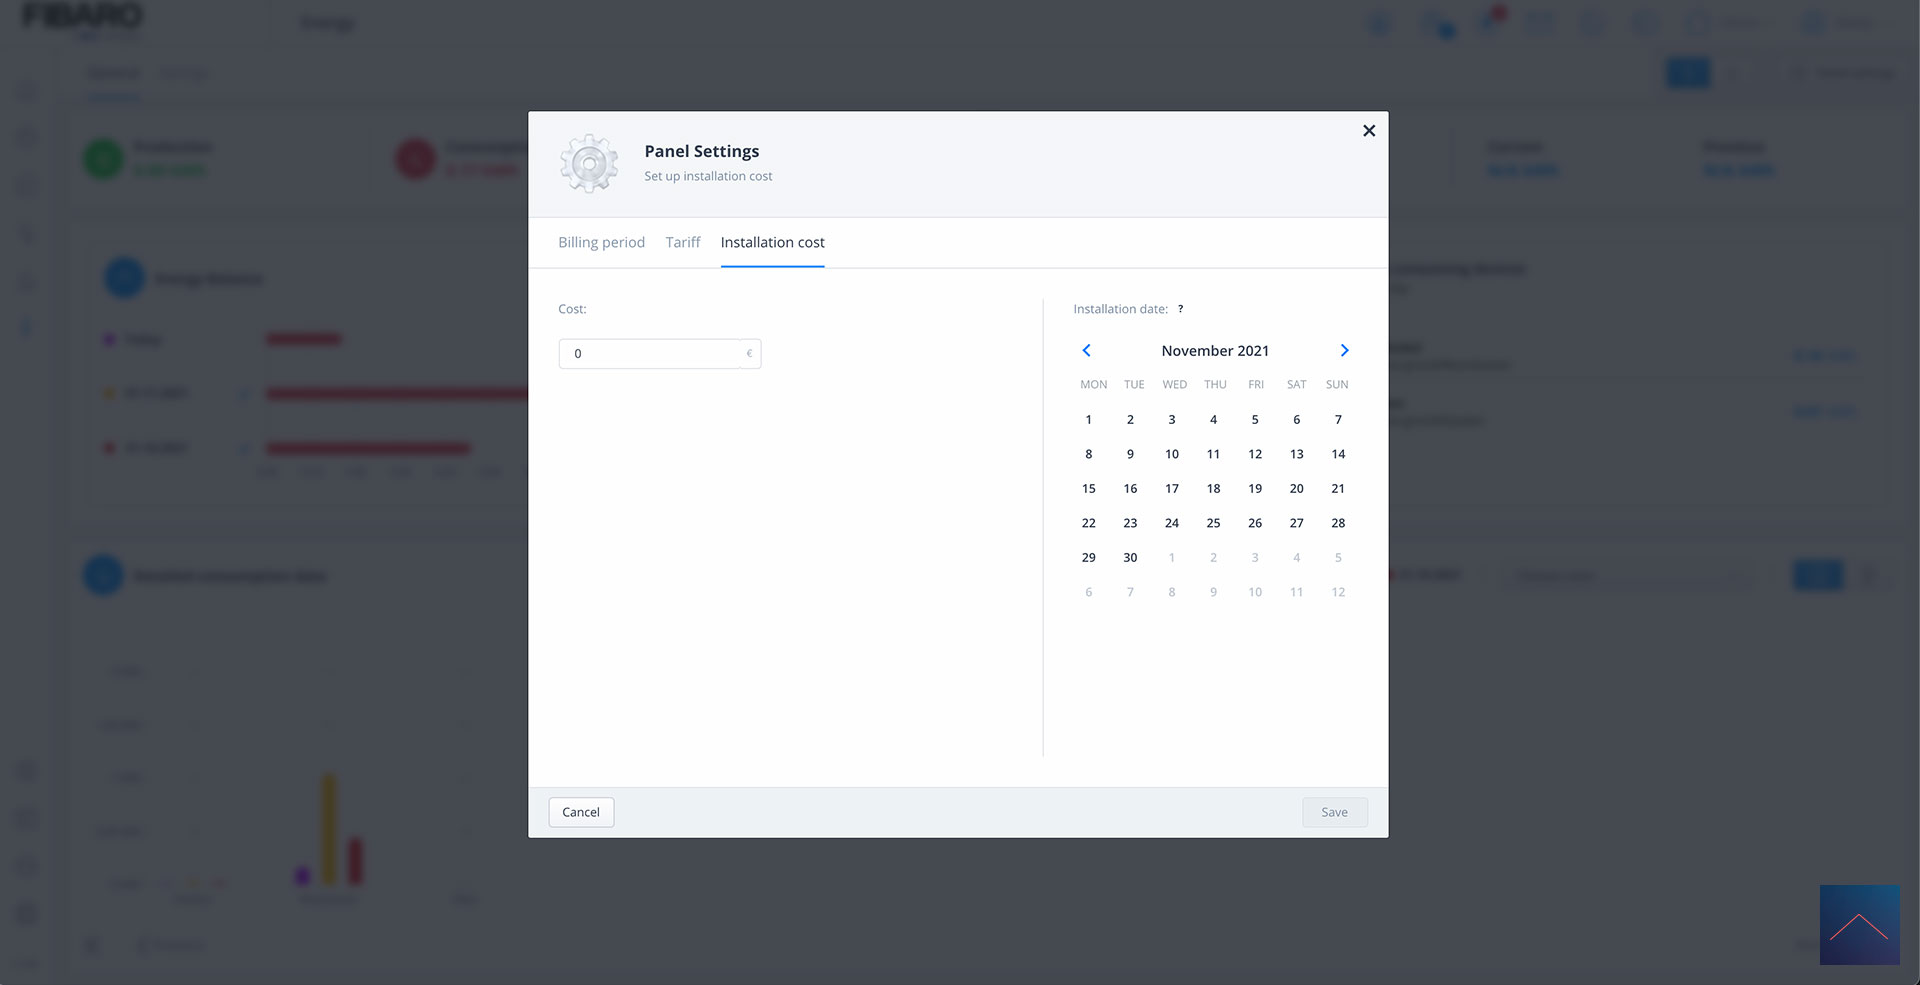
Via the settings you can set when you have to pay for your energy, the different rates (day/night) and what your installation costs were. The latter is of course useful to determine the payback time.
Settings
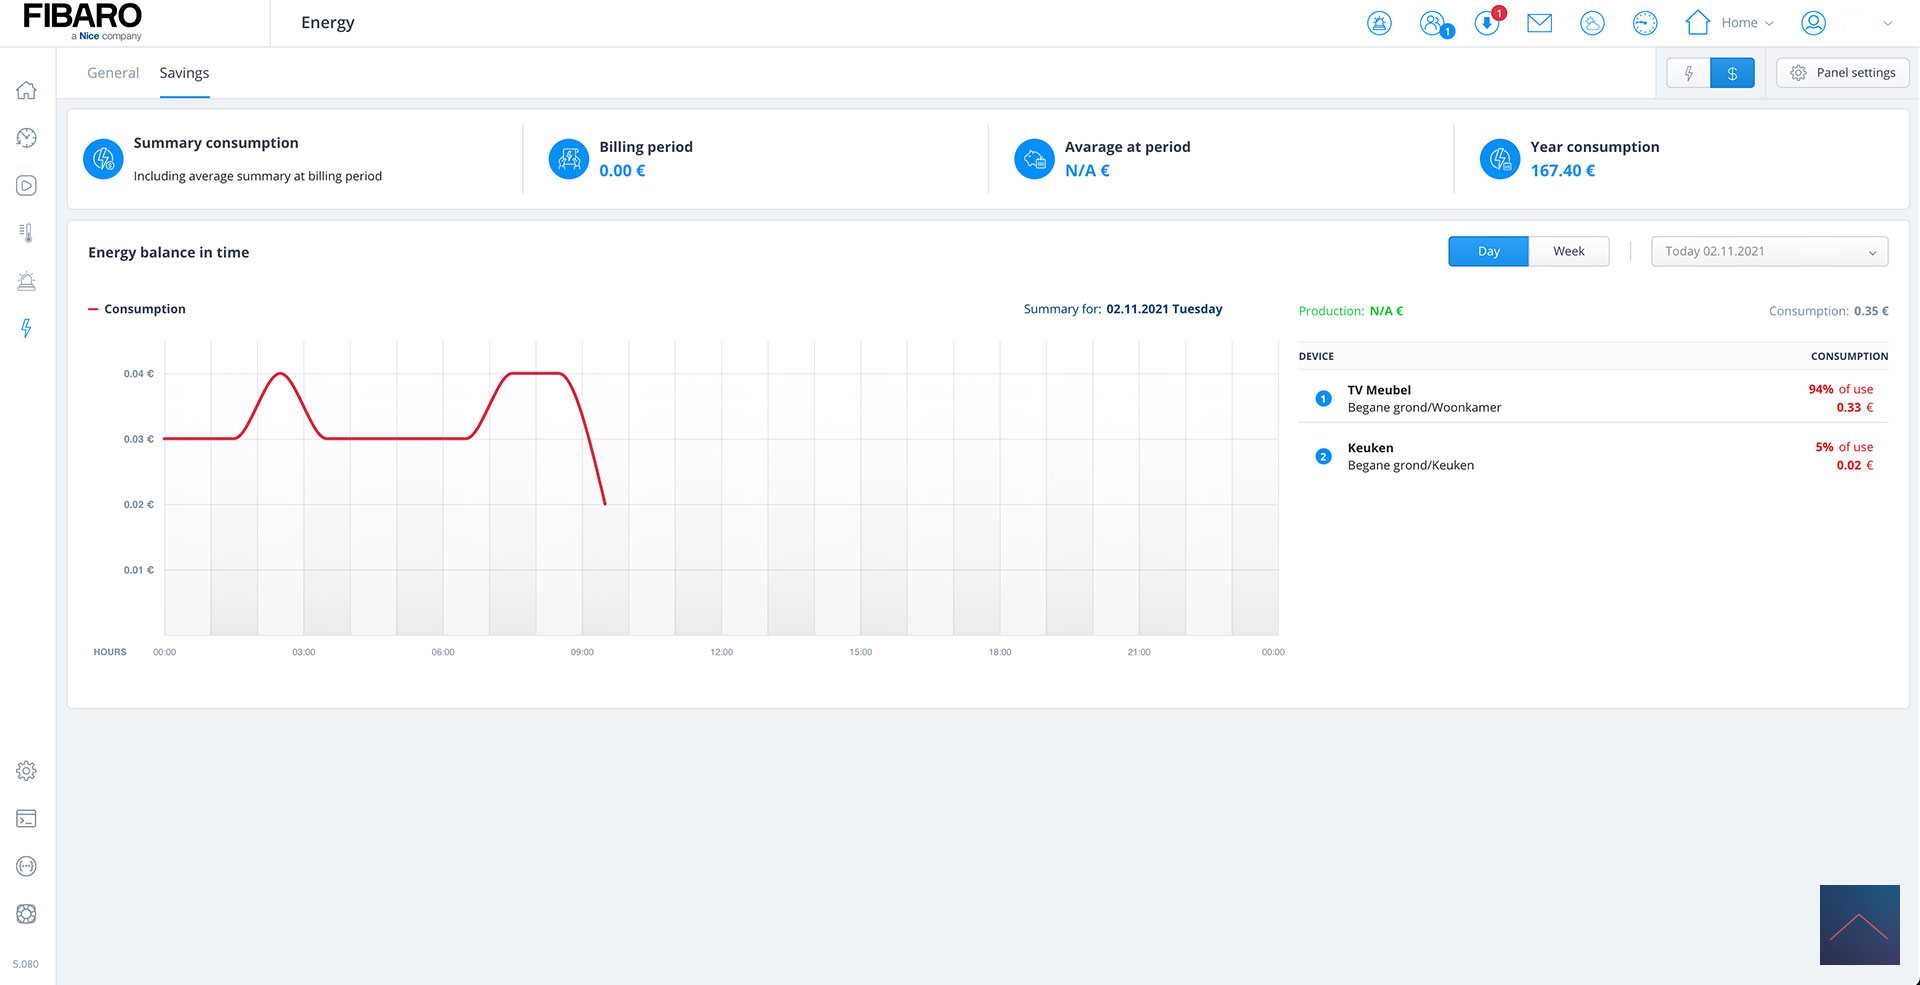
Savings:
The tab "Saving" gives you insight into what your savings were.

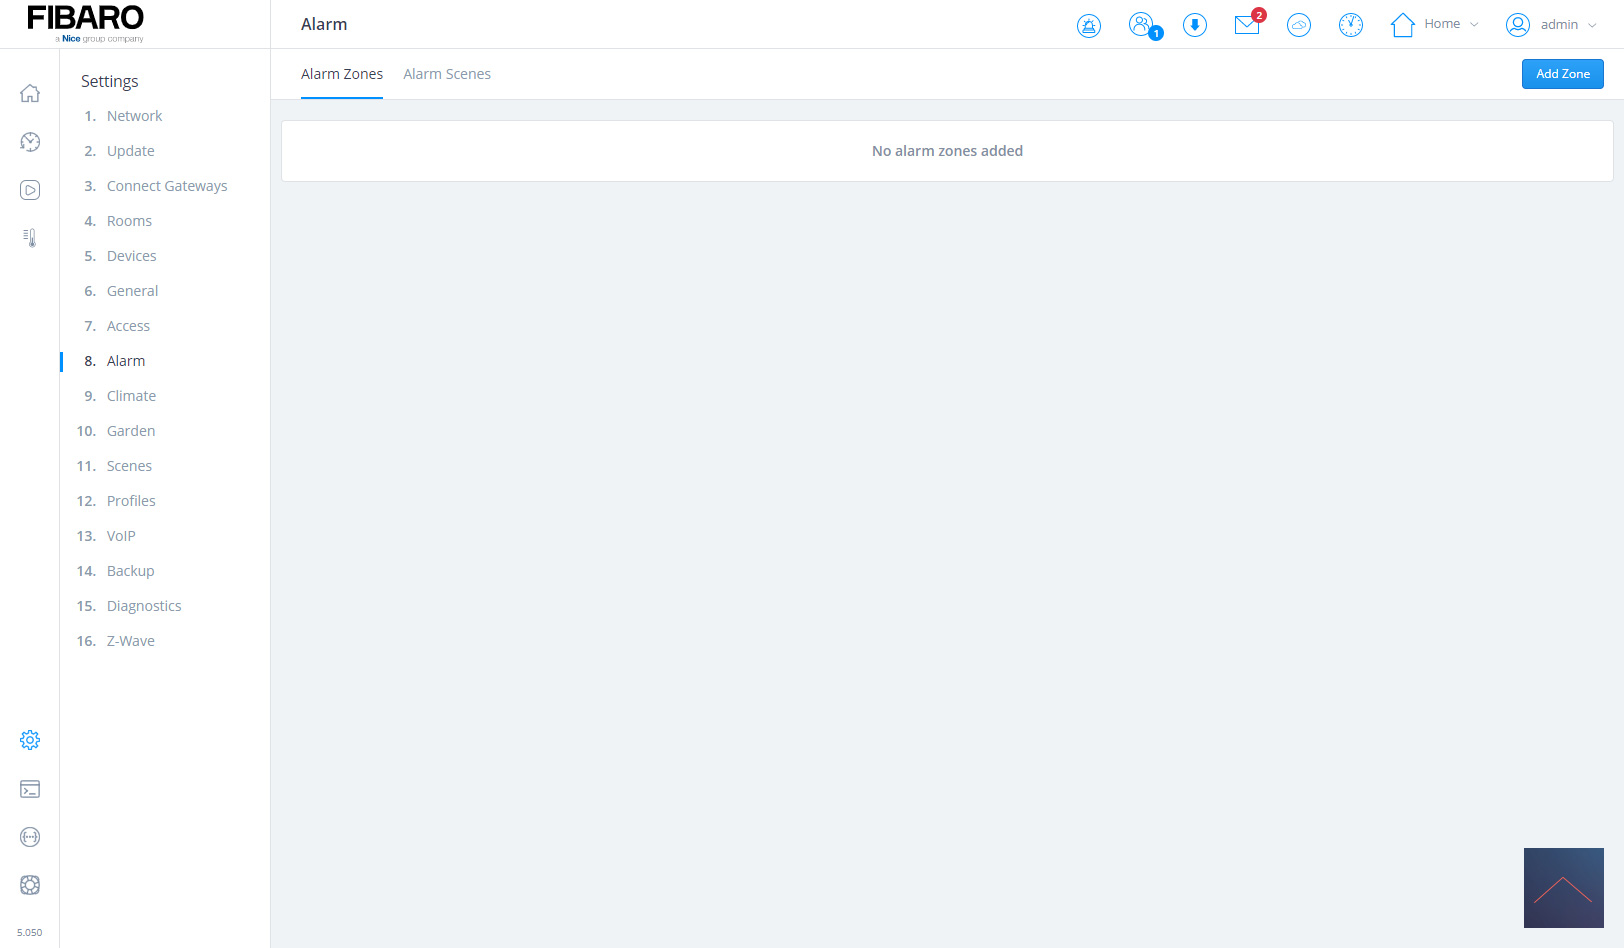
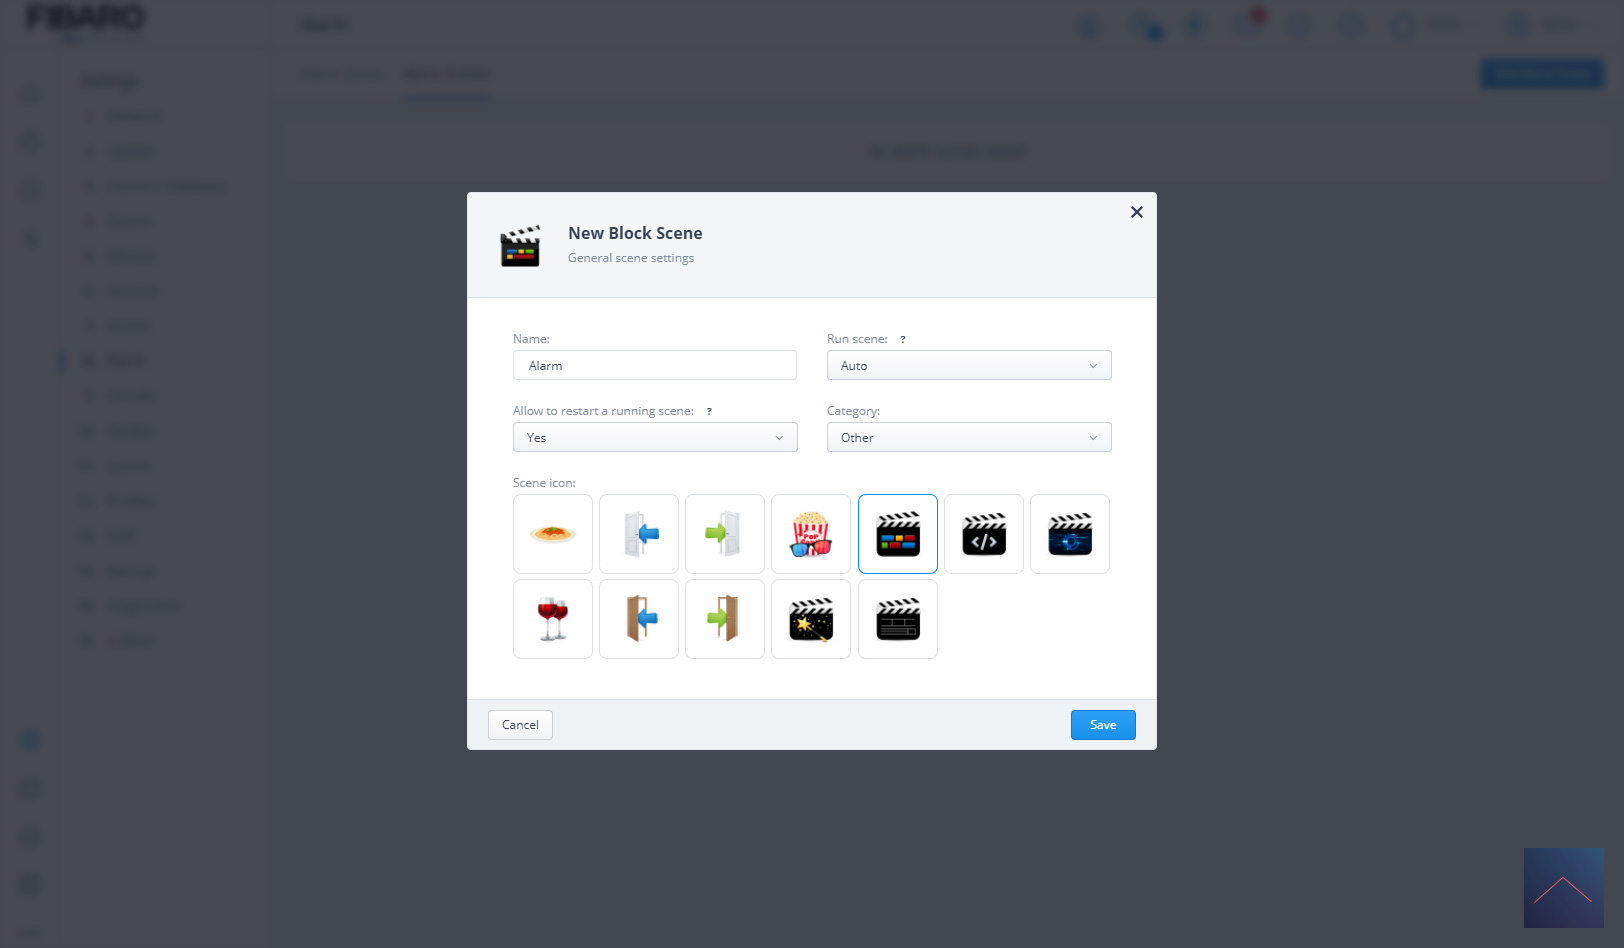
Alarm:
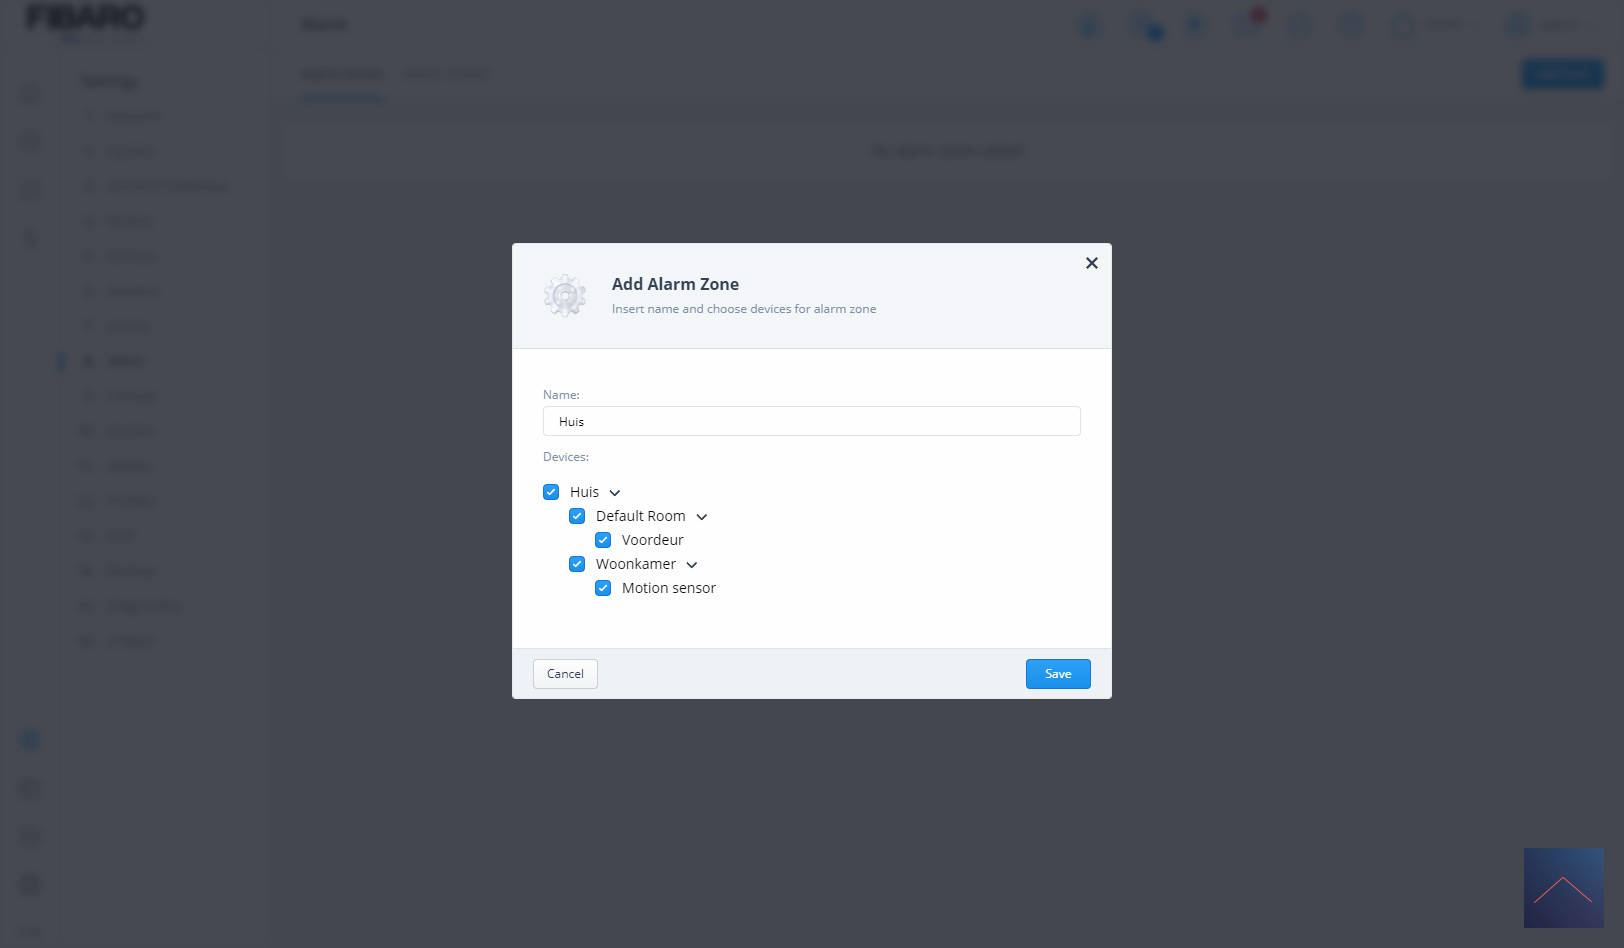
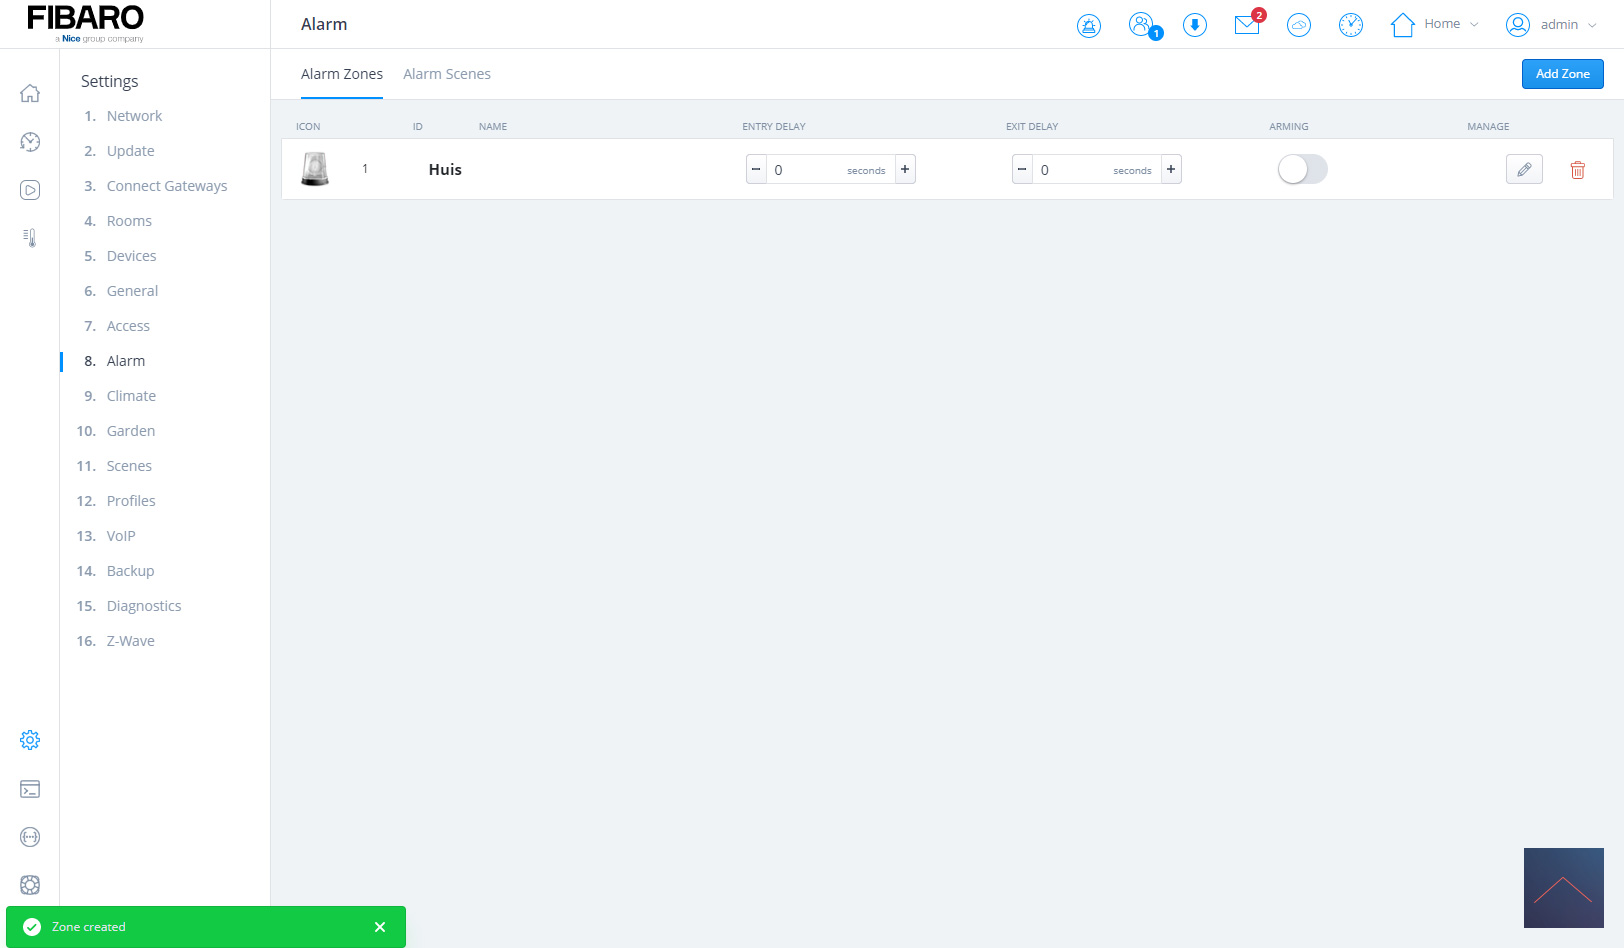
We start configuring the alarm system by going to our settings. We then click on the alarm and "add zone". You can therefore divide the system into different zones. For example, you can separate your house from the shed or the hall with the living room.
You can attach various sensors to the alarm. These can be motion detectors and door sensors. We select this and press save. Now we can set the delay for this zone. This is useful if you come in and want to turn off the alarm that you have some time for this. Likewise, when you leave, you naturally want to be able to walk out of your house quietly.
Installation screens:
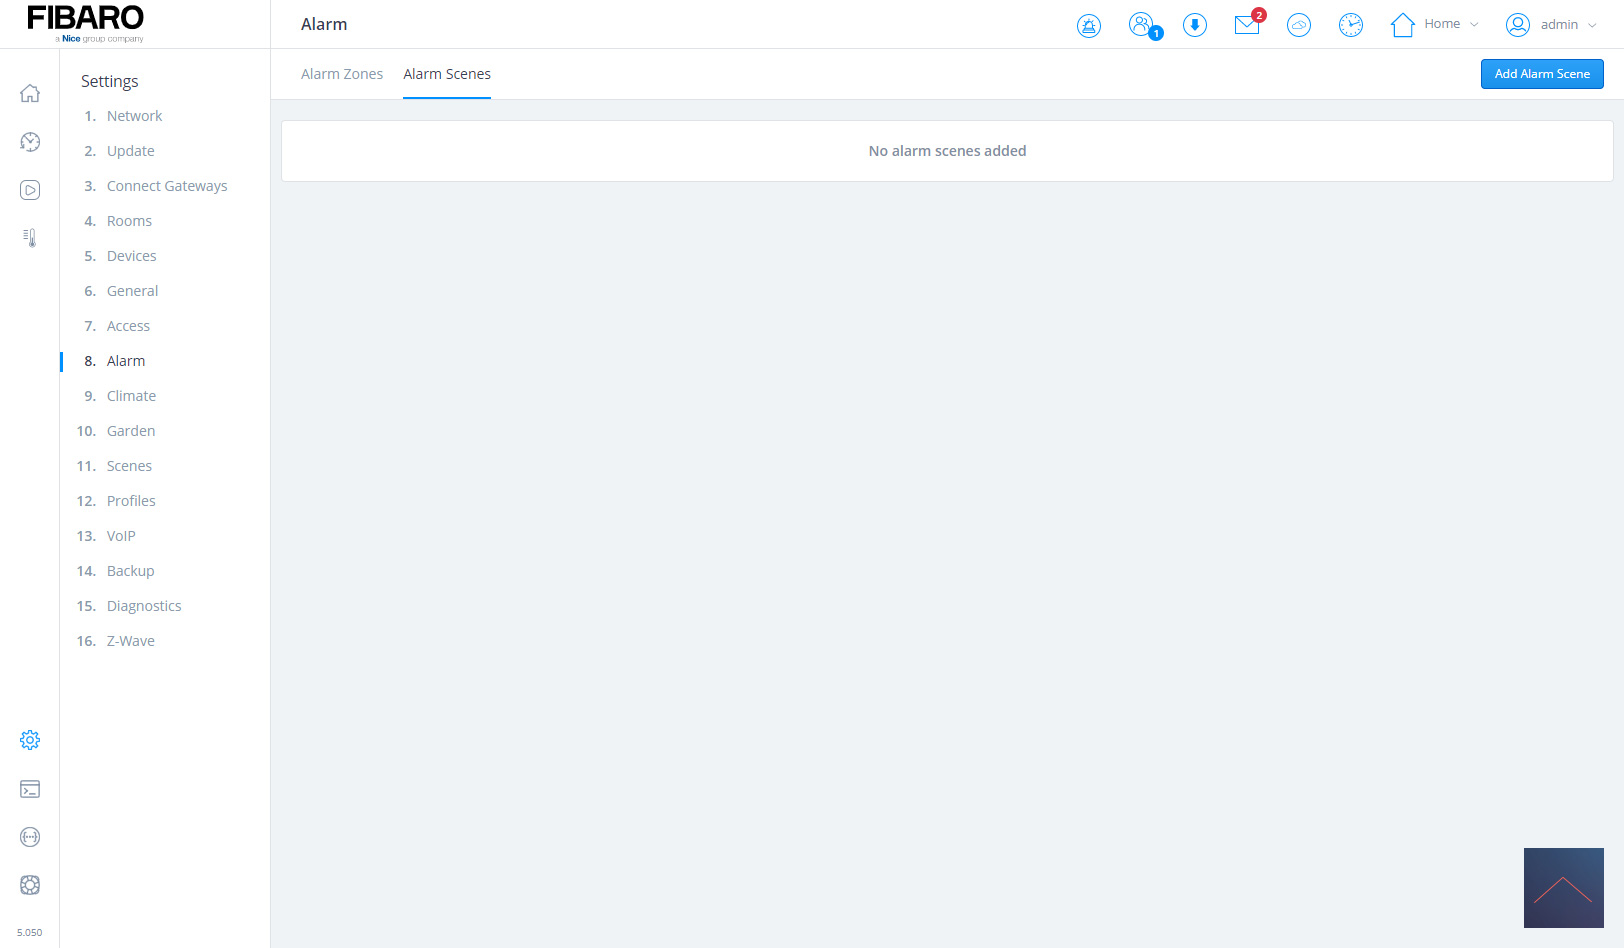
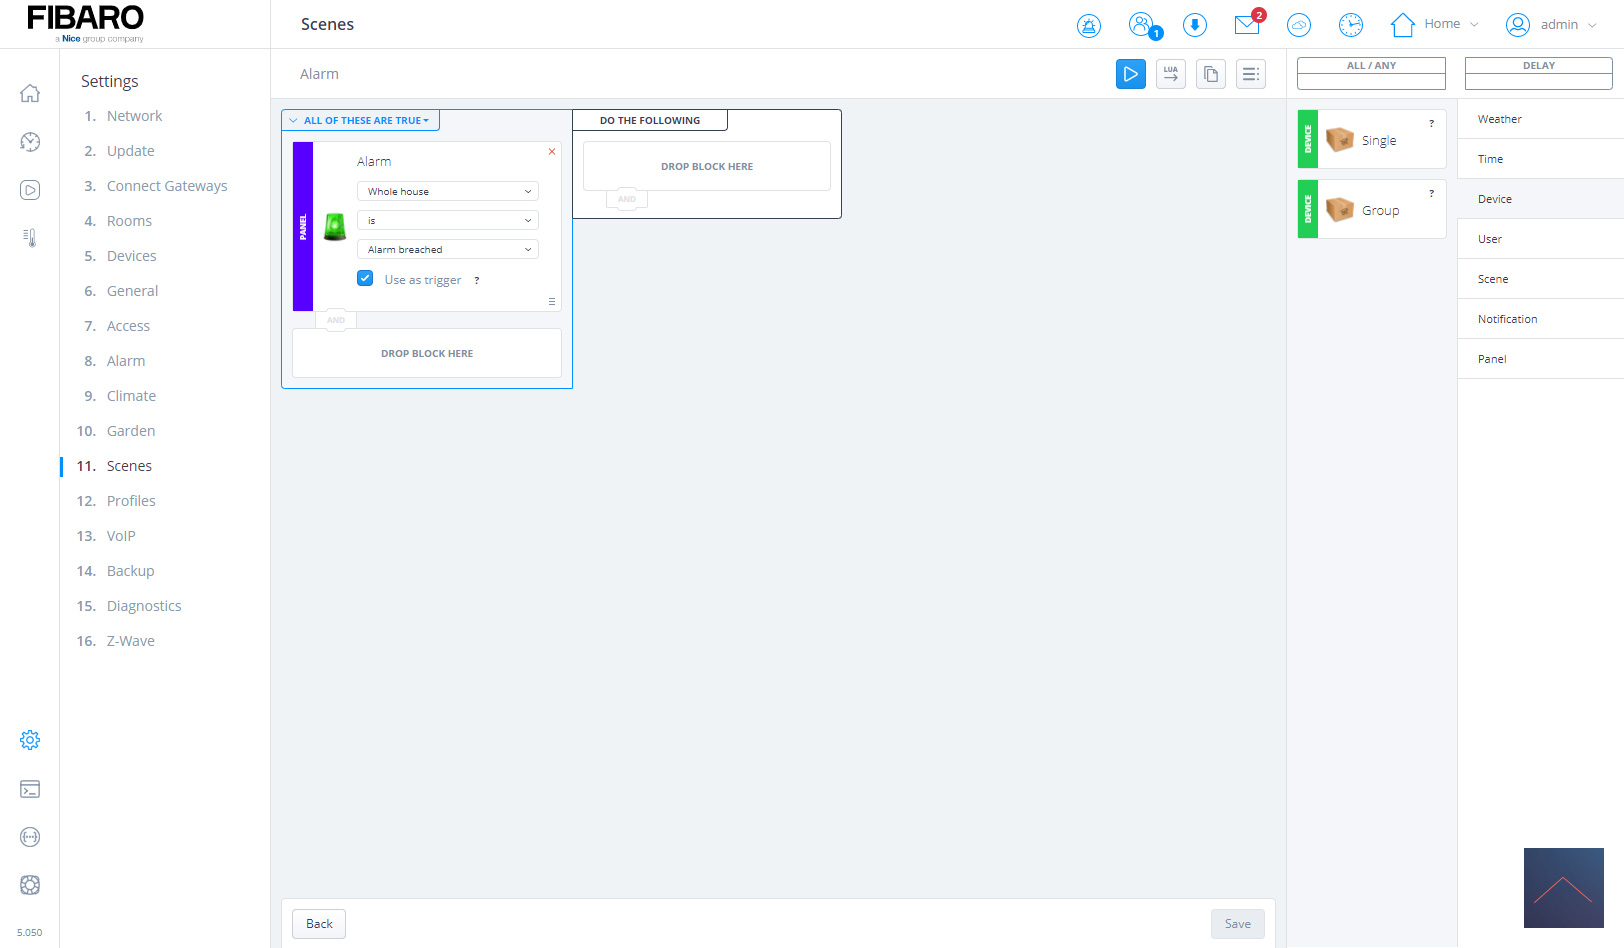

Now we have done the basic settings and we are going to link a scene to the zone to ensure that something also happens when the alarm is triggered.
We use the alarm and possibly the zone as a trigger and we put a siren in it. Now we have arranged if the alarm is on and motion is detected that the siren will go off.

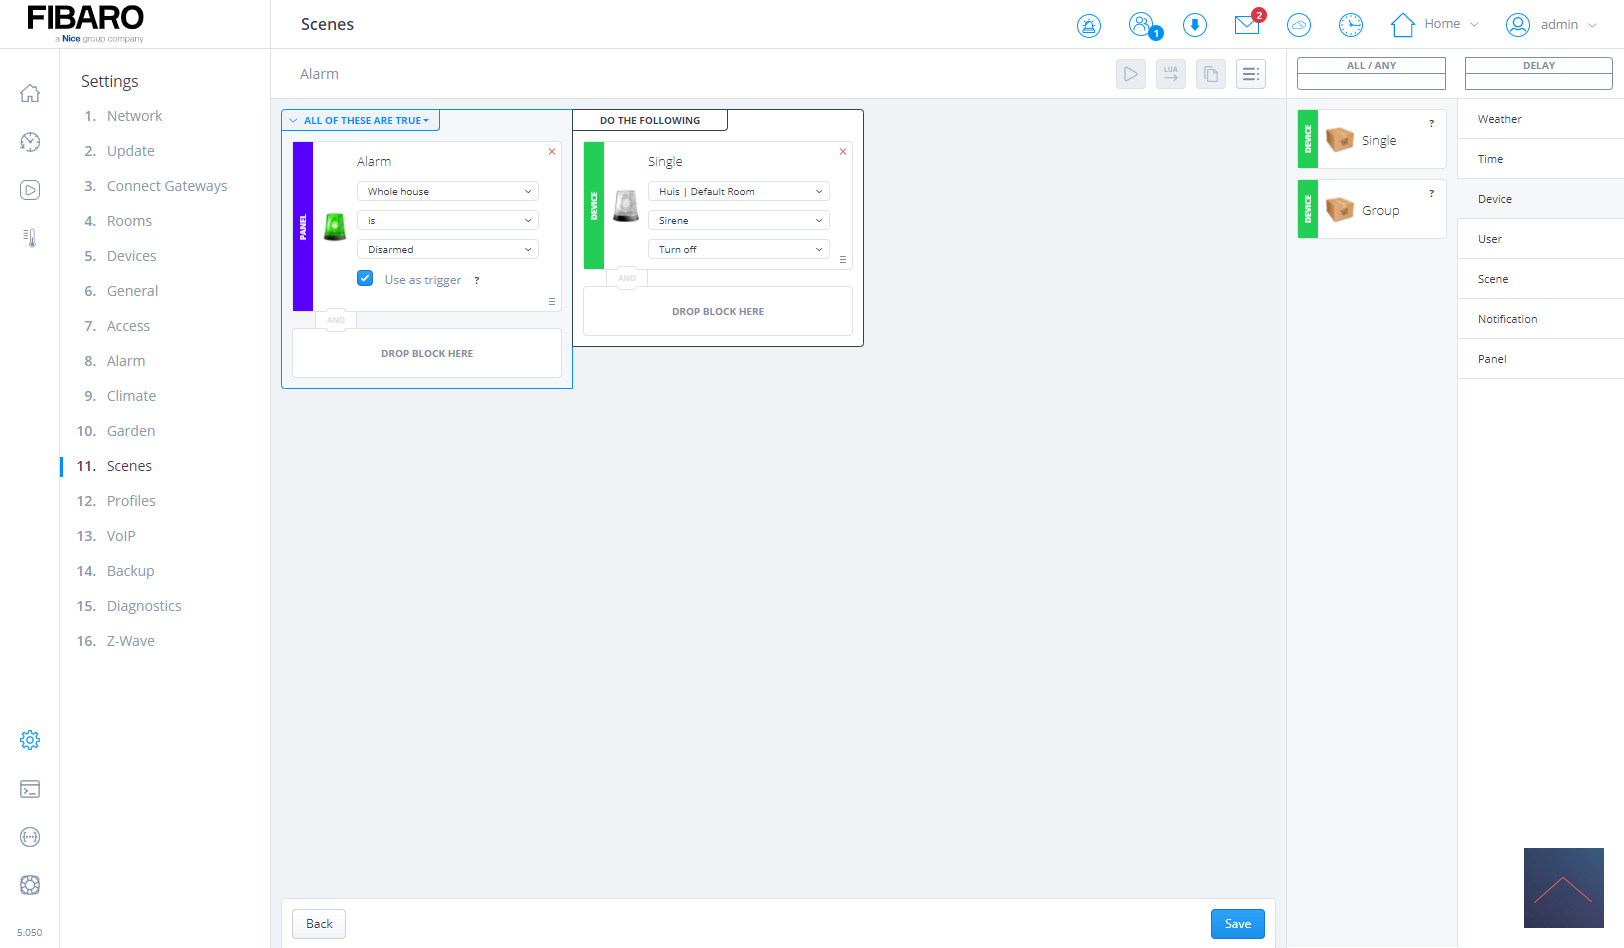
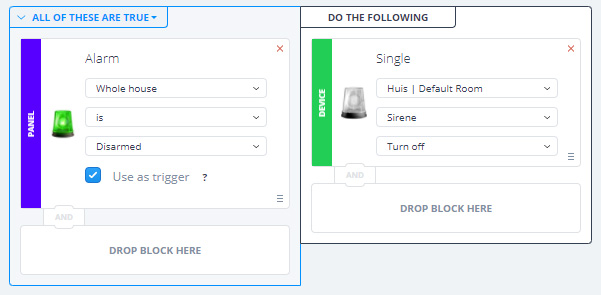
To turn off the alarm, we make a separate scene using the disarmed function. This can be switched off via the APP or eg via a keyfob or keypad.
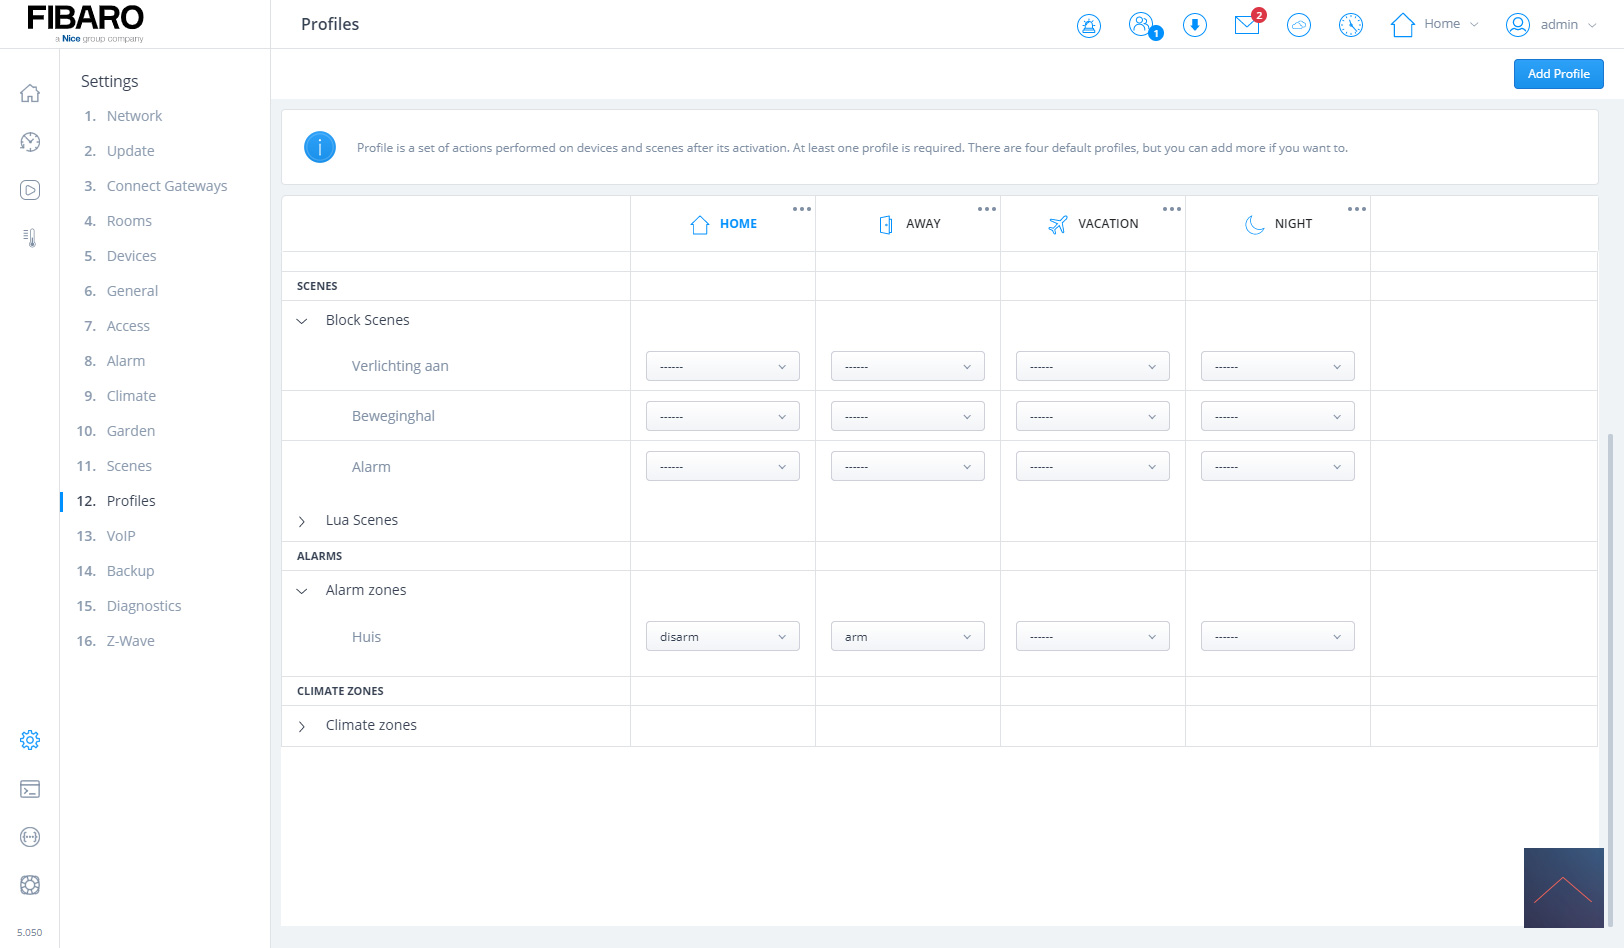
You can of course also turn on the alarm in this way, but we have a smart system so this can of course be even easier. For this we use the "profiles" function.
These are profiles that can be set, whereby certain things can be switched on or off, for example when you are away. So also the alarm. We click on "profiles" in the settings and look up the alarm.
We say that when we get home the alarm should be turned on and when we're gone the alarm should be turned on again.
Finally, I want to report that you can switch the alarm on and off via a code. This can be set in the settings and then "access".

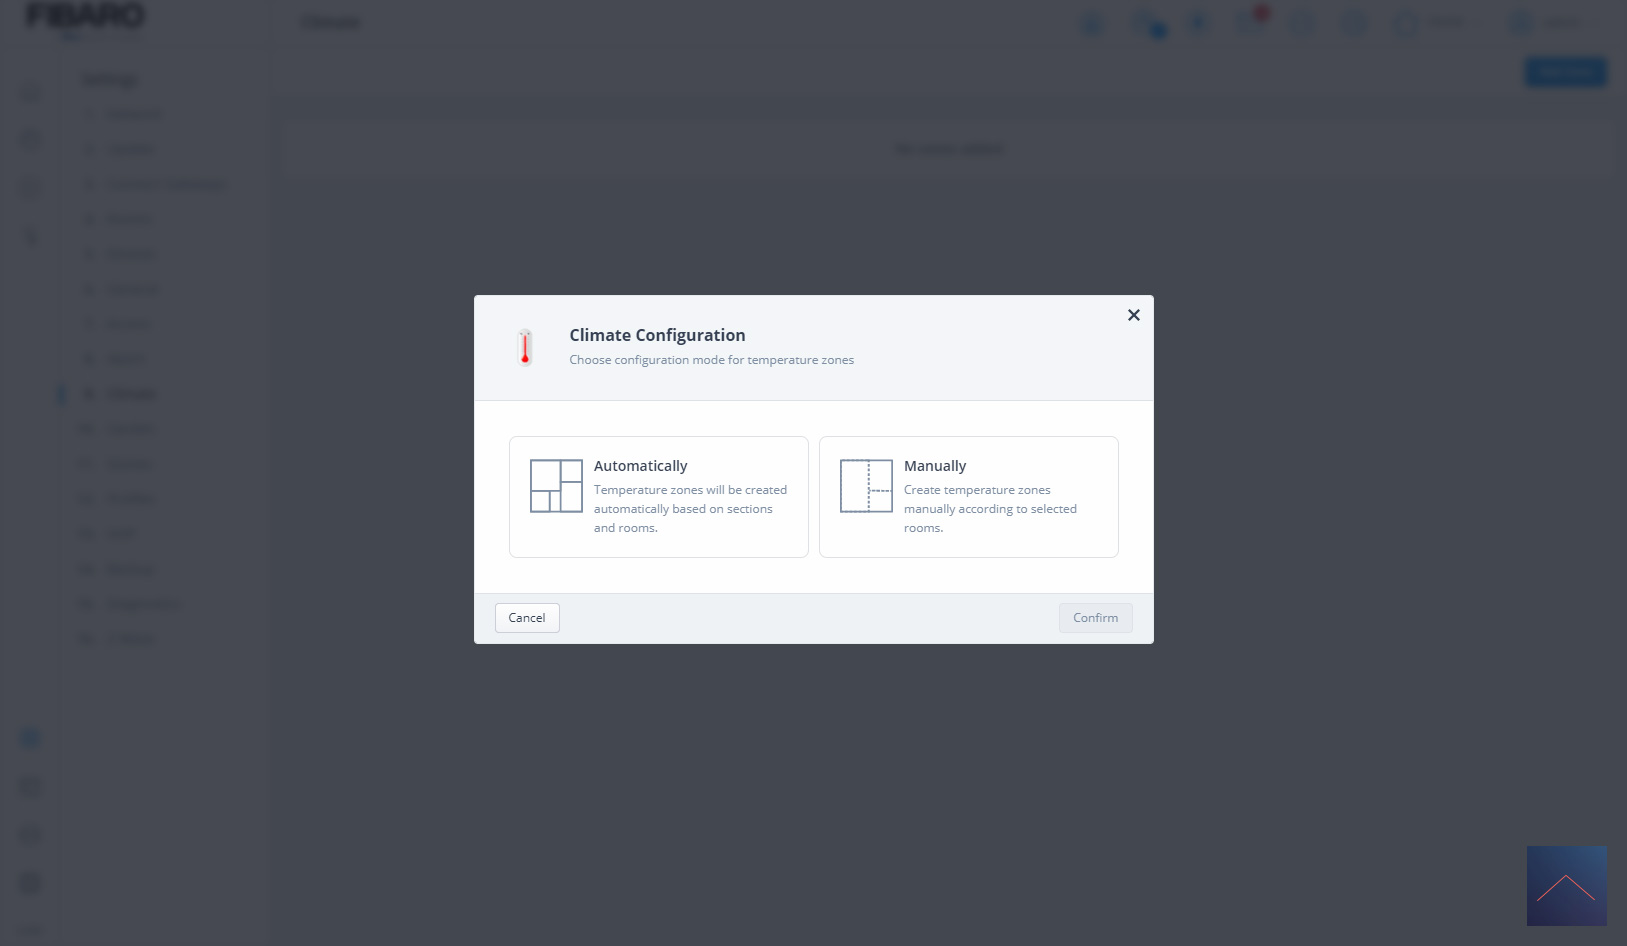
Climate:
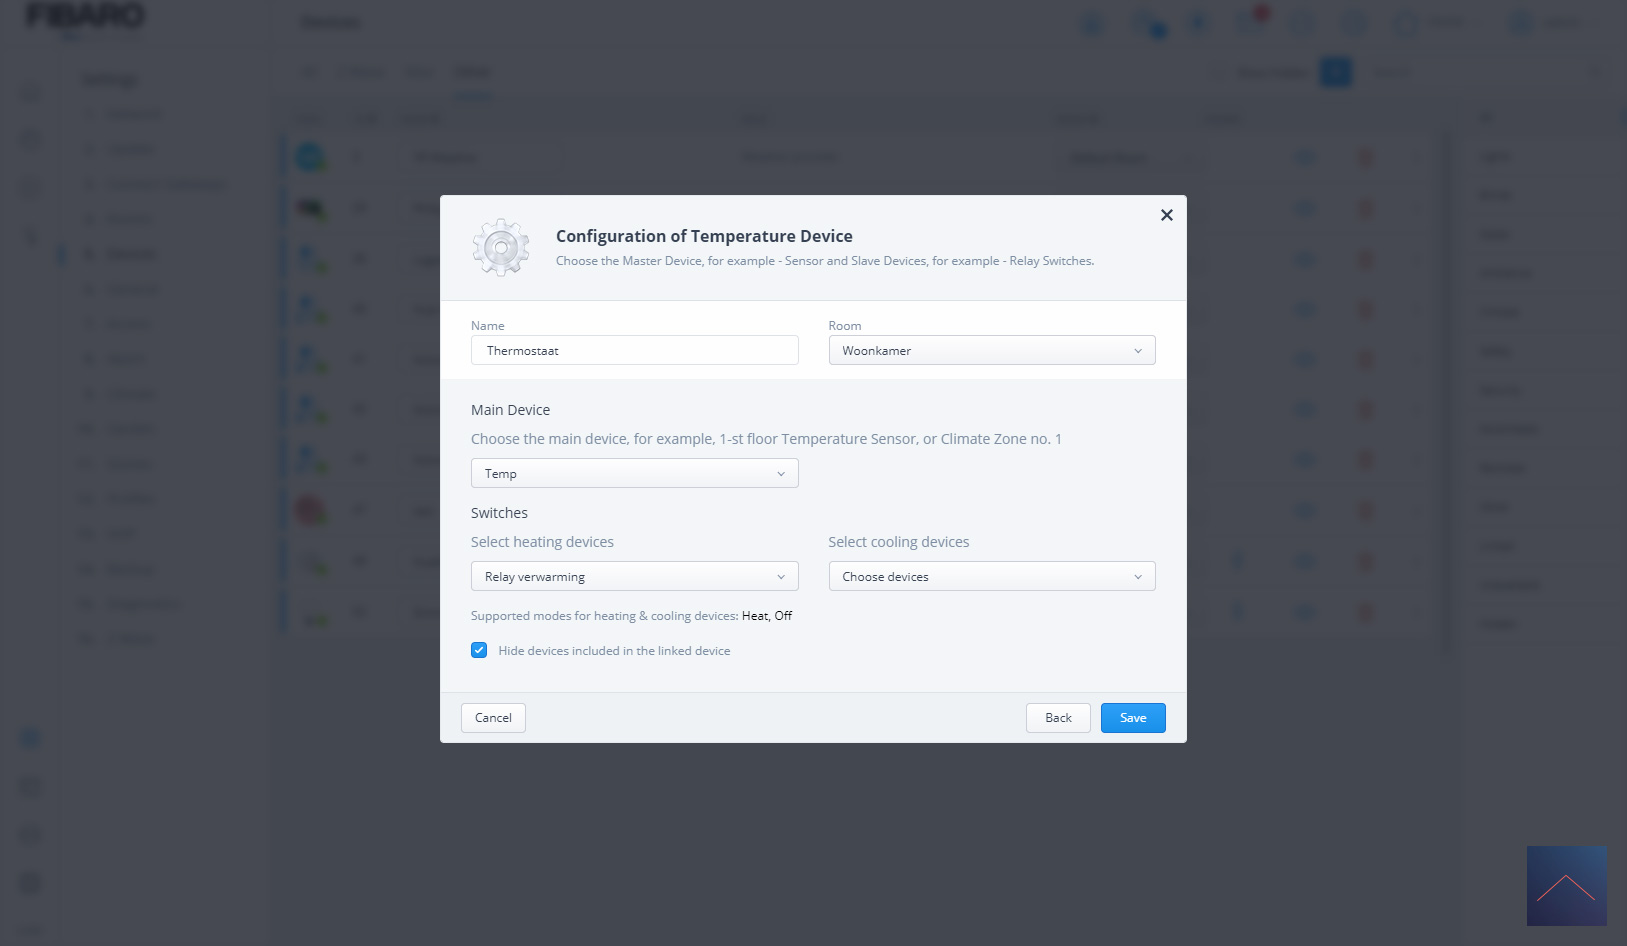
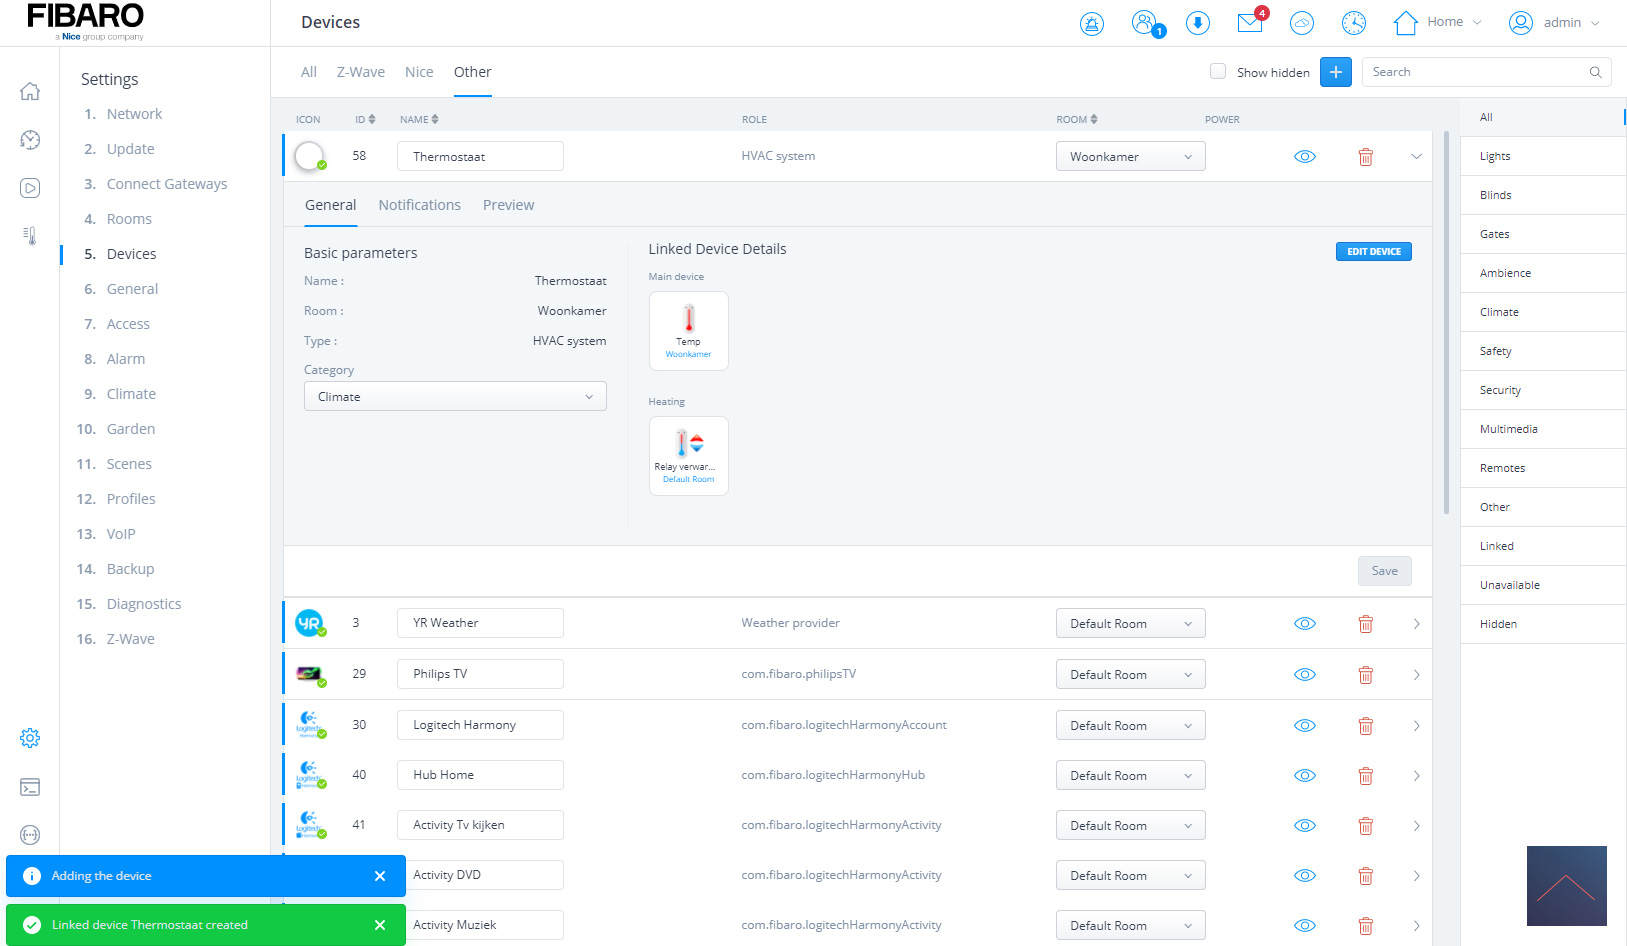
Just like the alarm, Fibaro also has a standard solution for controlling your heating. For this you need a temperature sensor and something to control your boiler in the event of a heating. If you want to cool, you need something to control your air conditioning. This can be a thermostat or a relay switch.
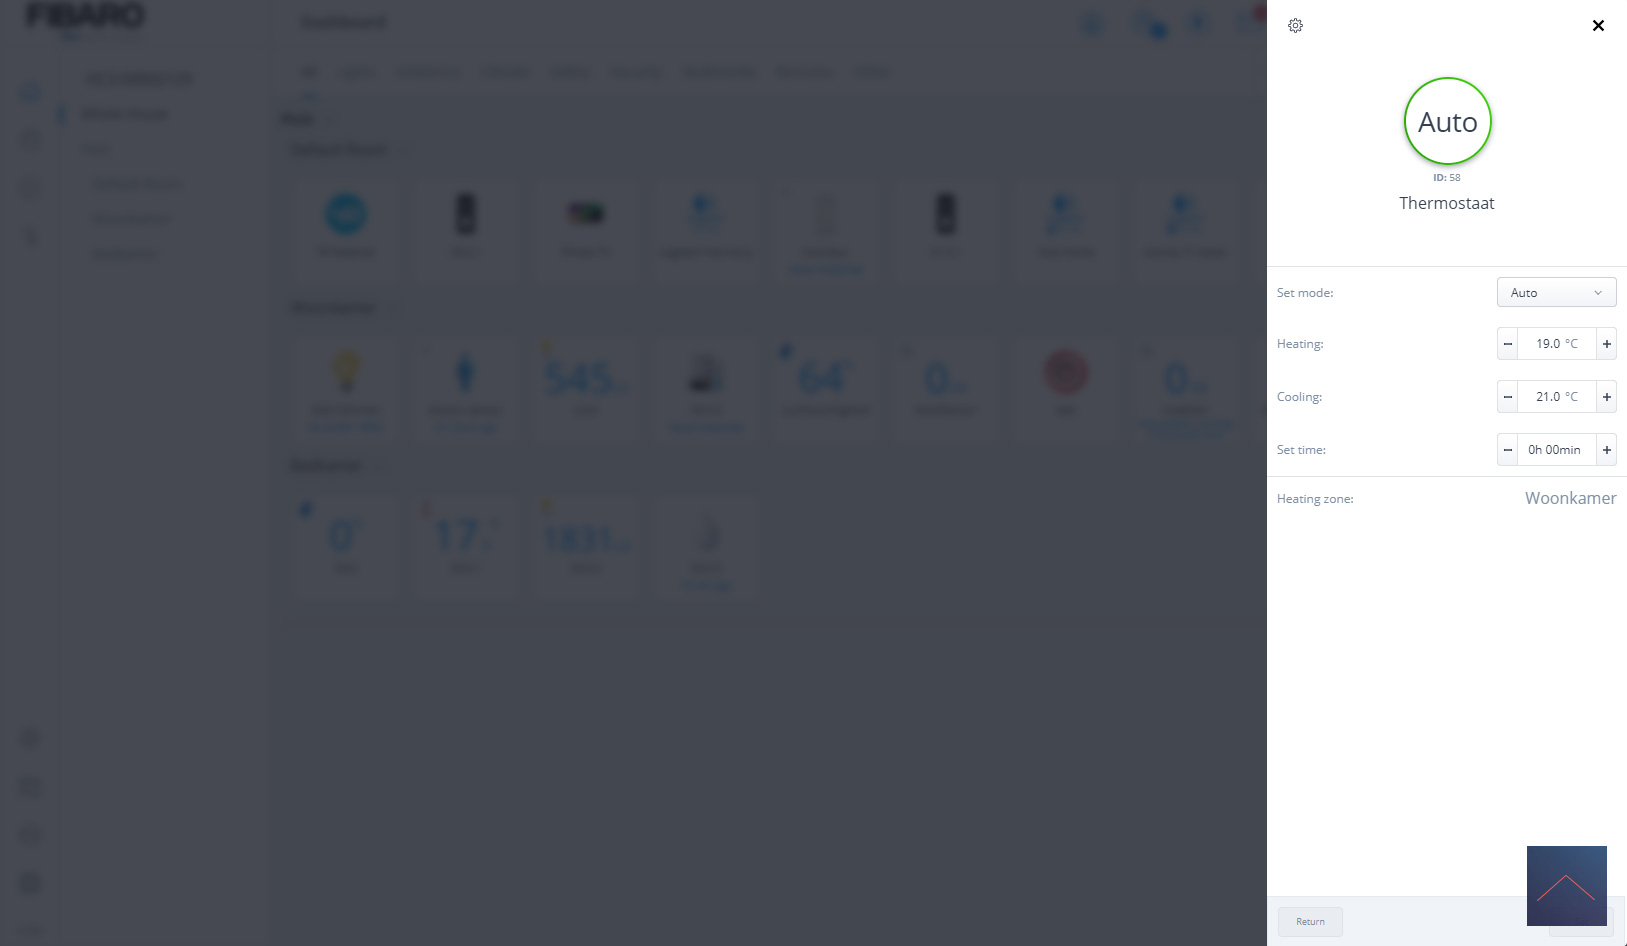
The first step is to create a "virtual" thermostat. You can do this again at the devices and then go to "other" and select the linked device and then thermostat. Give it a name and say which temperature sensor you want to use and which control for your heating and cooling.
Now that we have linked everything, we can create a zone for your climate. There is an option to have everything controlled automatically or manually so that you can really adjust everything to your liking. We opt for automatic.
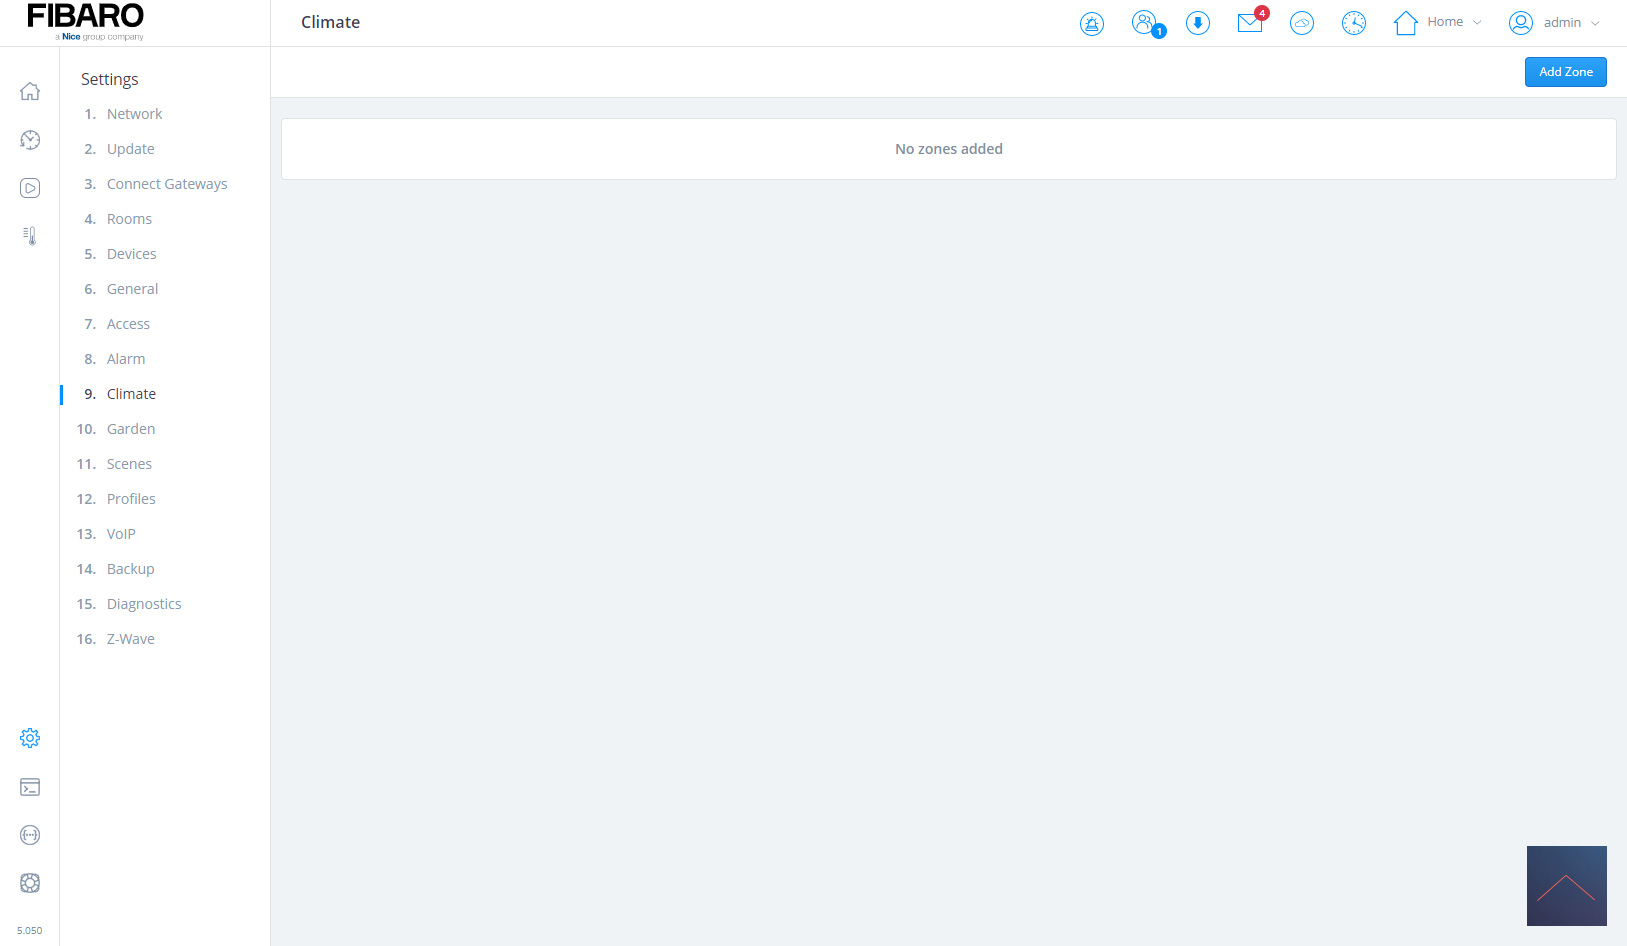
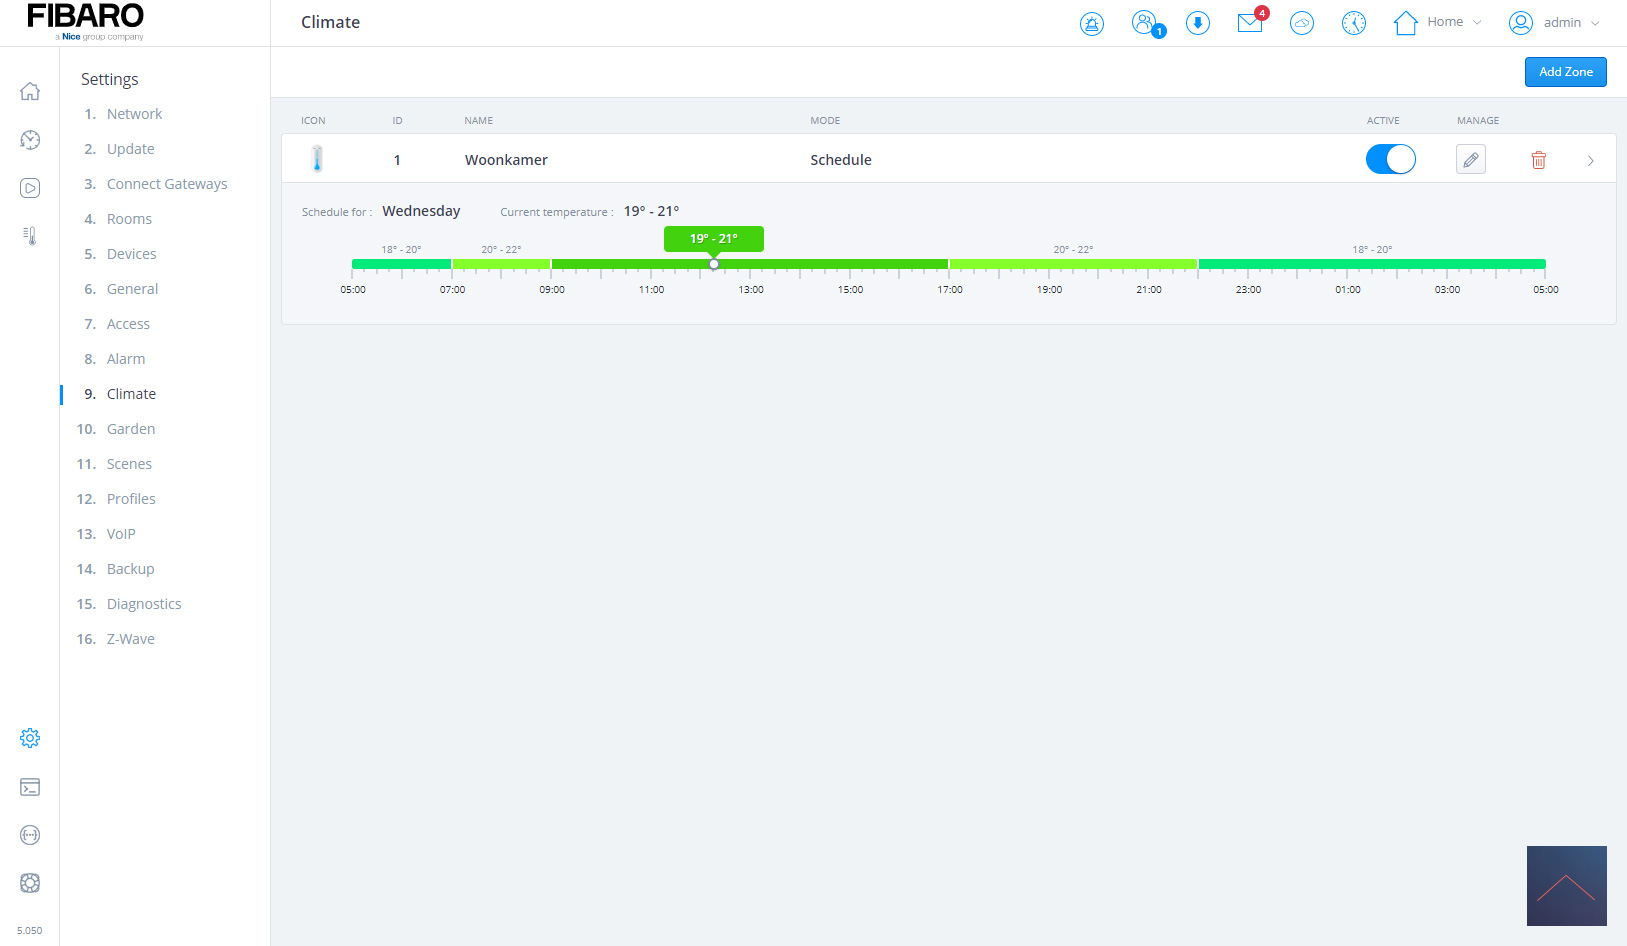

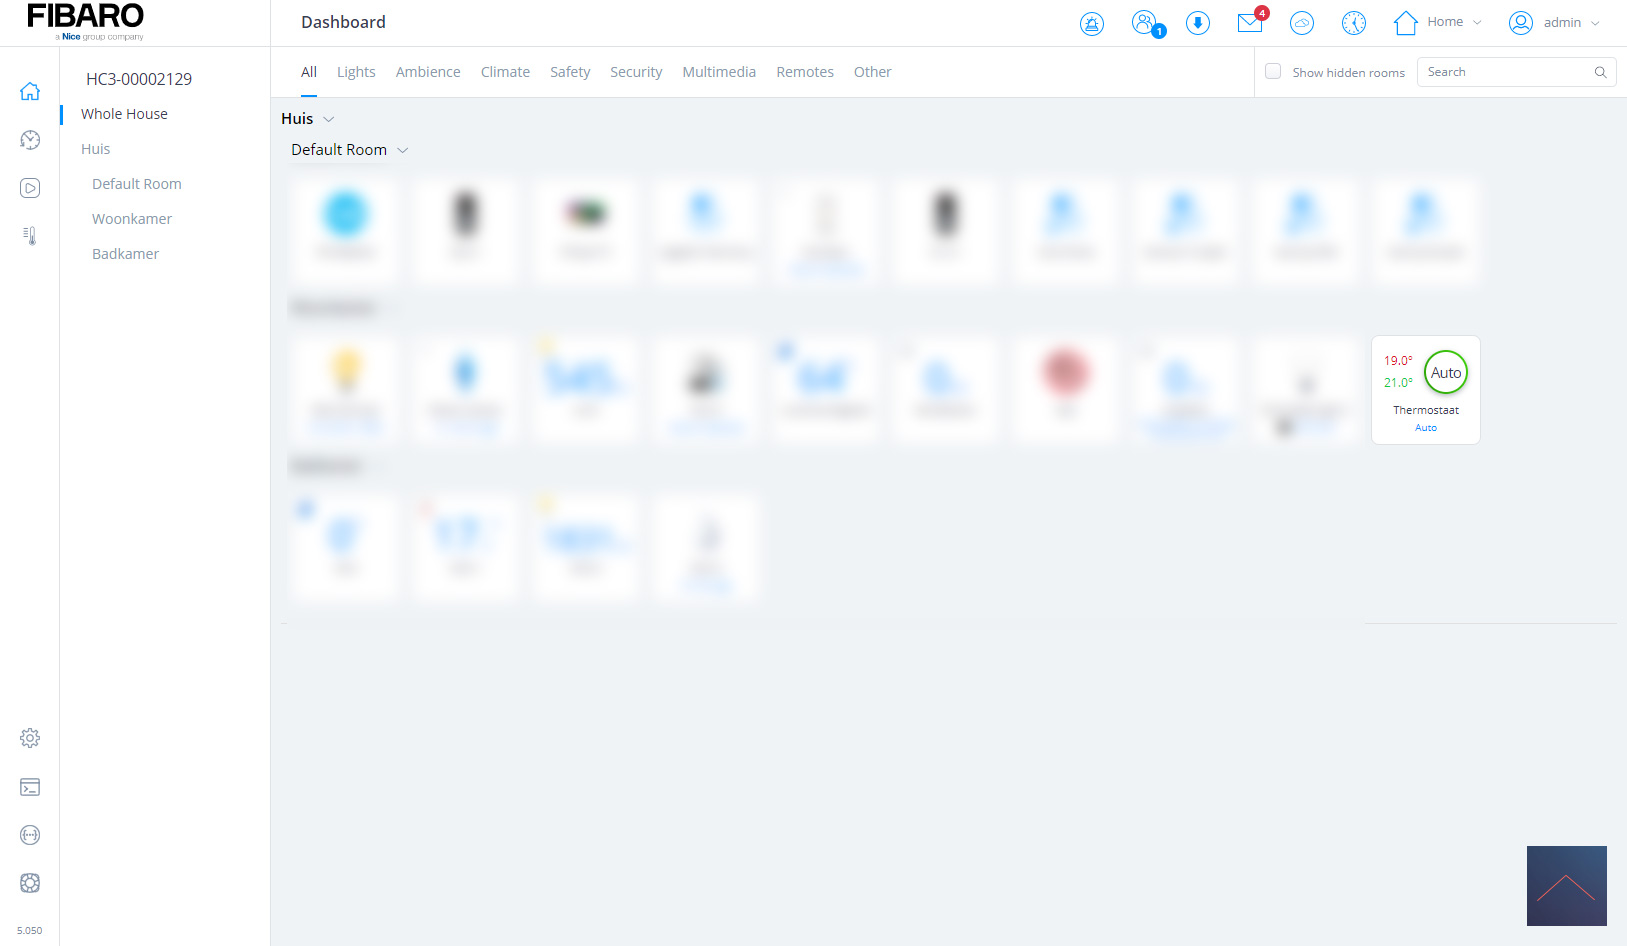
We can now set a schedule and control the thermostat on our devices.
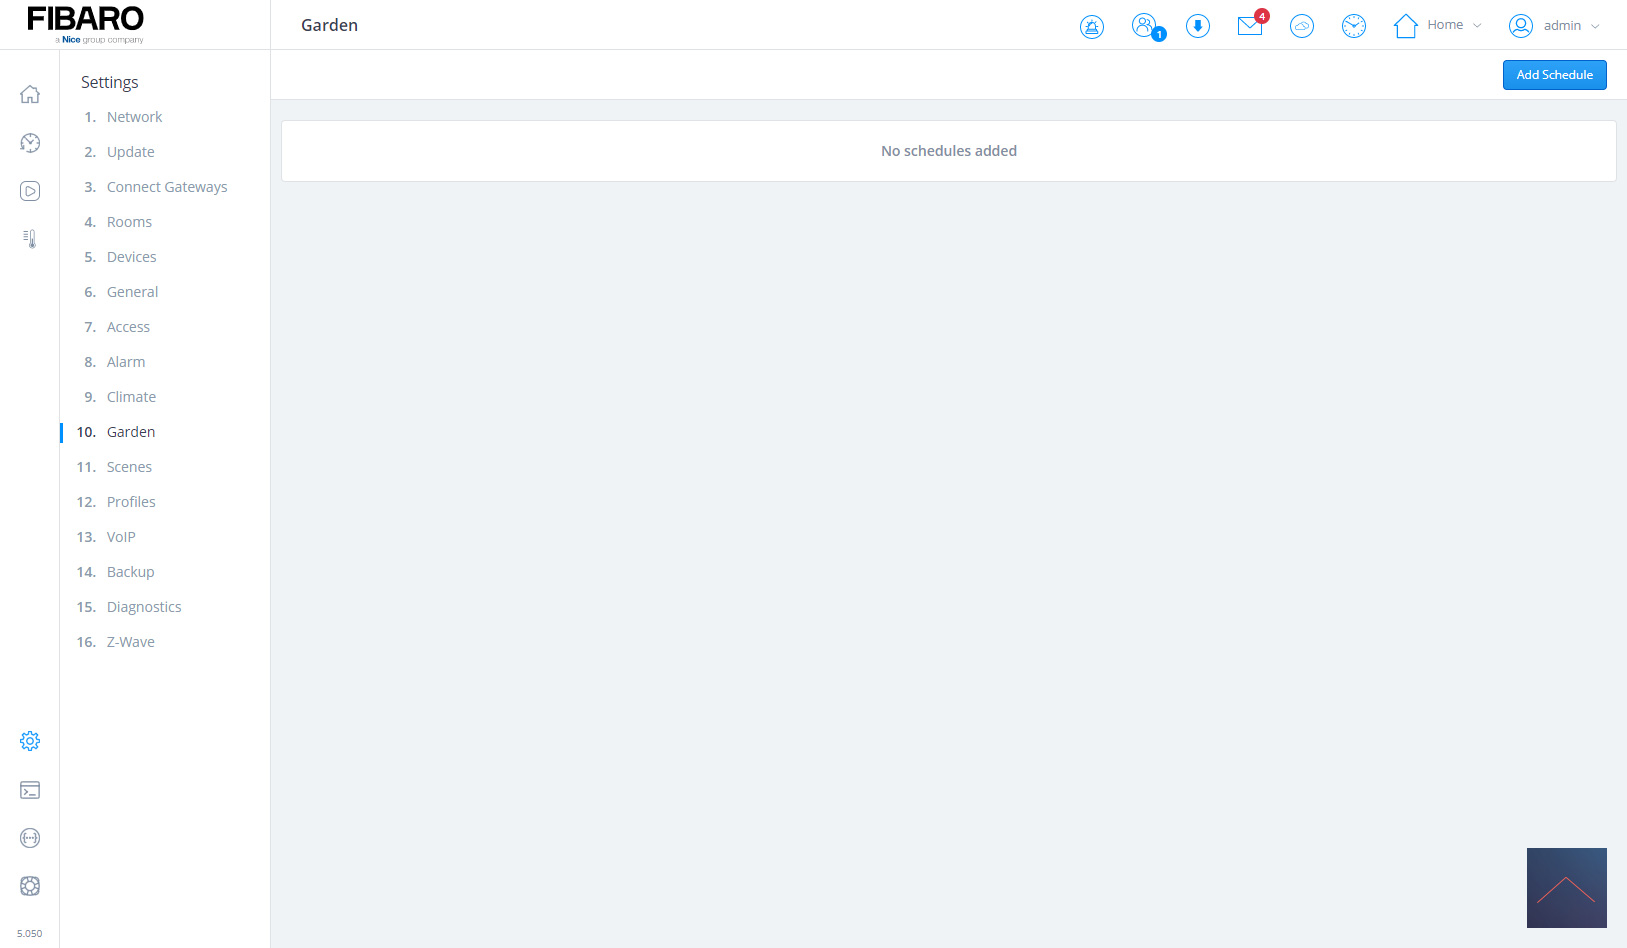
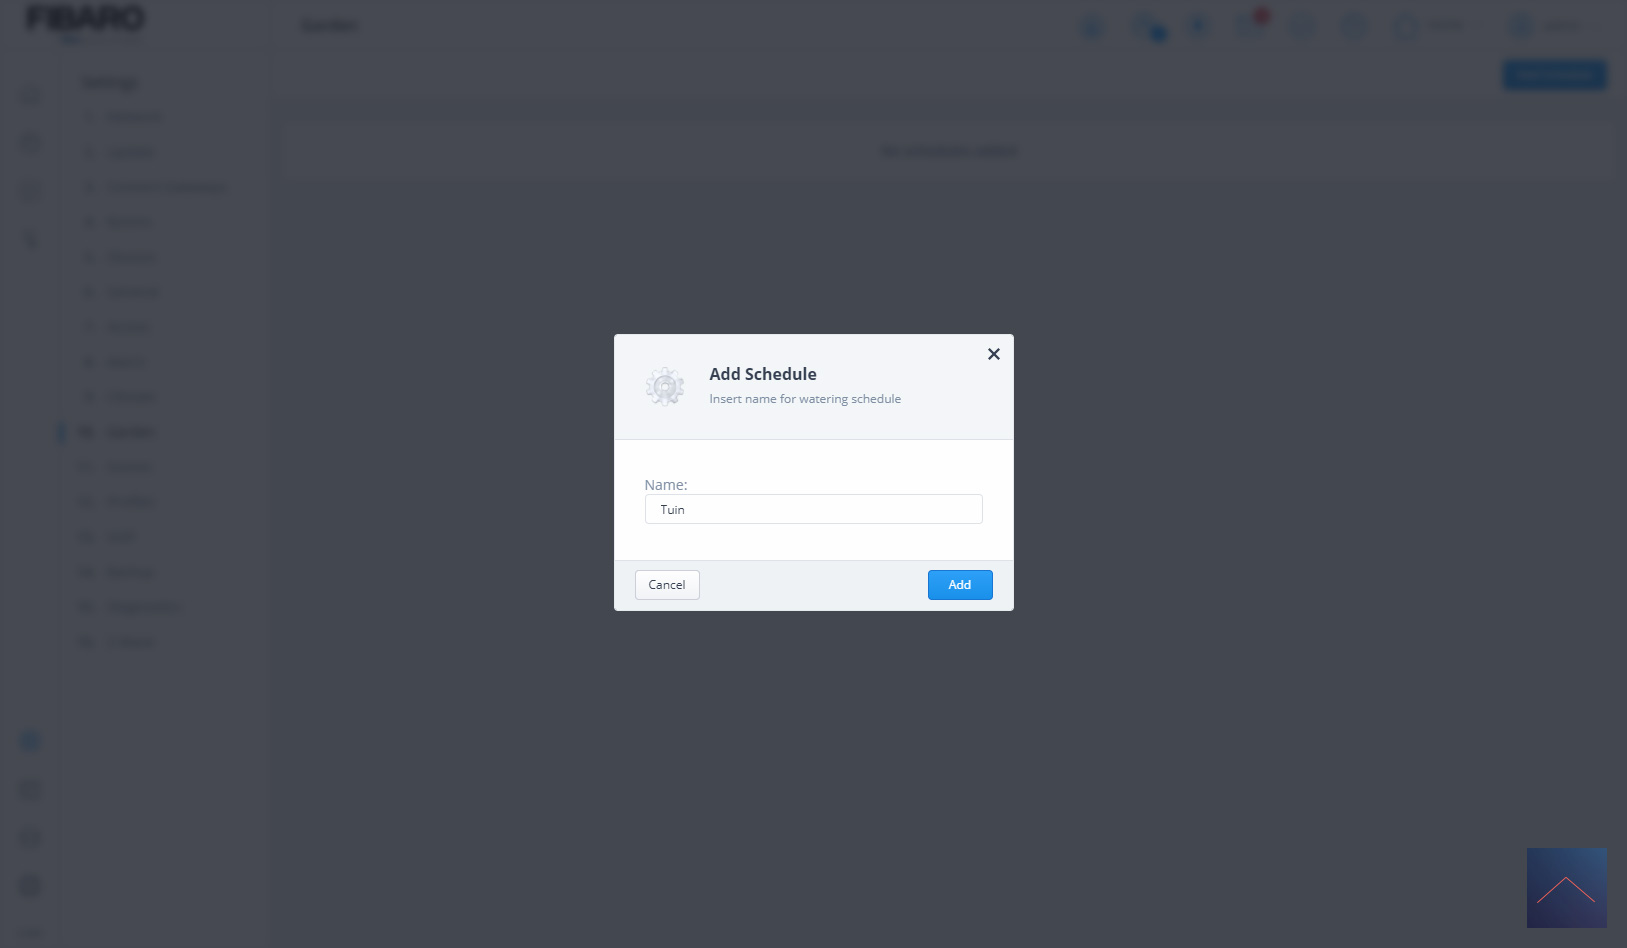
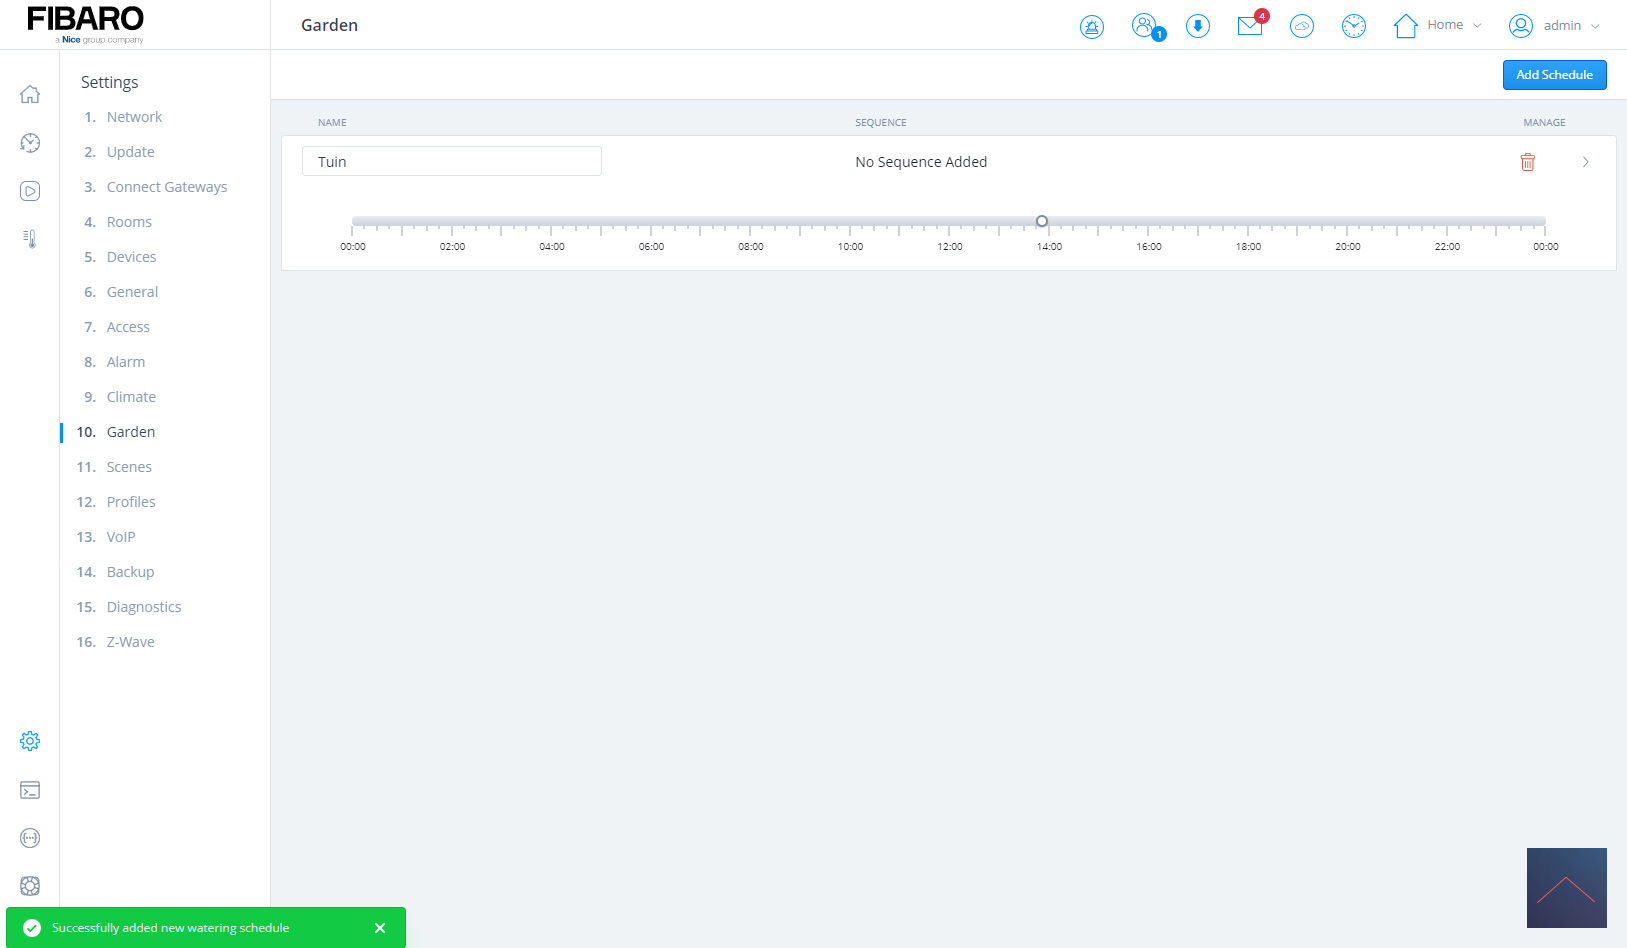
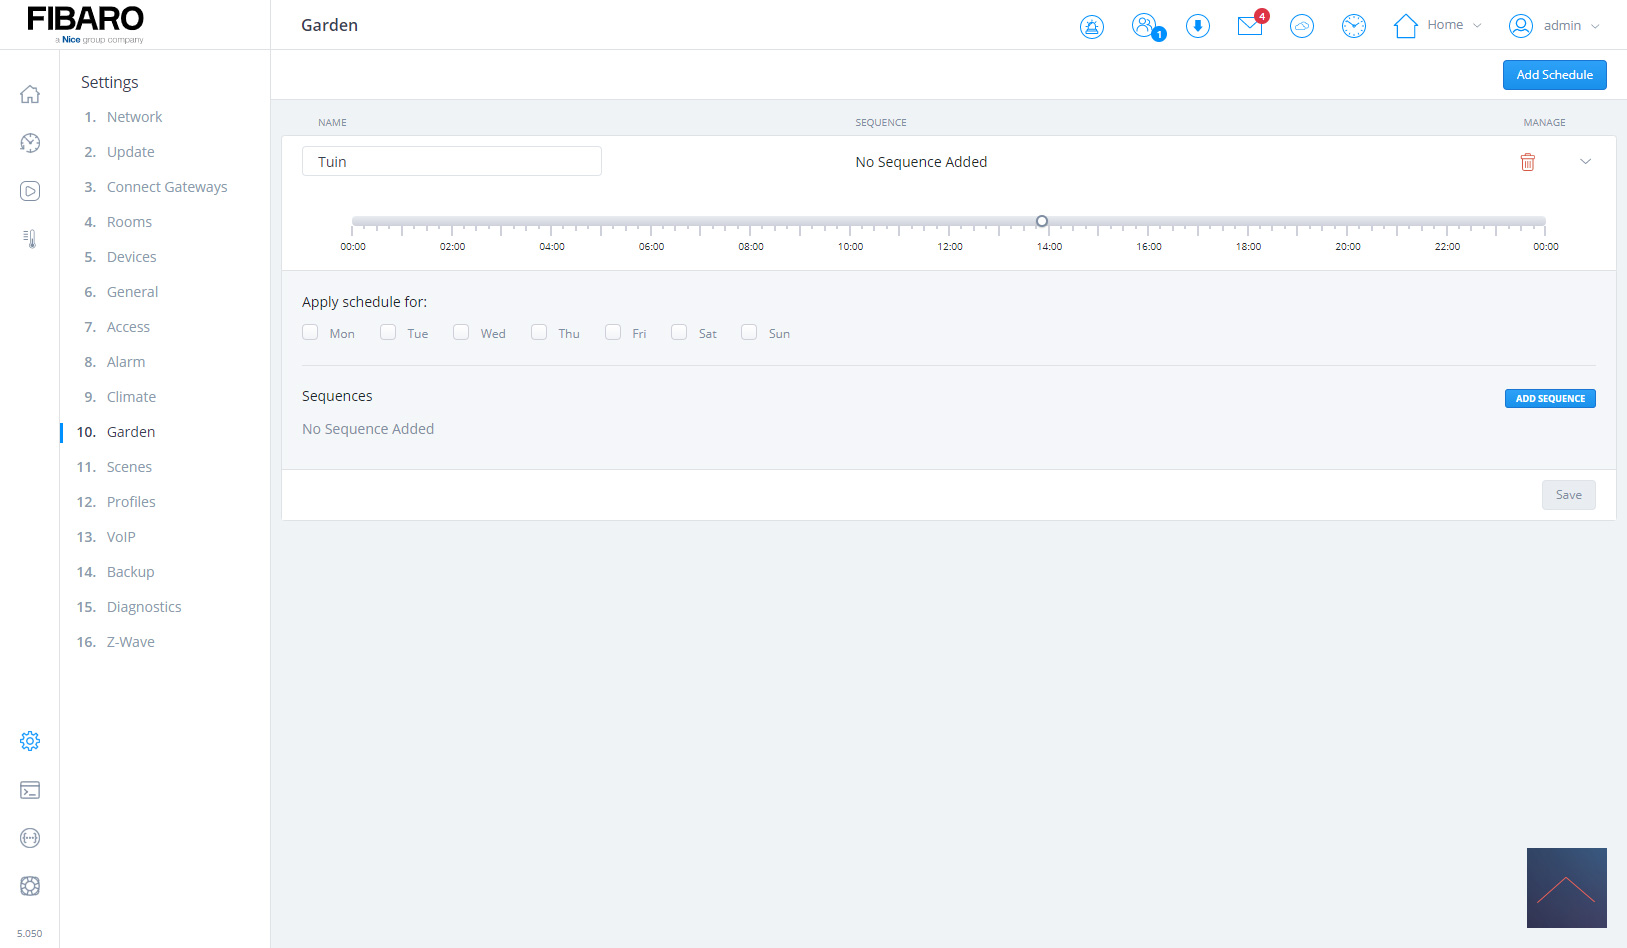
Irrigation system:
As with the heating, you can also use schedules to ensure that your garden gets enough water. Here the weather conditions can be taken into account.
It is very nice that the above things are built into the HC3. You can have this running with just a few clicks. We will now proceed to the APP.
