Review
Fibaro Walli Outlet/Power Socket
Installation on Fibaro Home Center 3:
We have arrived at the latest controller from Fibaro the HC3. Of course, adding this Walli Outlet shouldn't pose any problems, it is their own product after all.
The first step is to make sure the Walli is connected. You can do this by following the supplied schedule. This is not very complicated as it is really a matter of reconnecting the old wires. Everyone should be able to do that. Make sure your flush-mounted box is at least 40mm deep, otherwise the module will not fit in it.
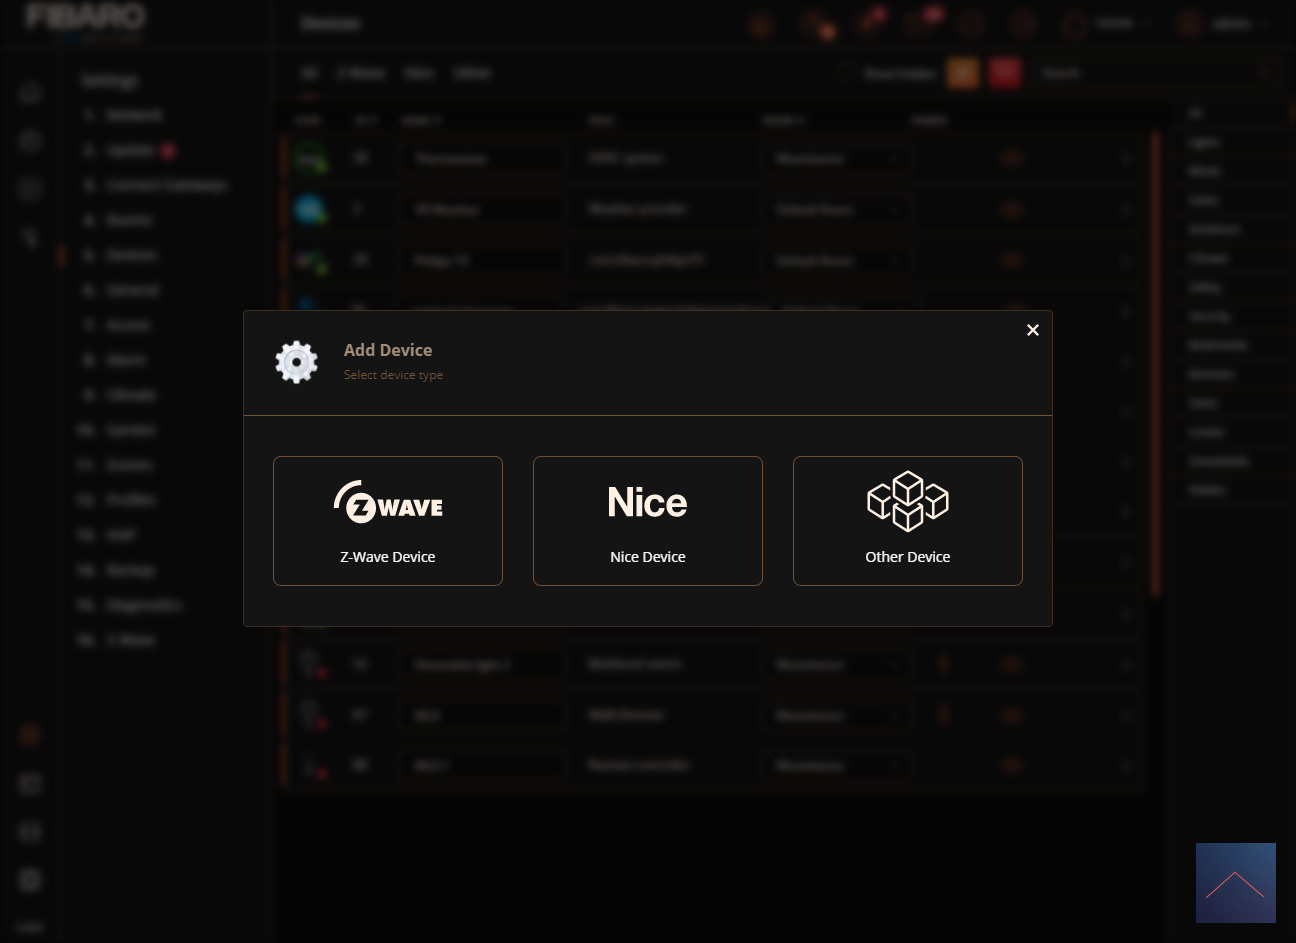
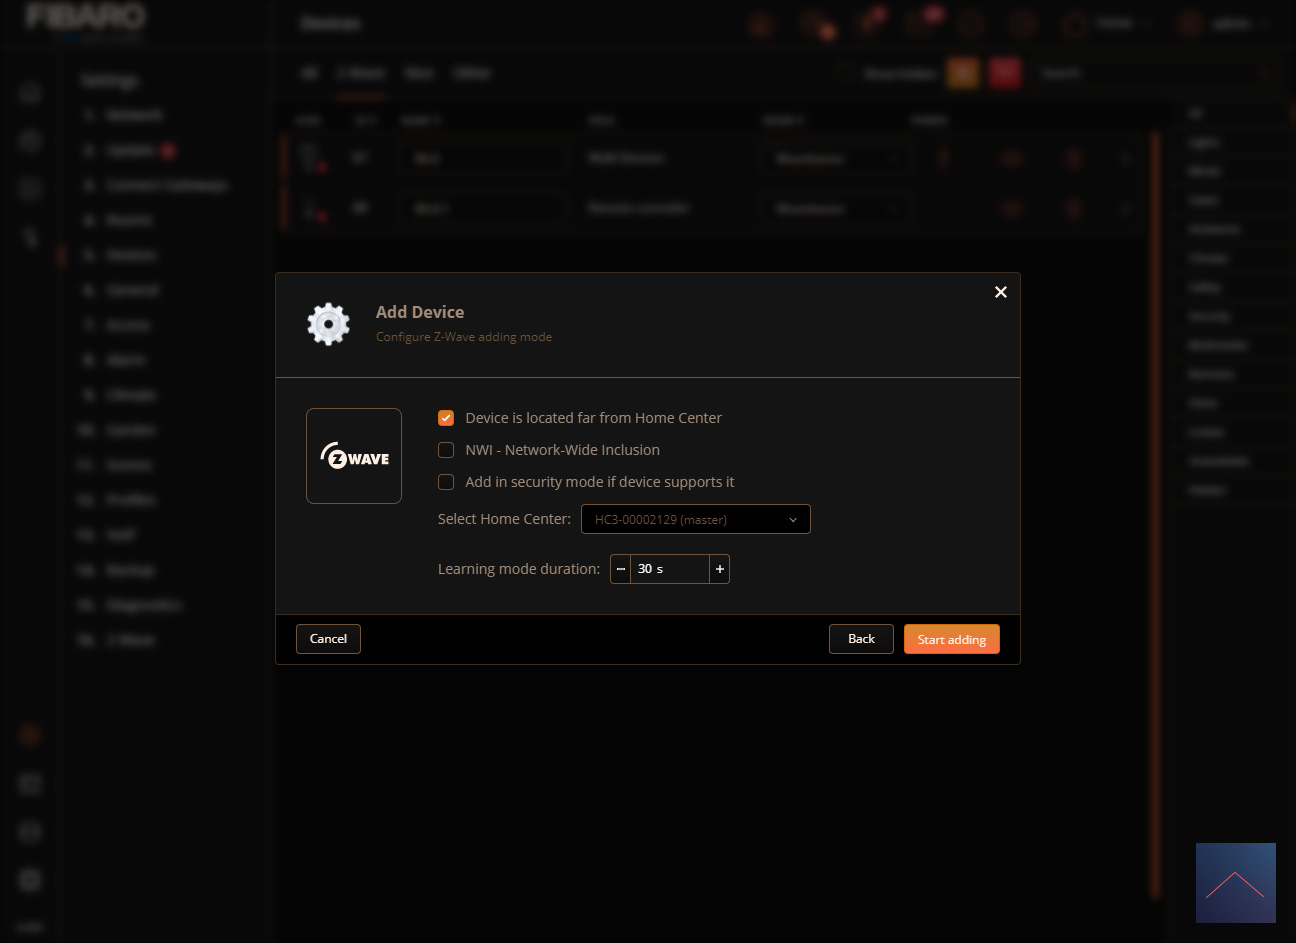
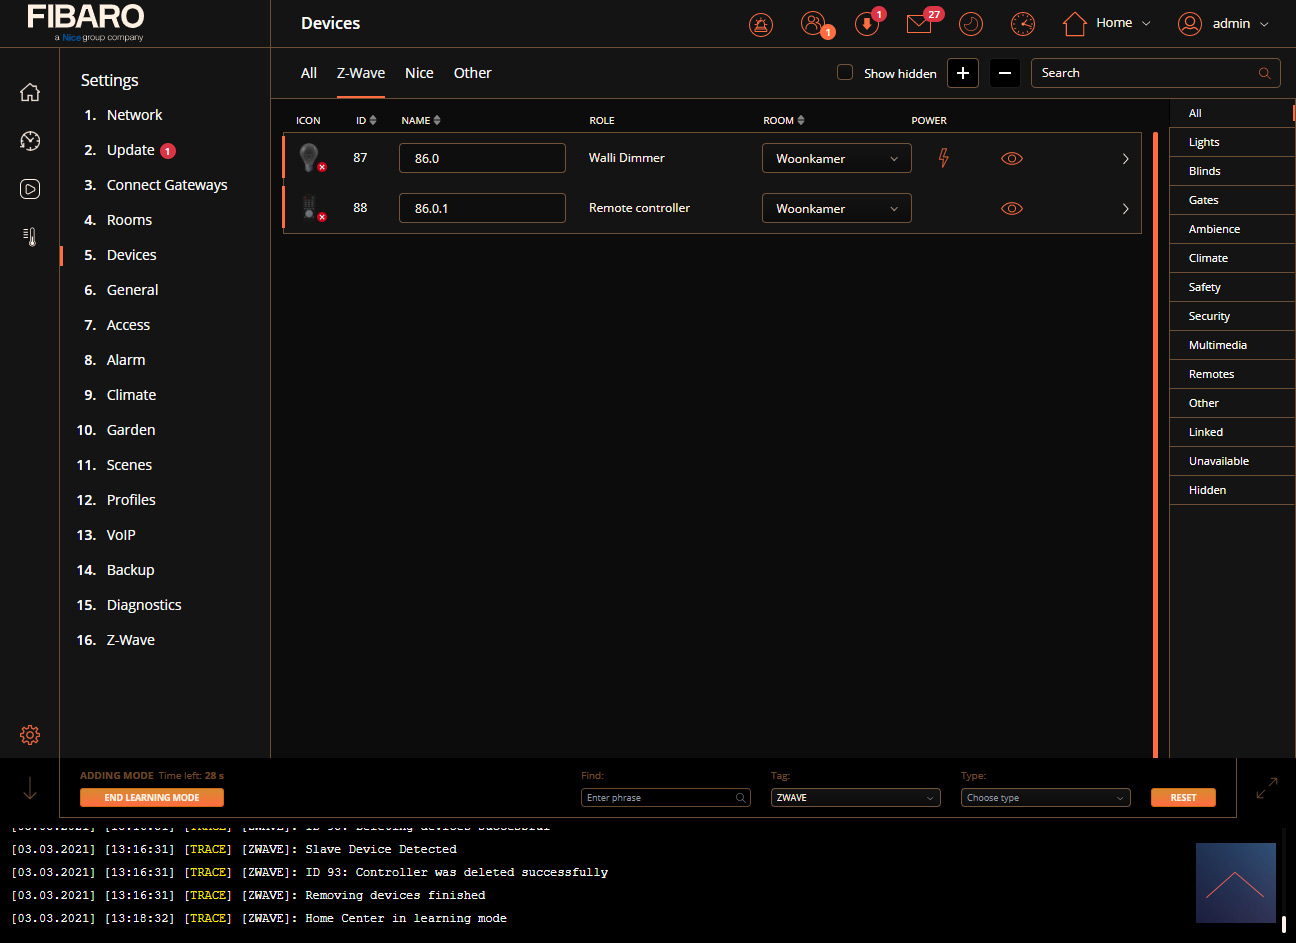
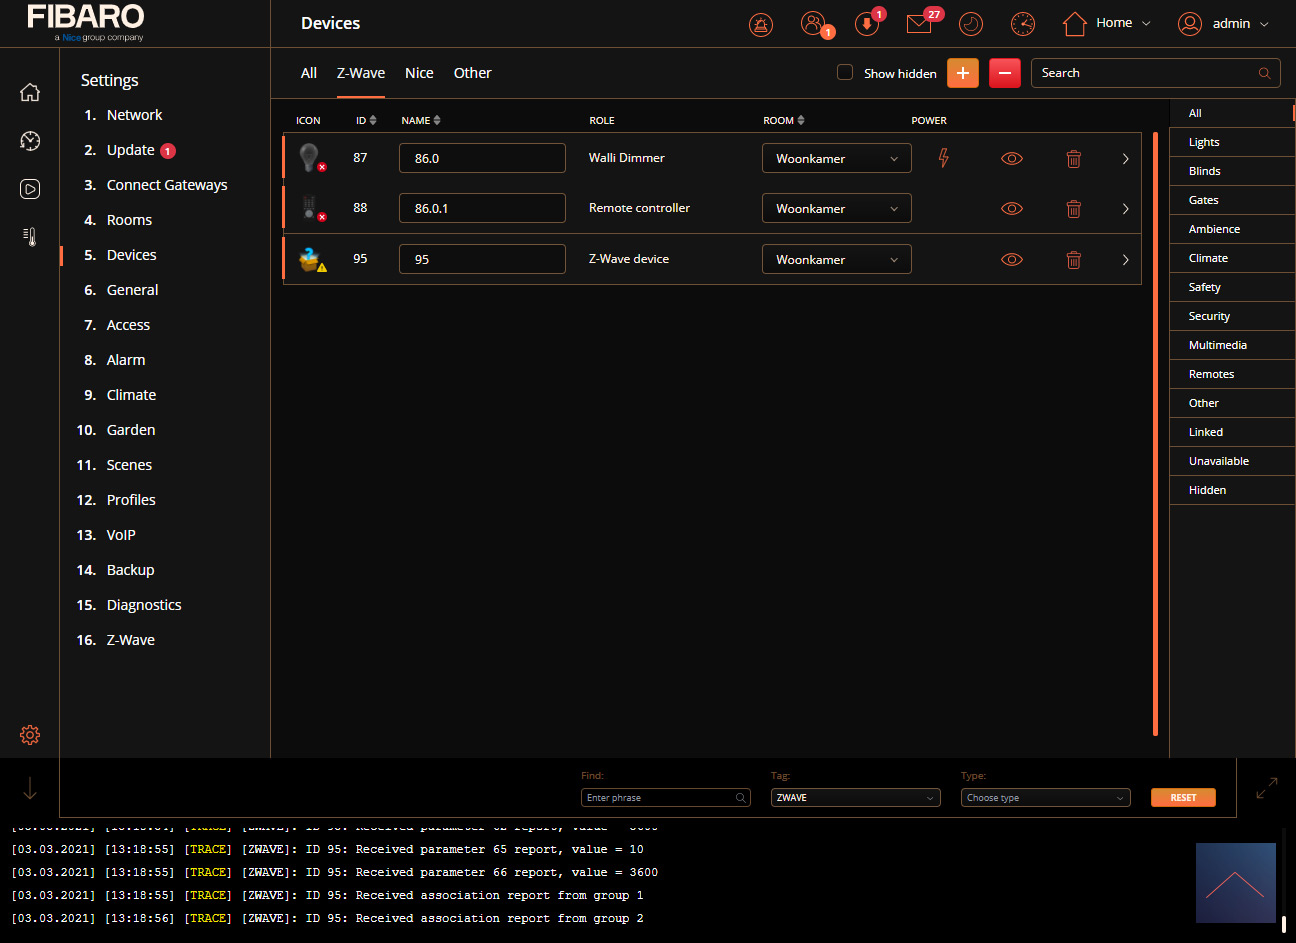
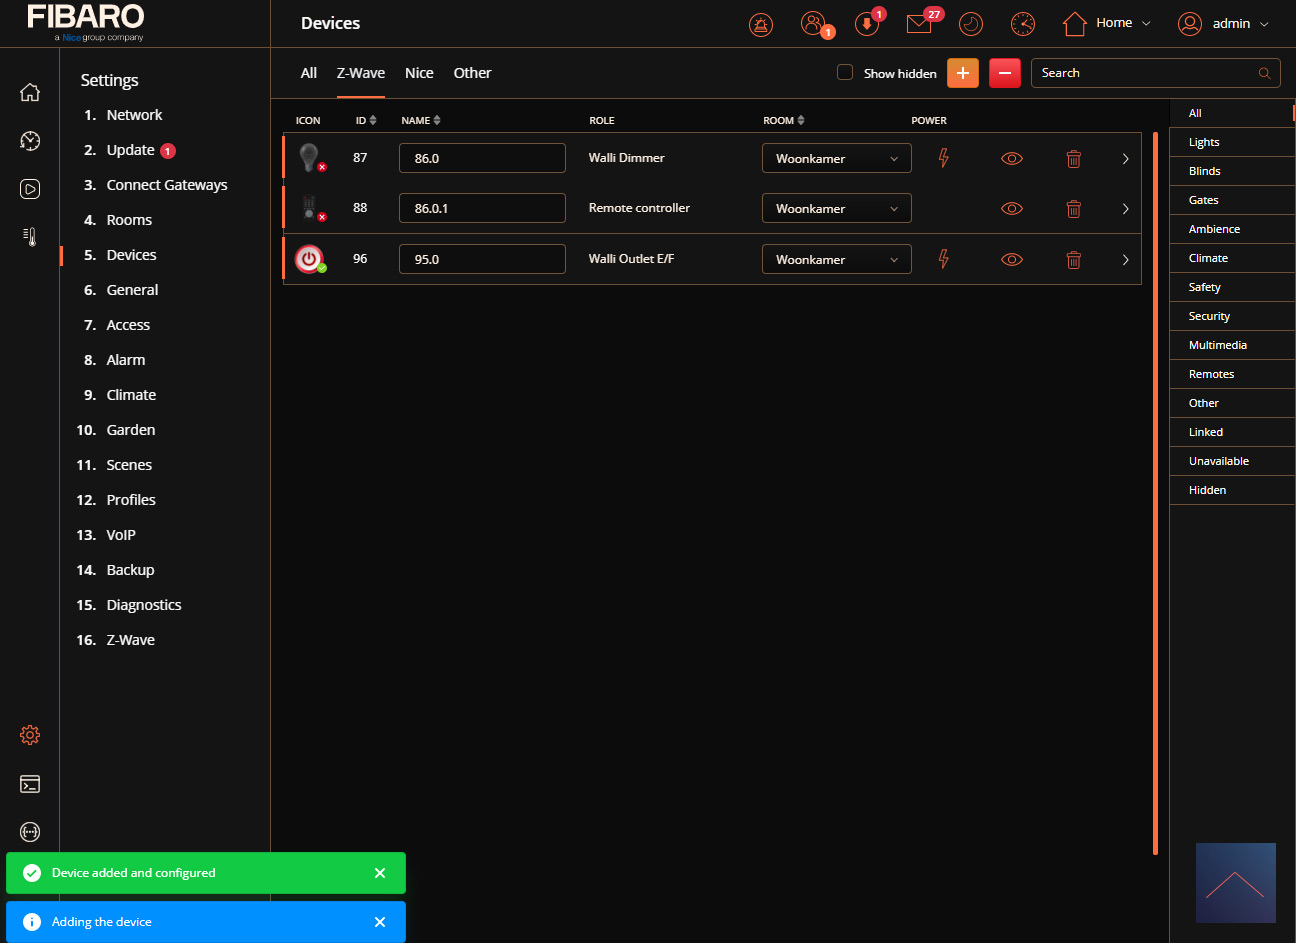
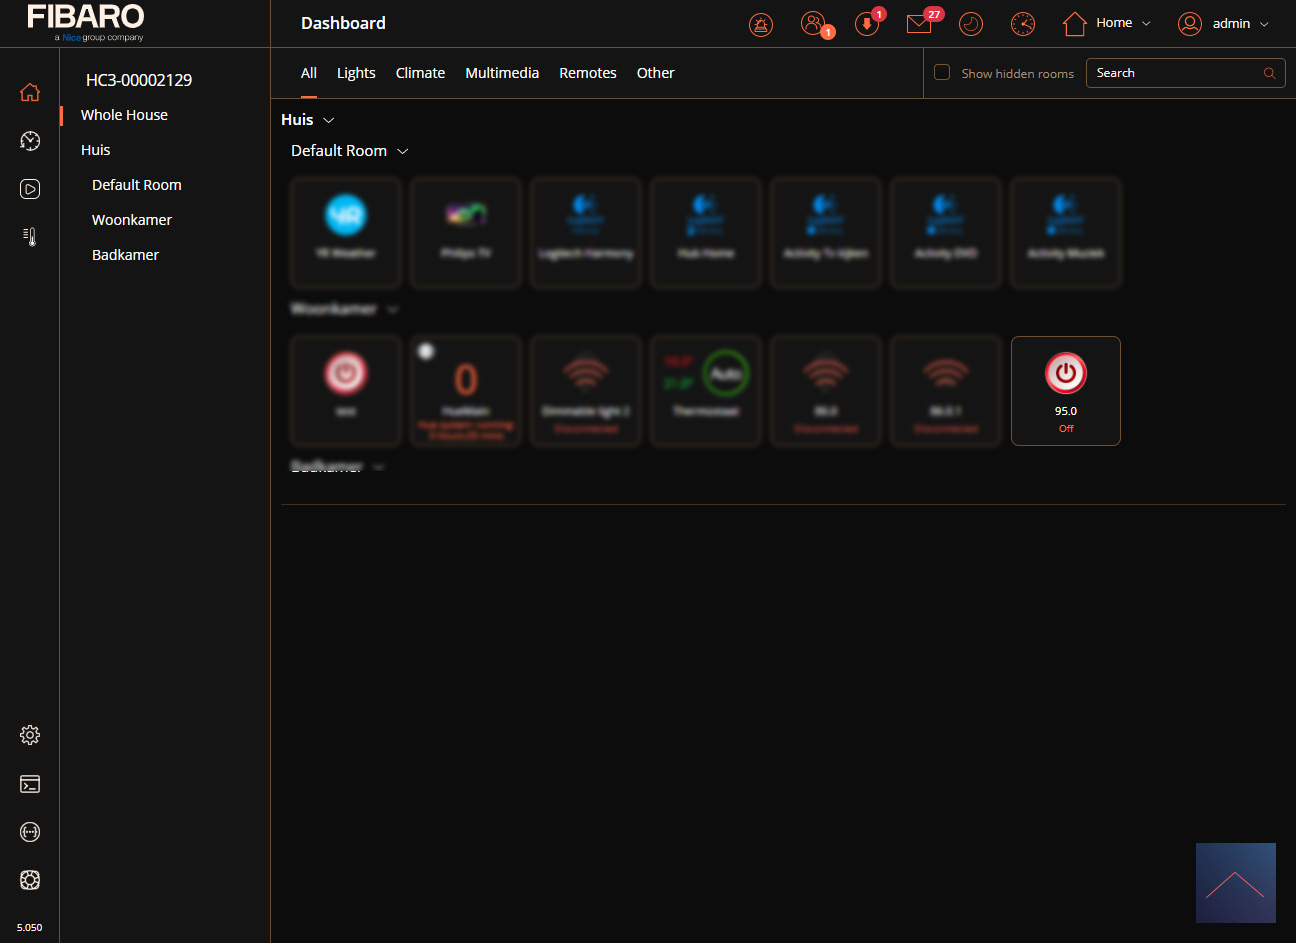
Now that we have connected everything, we provide the Walli with power and log in to the HC3. We go to our devices and press the plus sign. Now you have to press the add button on the front of the Walli 3x in quick succession. The LED of the Walli will light up yellow and then light up green to indicate that it was successful. I also see some values pass by in the HC3 and eventually see it appear with my devices.
If the addition does not work, you have to reset the Walli by using the "remove function" in the HC3. You also have to press the button 3x. It will light up red to indicate that the reset was successful. After this you can add it again. Also make sure you are close to the HC3 this will help with the successful addition.
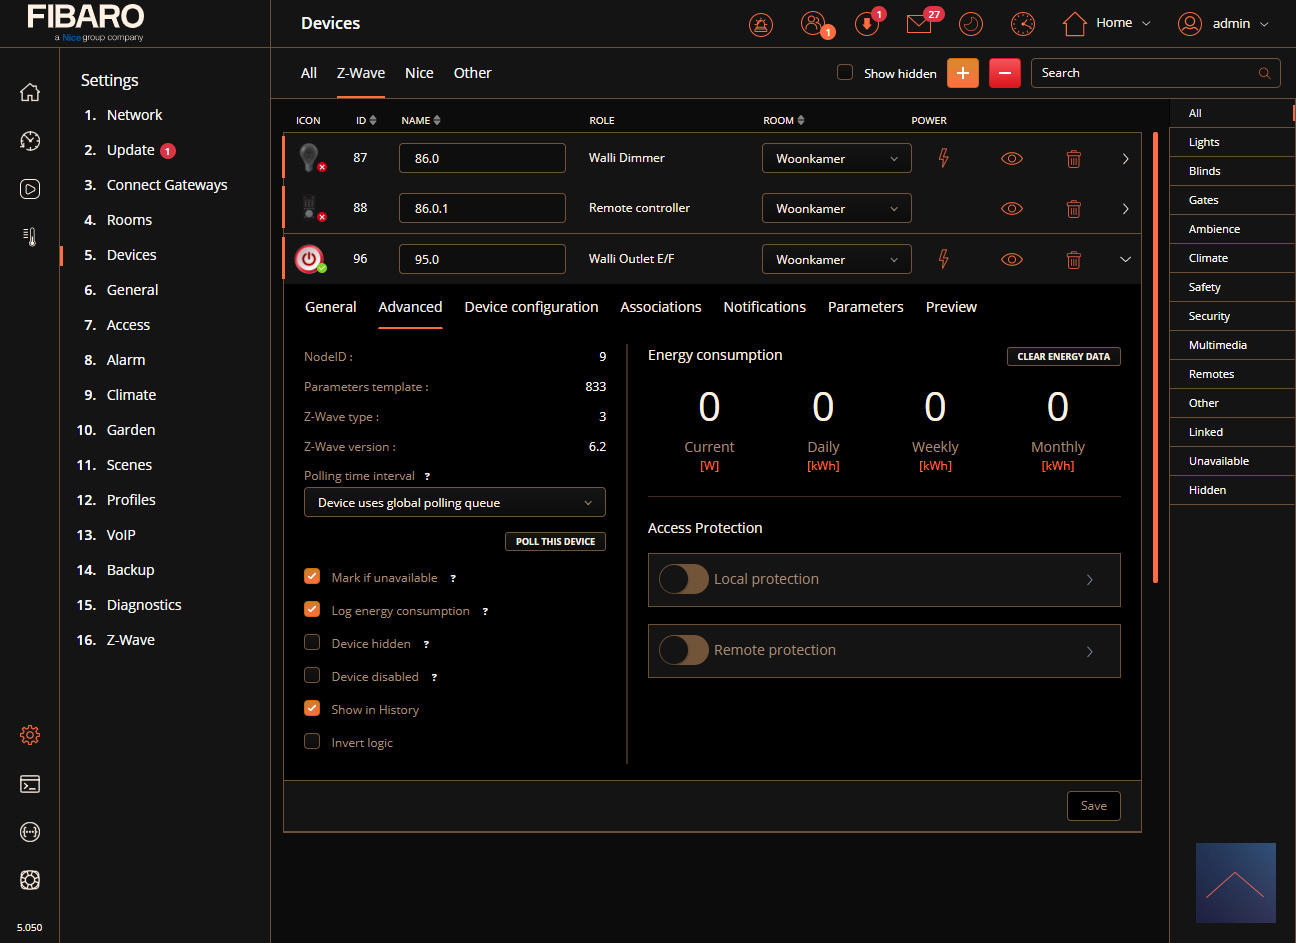
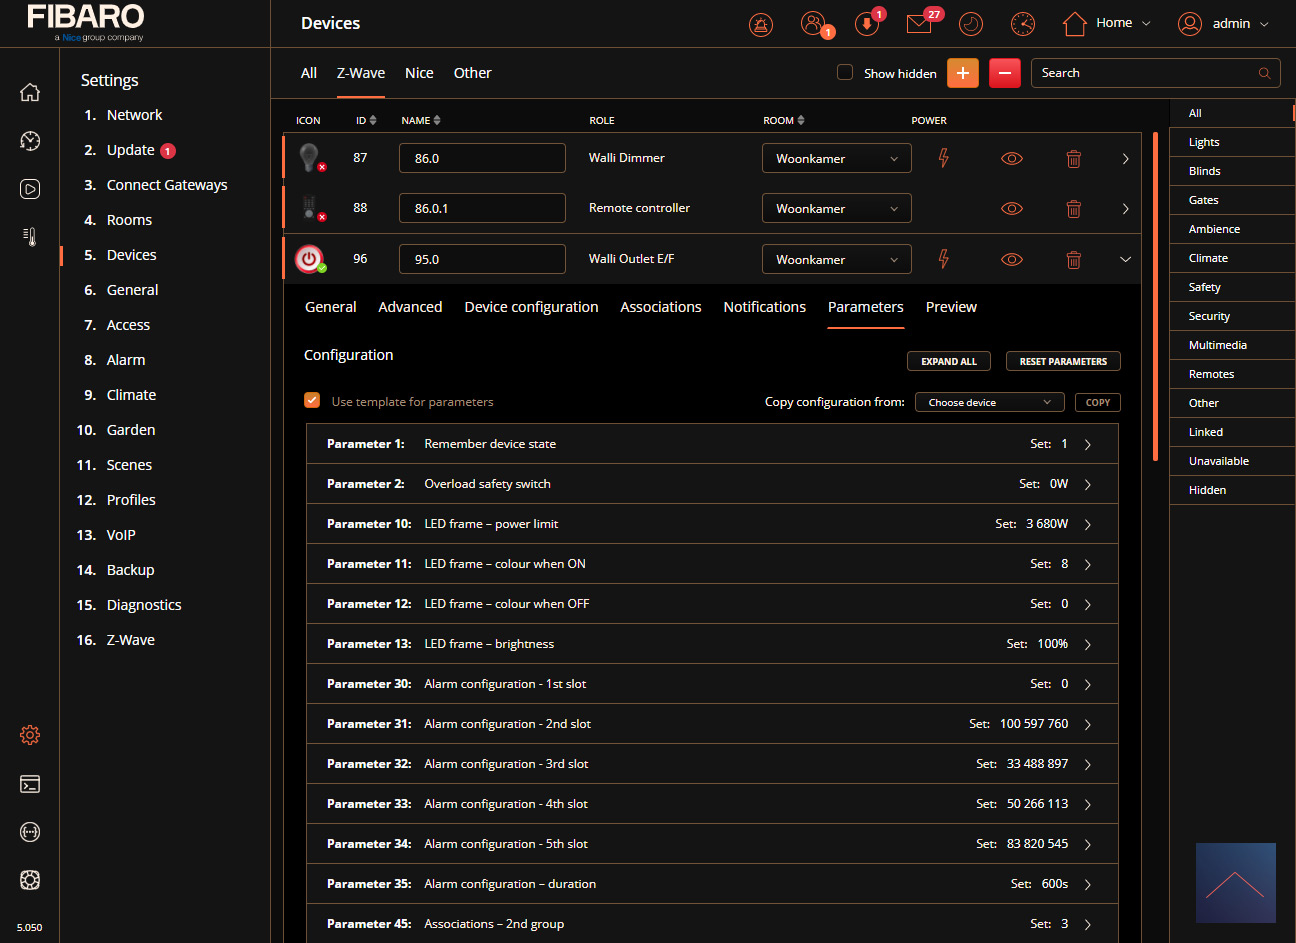
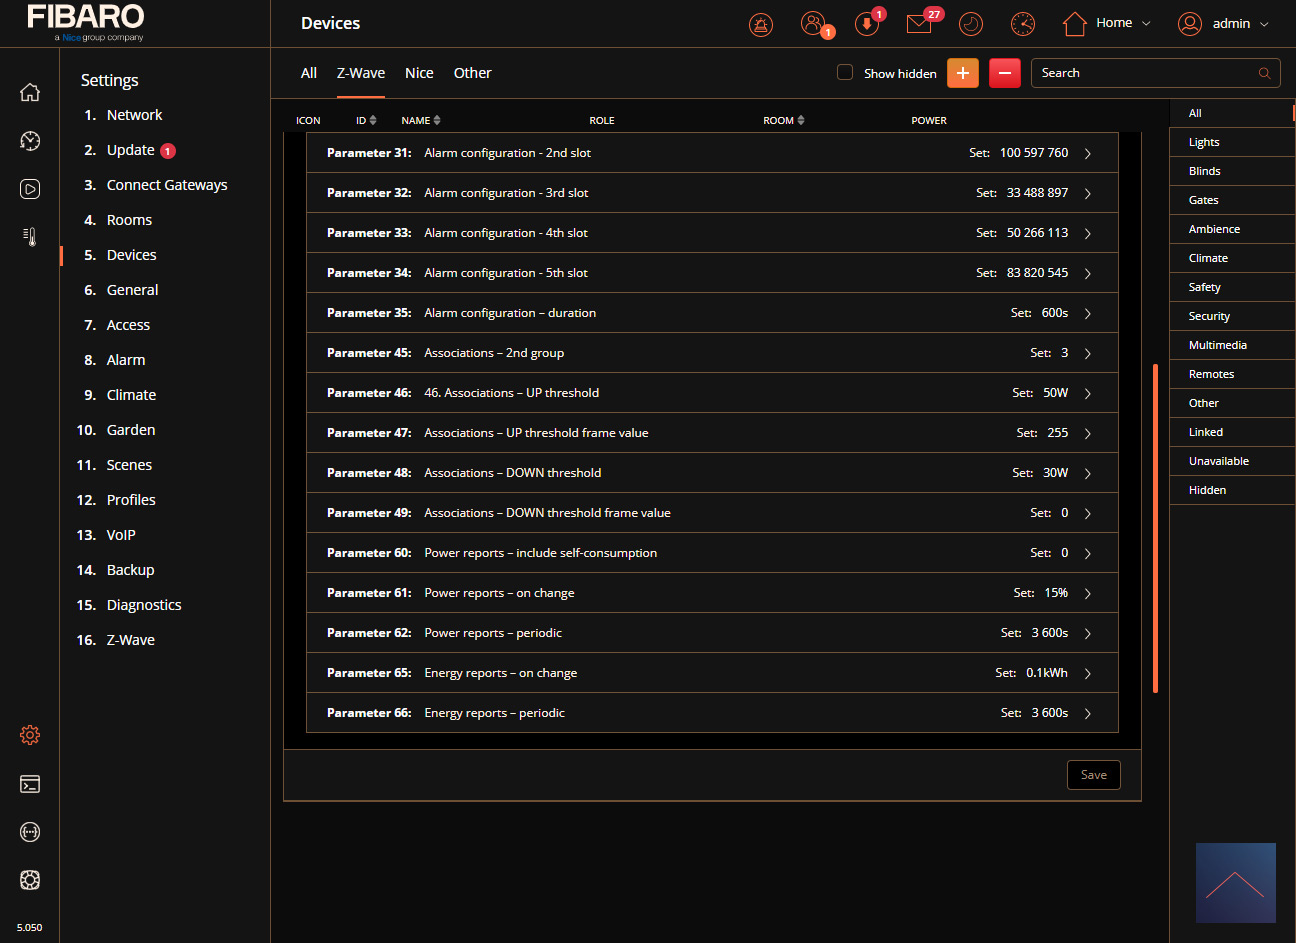
Installation screens:
Configuration:
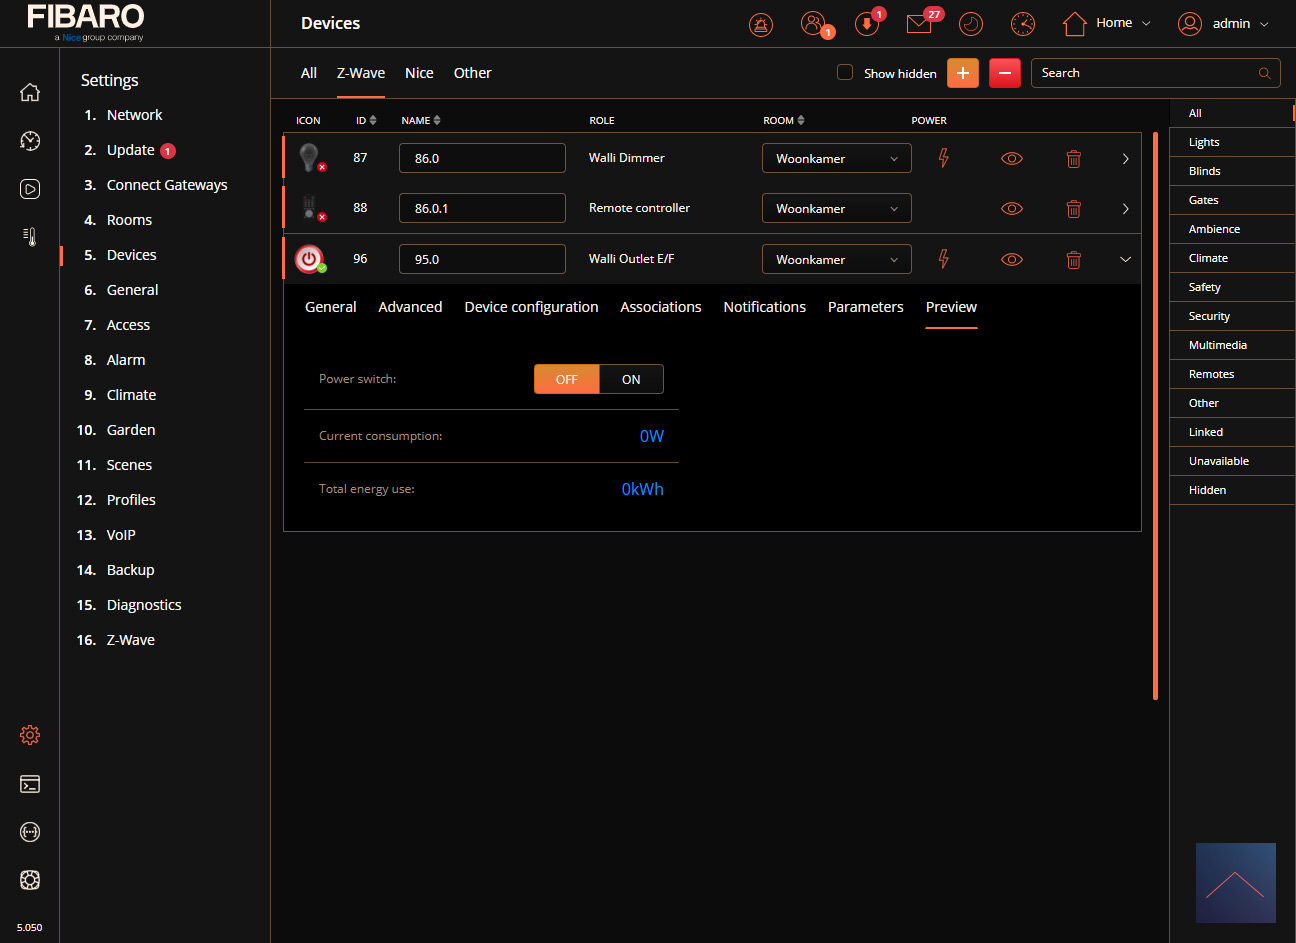
Control:
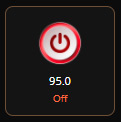
On/off switch:
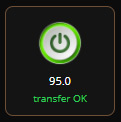
Energy measurement:

Scene options:
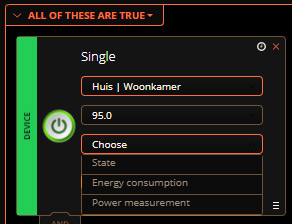
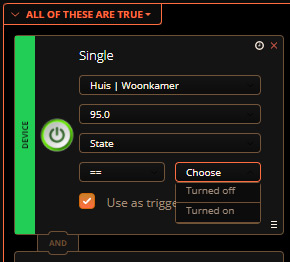
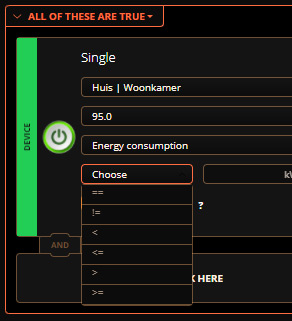
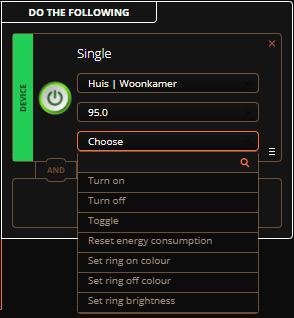
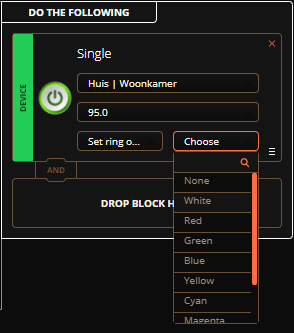
You will have the following options at your disposal for creating a scene:
Triggers:
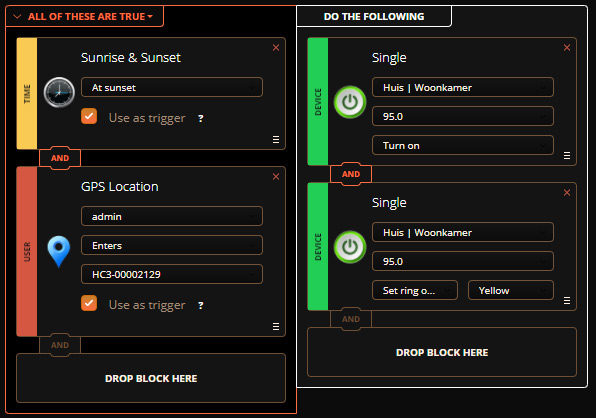
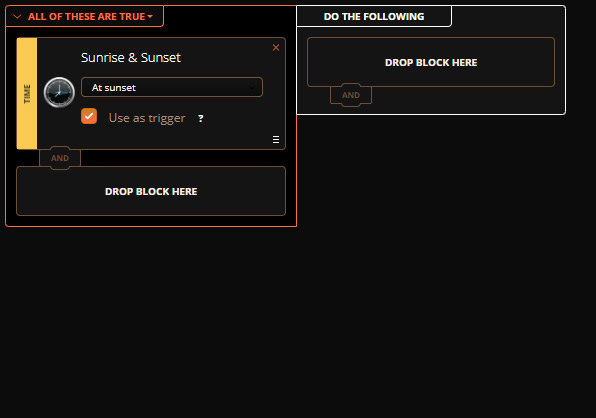
Example scene:
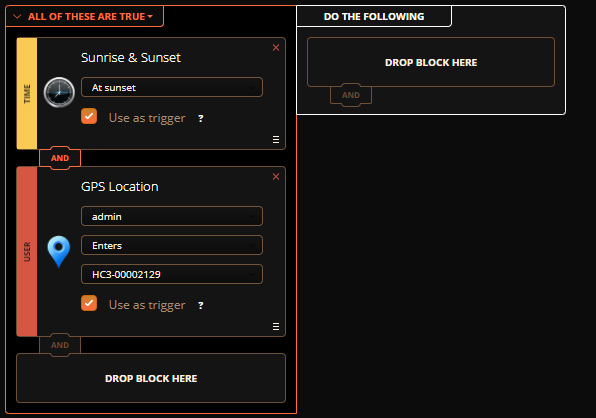
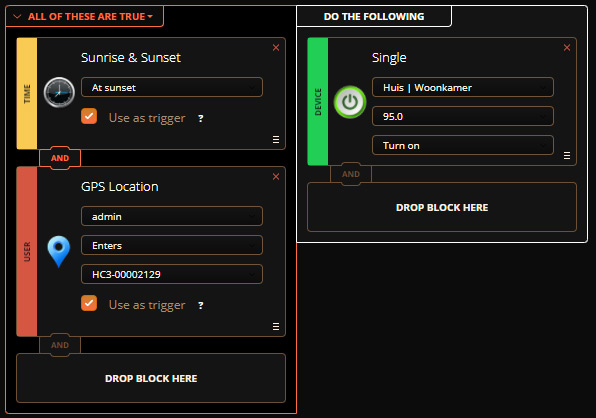
As an example, we make that when the sun sets, and someone comes home, that the Walli is switched on and the LED is set to a yellow color.
Trigger Sunset:
Comes home:
Turn on Walli:
Set color to yellow: